docs.autenticacao.gov
Autenticação.gov desktop application user manual
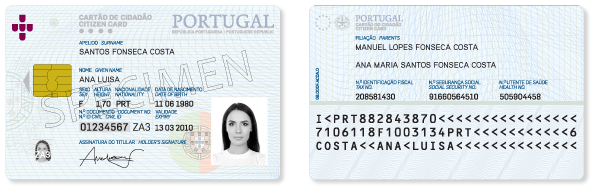
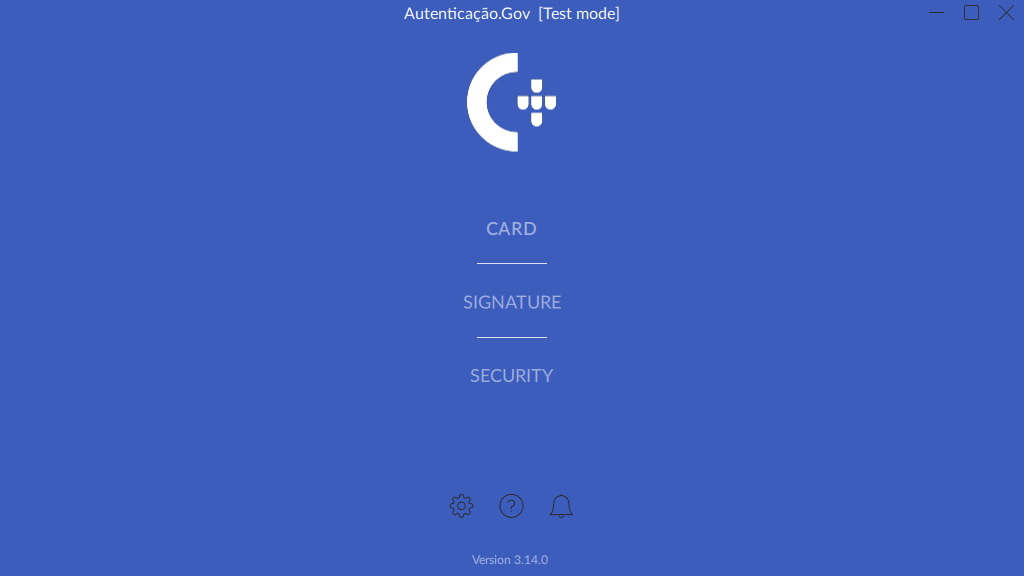
Table of Contents
- Introduction
- What’s new ?
- Downloading, installation and removal of the application.
- Autenticação.Gov Utility Application
- Integration with applications
- Integration with Windows applications
- Integration with applications via the PKCS#11 interface
- Digital signatures in common applications
- Digital signature in the Microsoft Office suite
- Digital signature in the LibreOffice / OpenOffice suite
- Digital e-mail signature with Microsoft Outlook
- Digital signature in Adobe Acrobat Reader
- Digital signature in Adobe Acrobat Reader on MacOS (as from version 3.11.0)
- Digital signature with Digital Mobile Key
- Digital e-mail signature with Mozilla Thunderbird
- Digital signature of DWF files
- Digital signature of DWG files
- Authentication at WEB portals
- Problem-Solving
- An error message is displayed when attempting to add the PKCS#11 module to Firefox / Thunderbird
- It is not possible to add the PKCS#11 module to Adobe Acrobat Reader in MacOS
- Unable to sign in Adobe Reader, Microsoft Office and LibreOffice with Citizen’s Card
- The card reader is installed but is not detected by the Citizen’s Card application.
- No certificates were detected during the signing attempt in the LibreOffice / Apache OpenOffice suite
- Graphics issues in the application
- Issues with integrated graphics cards
- It is not possible to move/drag the application (Linux on Wayland)
- Application won’t start
- Issues with the new chain of trust
- Issues validating signatures
- Issues with unsupported PDF files.
- Error in communication when signing with a Digital Mobile Key
- Online services used by the application
- Obtaining the report for analysis via the Configurations menu
- Removing metadata from PDF files
- File properties of the file signed by AutoCAD
- Command-line interface
- Configuration instructions in business environments
Introduction
This manual aims to describe all the features provided by the Autenticação.gov application for computers.
The installation of the Autenticação.gov application for computers includes Citizen’s Card middleware. This middleware constitutes the software layer between the computer and the Citizen’s Card. Authentication and electronic signature features are provided through the latter to the operating system and other electronic signature and authentication features and applications.
The Autenticação.gov computer application allows management of the Citizen’s Card. The application enables information viewing, note editing, personal PIN modification and the digital signature of files.
This manual comprises the following fundamental areas of use:
-
The first section (in chapter two) covers downloading, installing, and removing the application;
-
The second section (in chapter three) describes the features of the Citizen’s Card management application and the digital file signing function;
-
The third area (in chapters four and five) documents the integrations of middleware with the operating system and applications;
-
The fourth section (in chapter six) documents the automated installation in Windows environments and configuration in business environments;
What’s new?
Support for the new Citizen’s Card
Since version 3.12.0 of the application, the new Citizen’s Card is supported, enabling proximity reading (contactless) by using an appropriate card reader.
There is still the option to read the card via the contact chip interface, but ensuring that the card is inserted correctly into the reader as in the new Citizen’s Card the chip contacts are located on the back of the document.
Reference to the new section Contactless Access is advised
Since version 3.14.0 of the application, the “Travel Data” component of the new Citizen’s Card and other contactless chip-based identification documents can be read such as the Portuguese Residence Permit (“Título de Residência”) and identity cards from other European countries. There is a description of this feature in the Travel data section.
Downloading, installation and removal of the application
This section provides instructions for installing and removing the Autenticação.gov application for computers.
Officially supported operating systems
-
Windows systems:
-
Microsoft Windows 7
-
Microsoft Windows 8
-
Microsoft Windows 8.1
-
Microsoft Windows 10
-
Microsoft Windows 11
-
-
Linux Systems:
-
Fedora 38 and later versions
-
OpenSUSE Leap 15.2 and later versions
-
Ubuntu 20.04 and later versions
-
Other Linux distributions with support for Flatpak packages and Intel x86_64 architecture.
-
-
Apple MacOS Systems:
- Mac OS High Sierra (10.13) and later versions
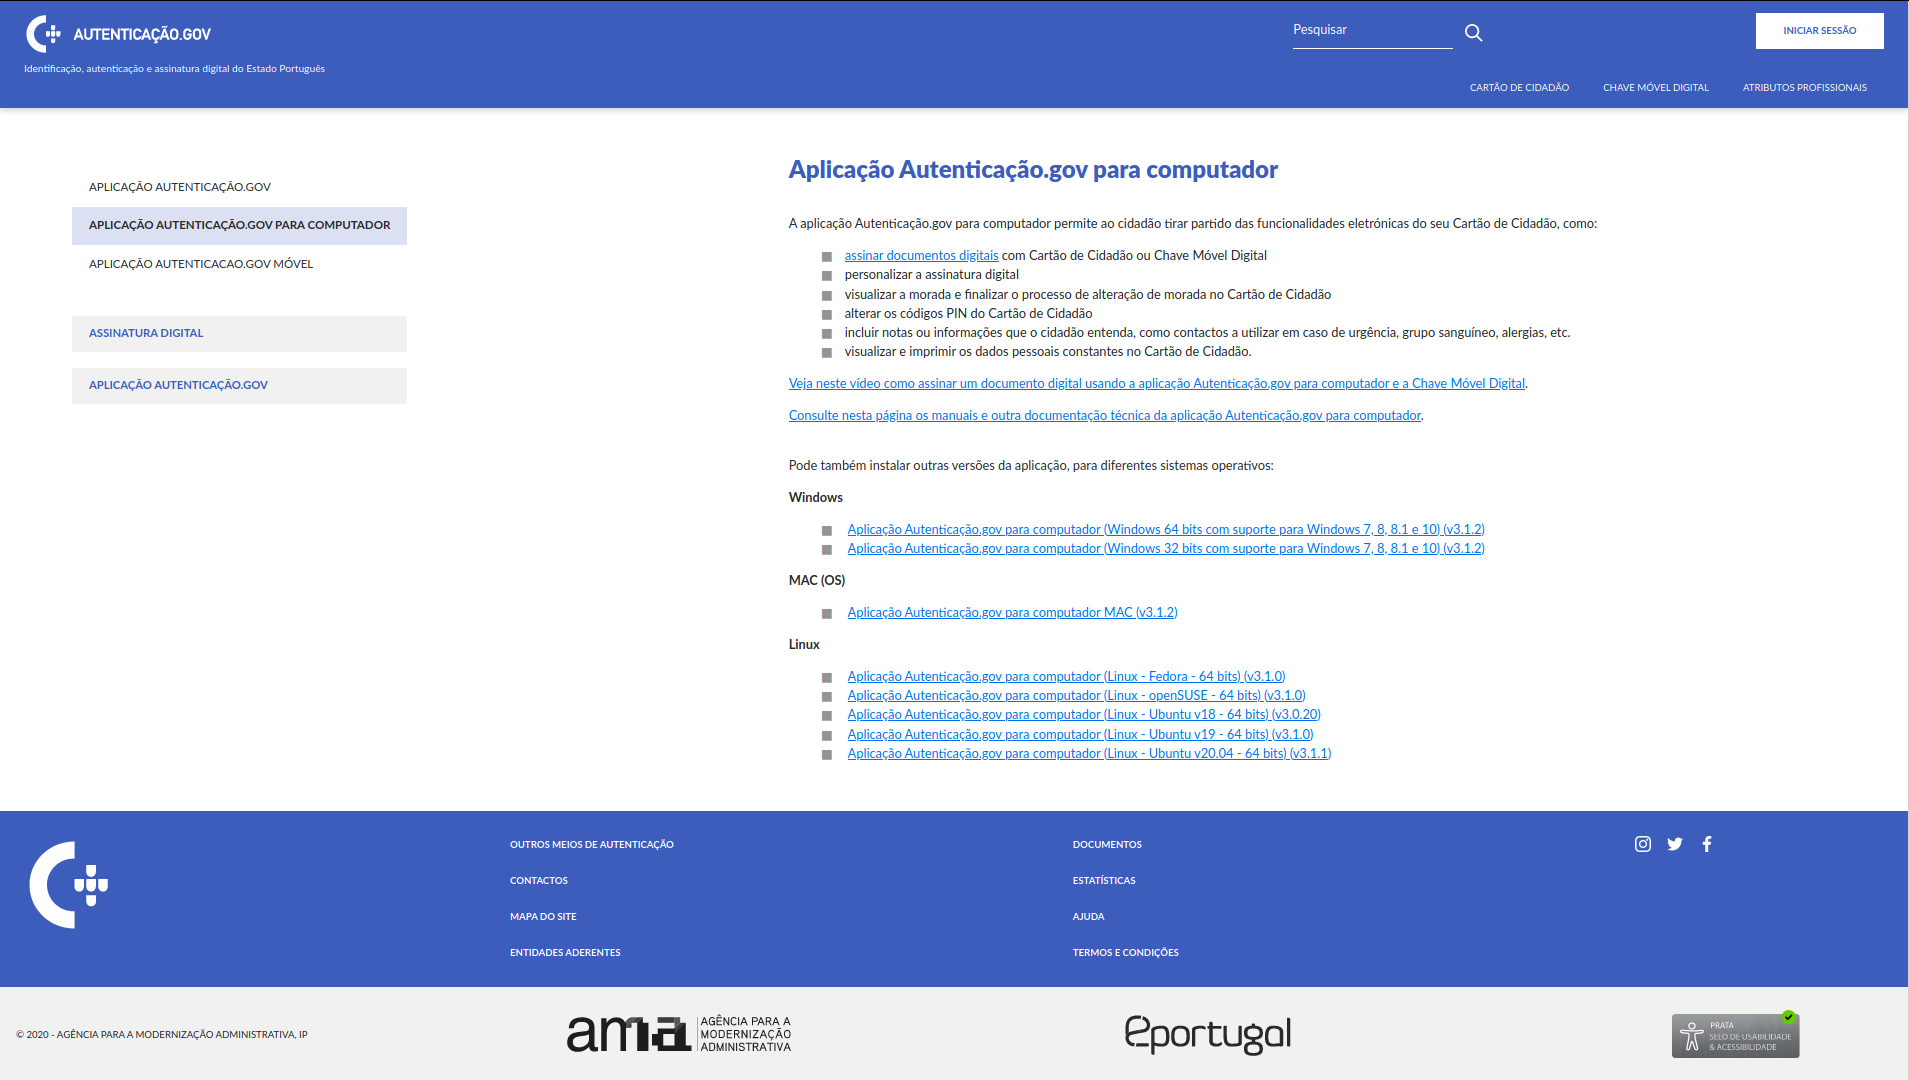
Downloading the application installation package
To obtain the application installation package, access the official website at Autenticação.gov application for computers and download the correct version for your operating system.
By clicking the link, an attempt is made to identify the operating system using the data provided by the browser, and a hyperlink is displayed in the content area on the right, allowing the downloading of the installation package appropriate for the system.
In the case of Linux operating systems, distribution cannot be identified and a list of supported distributions for the detected architecture is displayed.
This page contains a list of all officially supported operating system installer packages and user manuals.
After downloading the correct version, proceed to the next step: Application installation.
Application installation
The instructions below assume that the application installation file is previously downloaded online. If this is not the case, follow the steps described in the previous section: Downloading the application installation package.
To install the Autenticação.gov application on the computer, follow the steps described in the following points, depending on the operating system in use.
Installation on Microsoft Windows
-
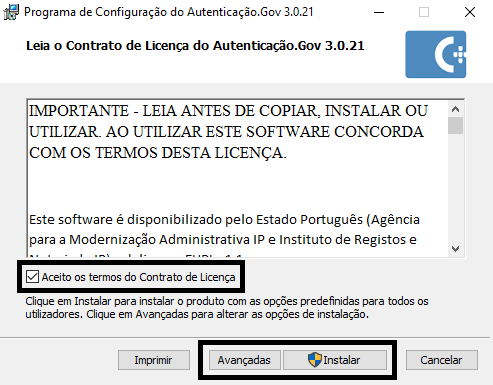
Run the installation package: After downloading the installation file, double-click on it.
-
On the first interactive screen, you must tick the box to accept the application’s terms and conditions. For easy installation, press Instalar (move on to step 5). For advanced installation, press Avançadas. Advanced installation allows configuration of the path to the installation folder and the features to be installed.
-
After selecting Avançadas, choose the folder where the application is to be installed. To change the default folder, click on Alterar in the window that appears, navigate to the destination folder and press OK. To continue the installation in the destination folder, press the Seguinte button.
-
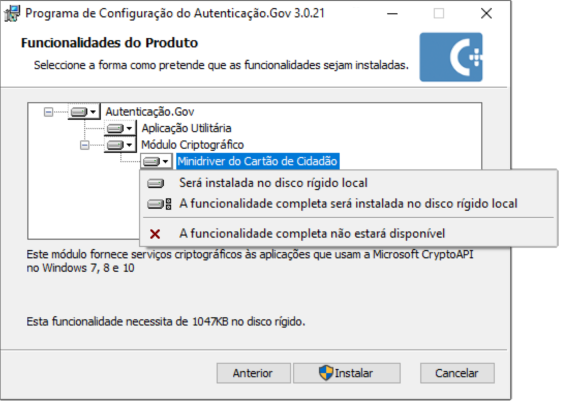
A screen should appear to choose the software features to be installed. The features are represented in a tree structure where each feature has a button to include or exclude it from the installation. When a feature is selected, the description is displayed and the disk space required for its installation. To install the selected features, click Instalar.
-
After this wizard finishes, it prompts a computer restart.
-
At the next Windows startup, the software installation will be completed.
Installation on Linux
Installation via command line
Flatpak package installation
As from version 3.9.0 of the application, a new package format for Linux was introduced. The Flatpak format supports a larger number of Linux distributions in a uniform way.
To install this version of the application, the procedure is as follows:
-
Any native version of the pteid-mw package installed on the system shall be uninstalled. For example, on Ubuntu use the command:
sudo apt remove pteid-mw -
The Flatpak software shall be installed following the specific instructions for your Linux distribution: https://flatpak.org/setup
-
The
pcsc-lite/pcscd packageshall be installed in the system using the distribution’s native packages. The application works without this component; only the features requiring access to the Citizen’s Card depend on the pcscd. -
Run the command
flatpak install pteid-mw-linux.x86_64.flatpakin the directory where the downloaded flatpak package is located.
Notes on communicating with the card
-
The Flatpak software shall be version 1.3.2 or a later version to allow the application to access the Citizen’s Card. This requirement is met by distributions such as Ubuntu 20.04 and 22.04, OpenSUSE Leap 15.3 and 15.4, amongst others.
-
In Ubuntu 22.04, run an extra command to ensure successful access to the SD card: sudo systemctl enable pcscd.socket
Installation on Mac OS
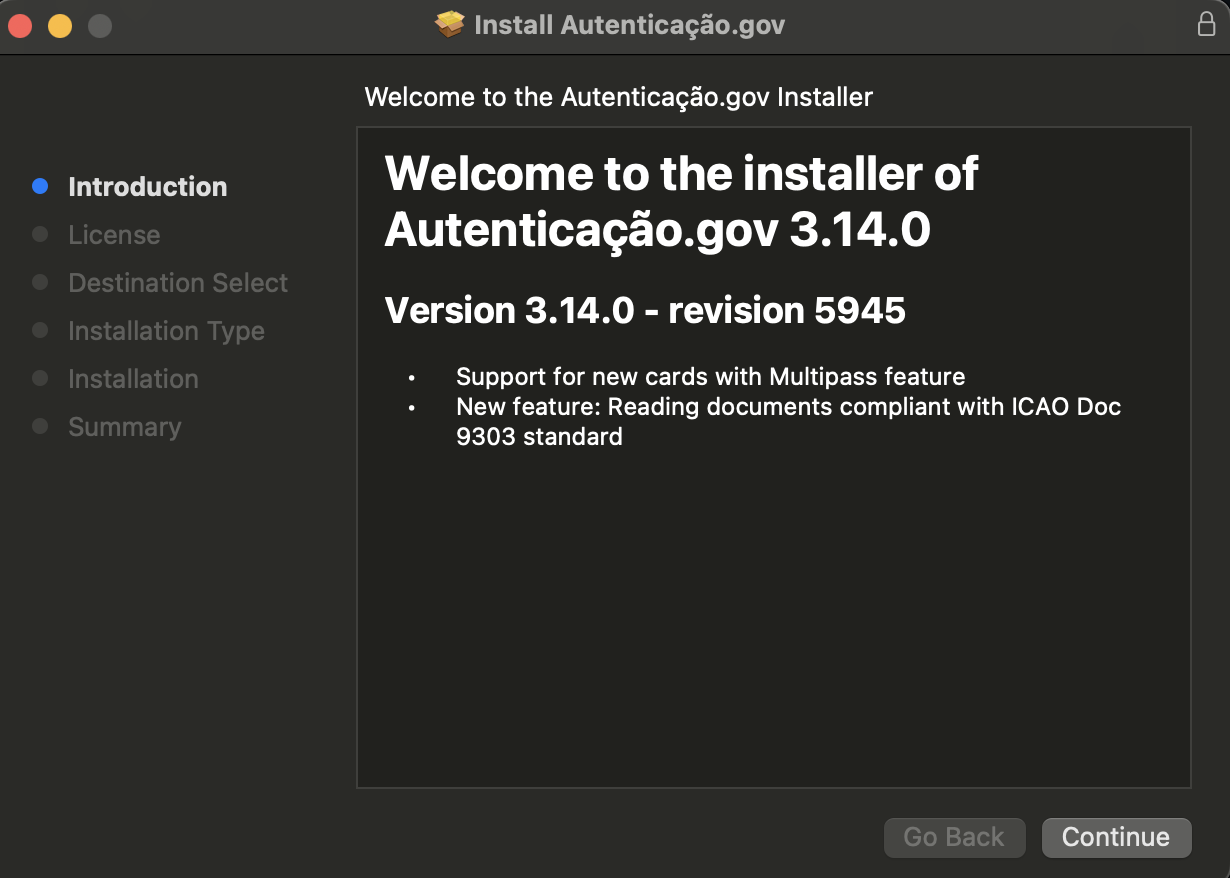
- Run the installer: after downloading the installation file, double-click it. A screen similar to the one shown below appears:
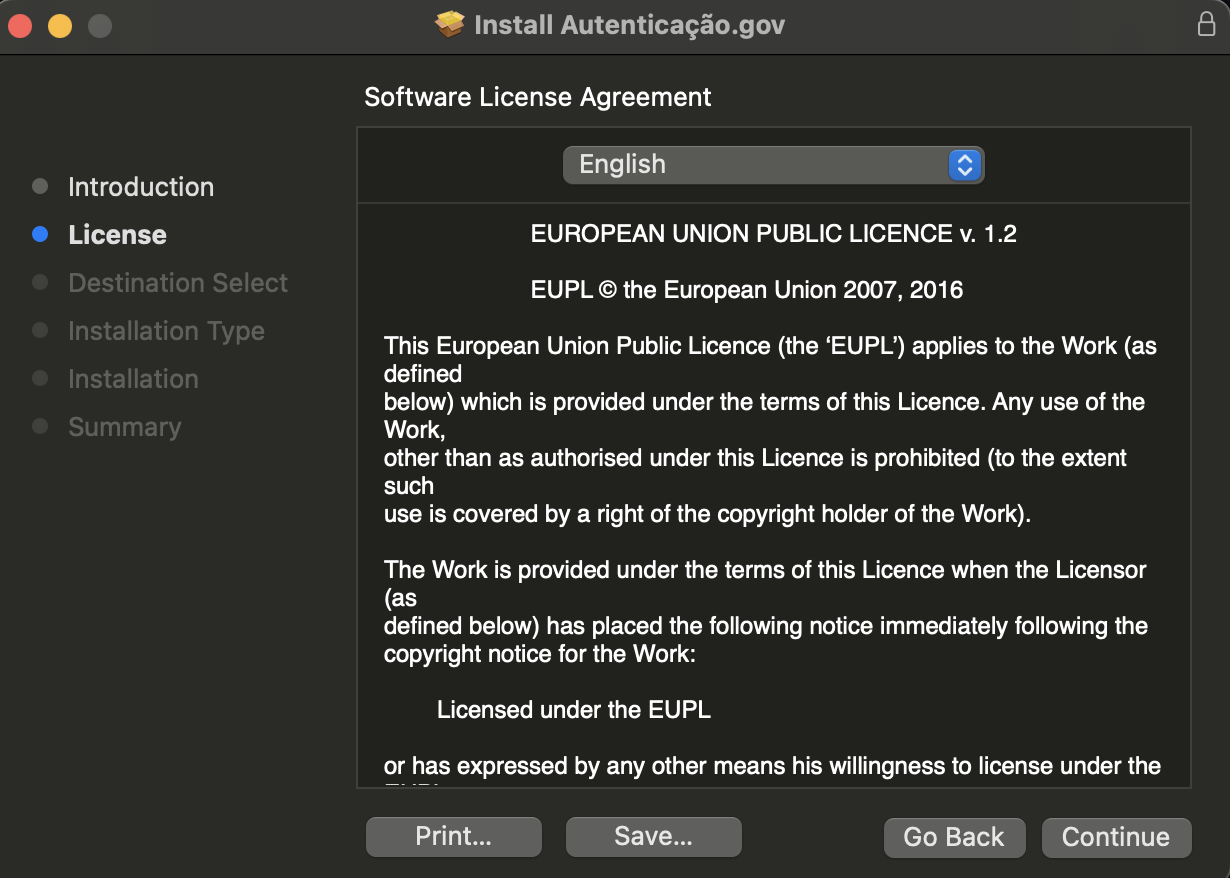
- Choose the Continue option. Then read and accept the software licence terms.
-
From this point on in the wizard, press the Continue button until the installation is complete.
-
After completing this wizard, the application is installed on the computer. The Autenticacão.Gov utility application shall now be available in the Applications folder.
Installation on ChromeOS
-
The Flatpak software shall be installed following the specific instructions for ChromeOS: https://flatpak.org/setup/Chrome%20OS
-
Download the Linux installer in Flatpak format from the official page.
-
Run the command
flatpak install pteid-mw-linux.x86_64.flatpakin the directory where the downloaded flatpak package is located. -
After installation, the application is run with the command
flatpak
run pt.gov.autenticacao
Note: The app’s feature is currently limited on ChromeOS and only the Digital Mobile Key is used.
Removing the application
To remove the Citizen’s Card application, the steps described in the following points, relating to the operating system used, shall be followed.
Removal from Microsoft Windows 7
-
Access the Control Panel.
-
Select the Add or Remove Programmes option.
-
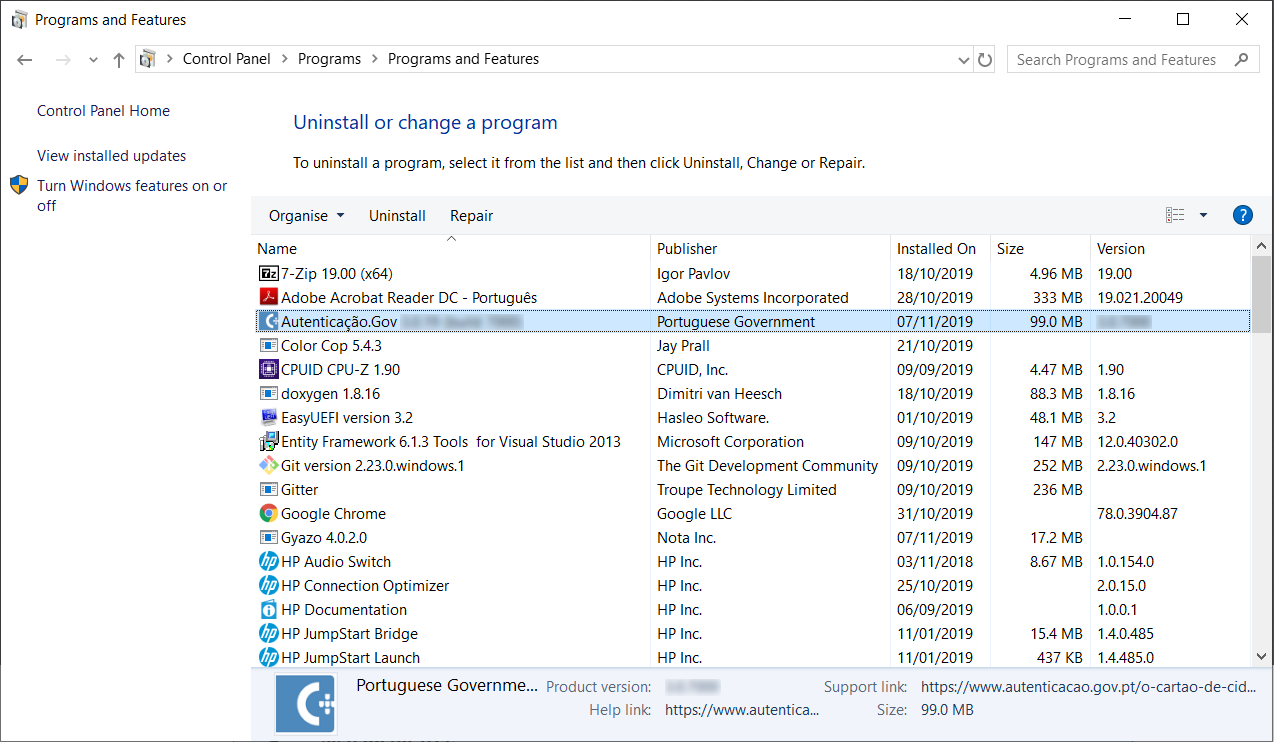
Select the Autenticação.Gov programme as shown in the following window:
-
Click on Uninstall. Confirm all dialog boxes.
-
After these steps, the application shall be removed from the computer. It is advised to restart the computer after these steps.
Removal from Microsoft Windows 10 or 11
Via the Control Panel
-
Access the Control Panel.
-
Select the Add or Remove Programmes option.
-
Select the Autenticação.Gov programme as shown in the following window:
-
Click on Uninstall. Confirm all dialog boxes.
-
After these steps, the application shall be removed from the computer. It is advisd to restart the computer after these steps.
Through Windows Settings
-
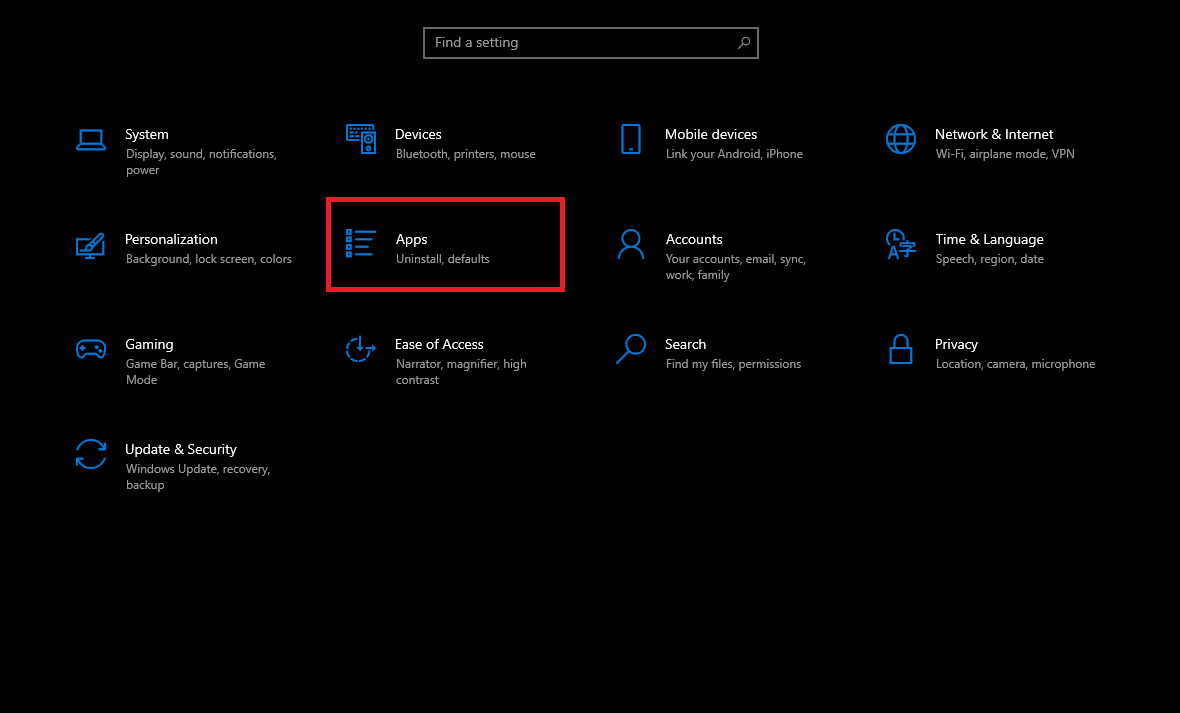
Access Start Menu -> Windows Settings.
-
Press the Applications button (Uninstall, defaults, optional features):
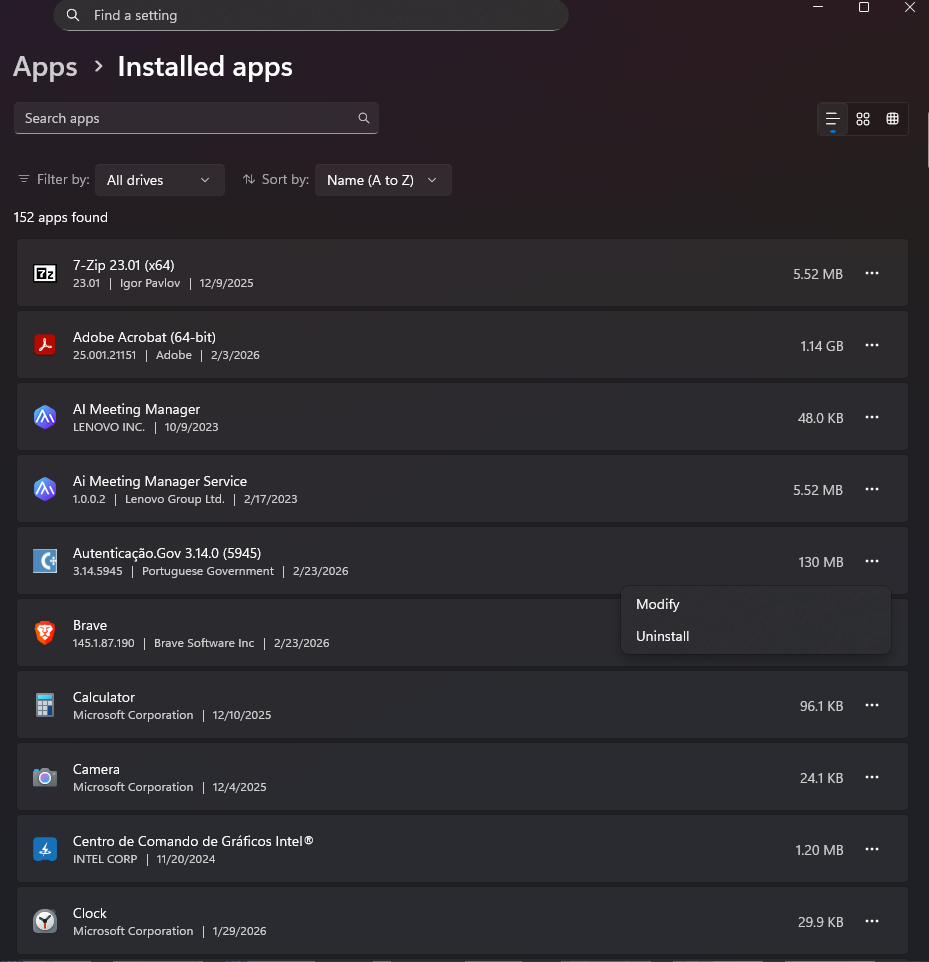
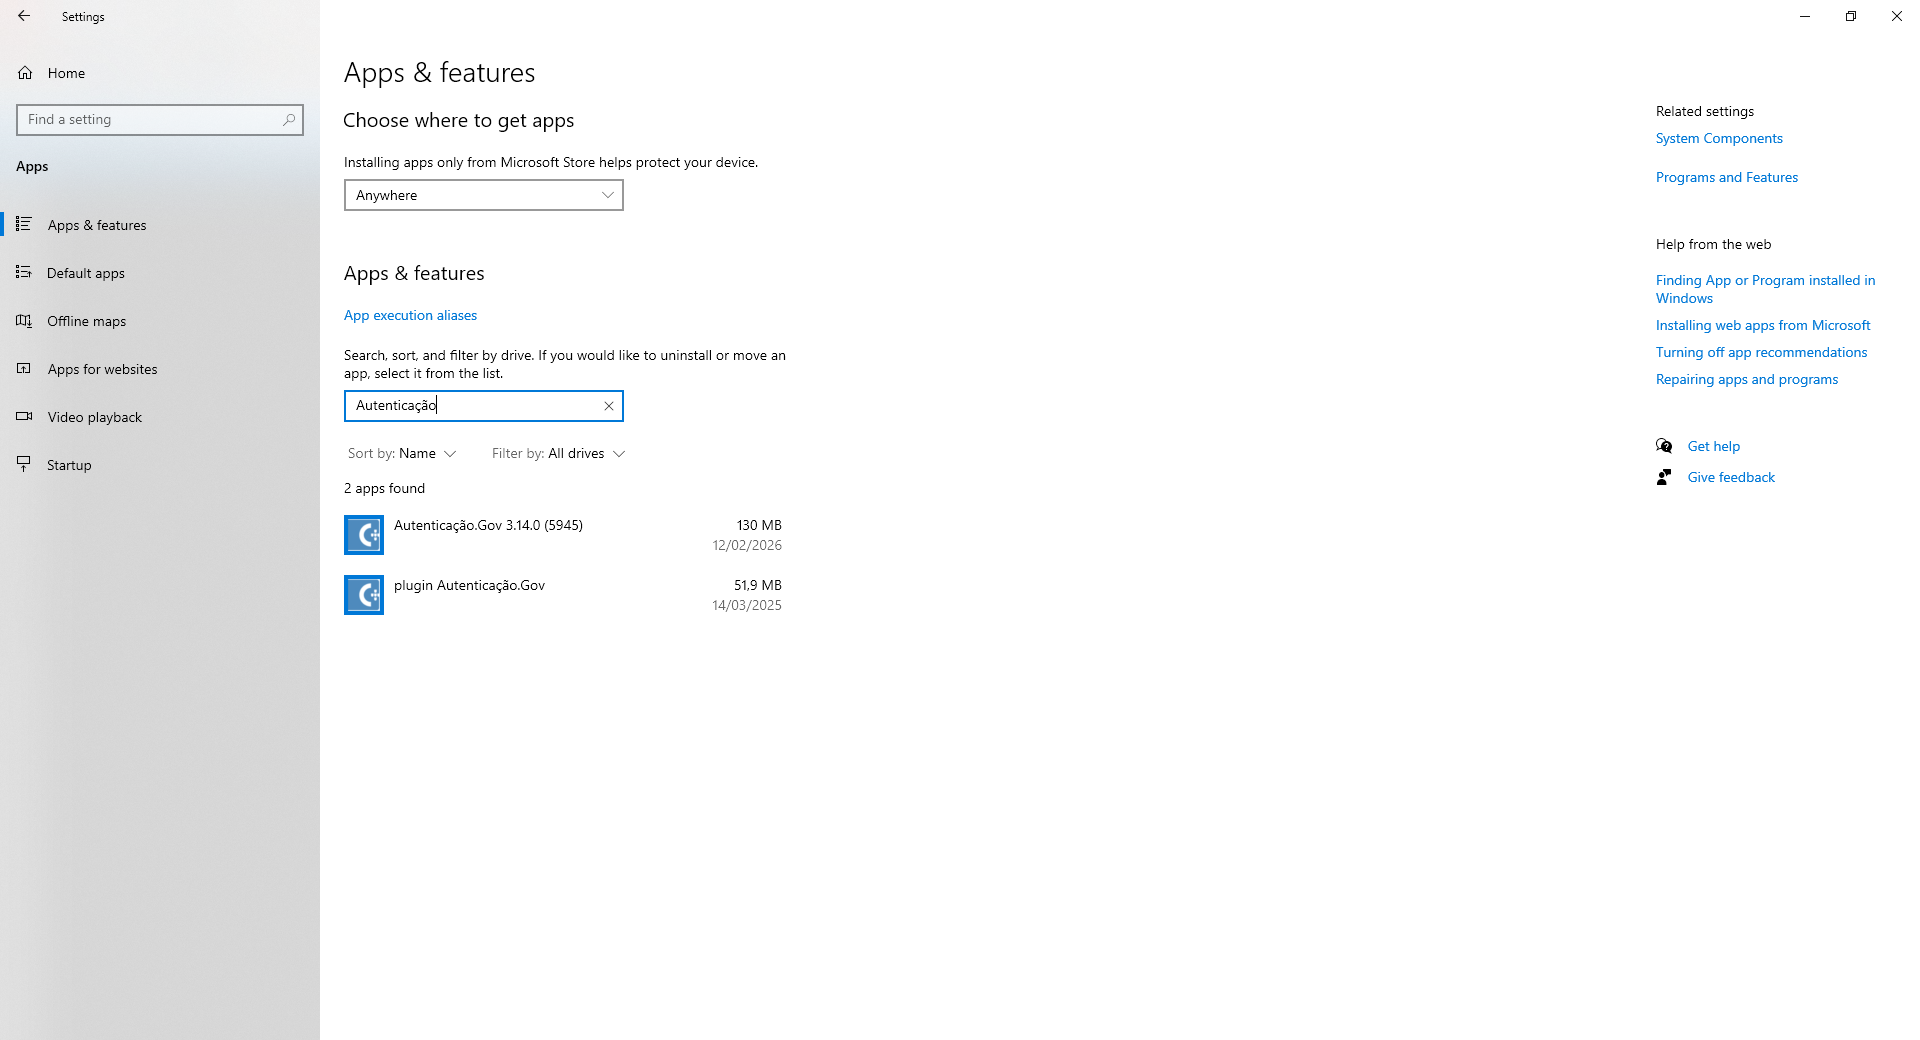
- Search for the Autenticação.Gov application and press Uninstall, as shown in the following figure:
-
Click on Uninstall. Confirm all dialog boxes.
-
After these steps, the application shall be removed from the computer. It is advisd to restart the computer after these steps.
Note: the directory and log files located in the installation folder (by default in C:\Program Files\Portugal Identity Card\log\) shall not be removed
upon uninstalling the Autenticação.Gov application.
Removal from Linux and ChromeOS
Removal via command line.
Flatpak package removal
-
Verify the Flatpak installation status: successful installation is indicated by the presence of an entry with the ID
pt.gov.autenticacaoon the list returned by the commandflatpak \--columns=app list -
If affirmative, remove the package with the following command:
flatpak remove pt.gov.autenticacao
Removal from MacOS
-
Open the “Terminal” application on MacOS.”
-
Run the following command to uninstall all application files.
sudo /usr/local/bin/pteid_uninstall.sh
Application update
Linux update
Upon transferring the installation file via the menu
Configurations -> Updates of the application, the
installation file is found in the Transfers directory, by default under ~/Downloads.
The latest version of the application can always be downloaded from the official page.
After downloading the installation file, follow the steps set out in the section “Installation via command line” to complete the update.
Autenticação.Gov Utility Application
The Autenticação.Gov utility application is used to view and manage data on the Citizen’s Card and to sign digital documents.
The following operations can be performed on this application:
-
Viewing of identity information and photo of the citizen;
-
Viewing the citizen’s address;
-
Viewing and editing the card notes;
-
Printing the Citizen’s Card data;
-
Digital signature of PDF documents and other files;
-
Viewing of citizen card digital certificates;
-
Registration of Portuguese Root authority certificates (specific to Microsoft Windows);
-
PIN Management (Test PIN, Change PIN).
The application’s appearance and behaviour are similar across all three operating systems, except for some features only available on Windows, as they are native features or specific Windows environment configurations.
The shortcut to the application shall be available in different locations depending on the operating system type:
-
In Windows, it shall appear in: Start Autenticação.Gov Programmes
-
In Linux, it will appear in: Autenticação.Gov Accessories Applications
-
On MacOS, it will appear in the location chosen by the user during the installation process.
Application Presentation
The application comprises 4 main areas of interaction:
-
Main menu: The three basic features of the application are provided;
-
Secondary menu: The specific features of each option on the main menu are provided;
-
Configurations and help menu: The configurations and help menus are provided;
-
Working area: Data viewing area for the Citizen’s Card and workspace for signature and security menus.
 f
f
Application features
The application features comprise three main menus: Card Menu, Signature Menu and Security Menu.
Card Menu
To view the citizen’s identity information and photo, view the citizen’s address, edit notes, and print the Citizen’s Card data. The application enables the export of the citizen’s photo to a file.
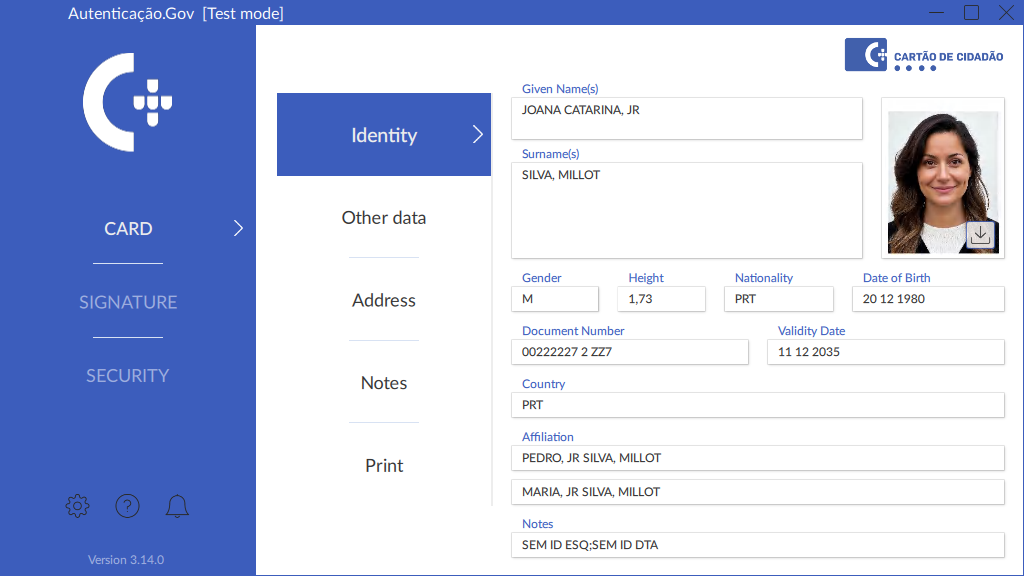
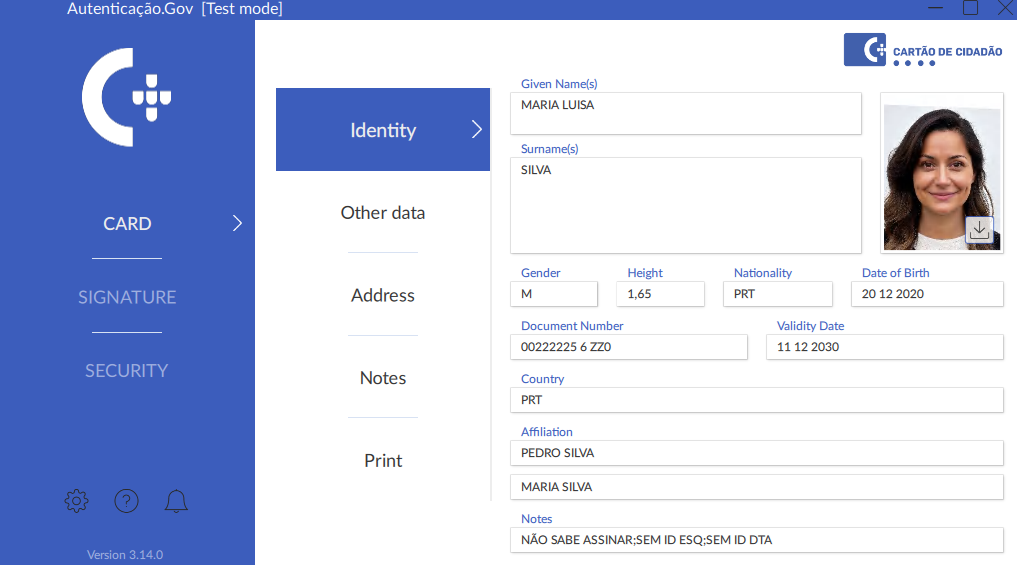
Identity
Provides viewing of the citizen’s identification data and photo to be found on the Citizen’s Card. A photo of the citizen can also be exported via this page.
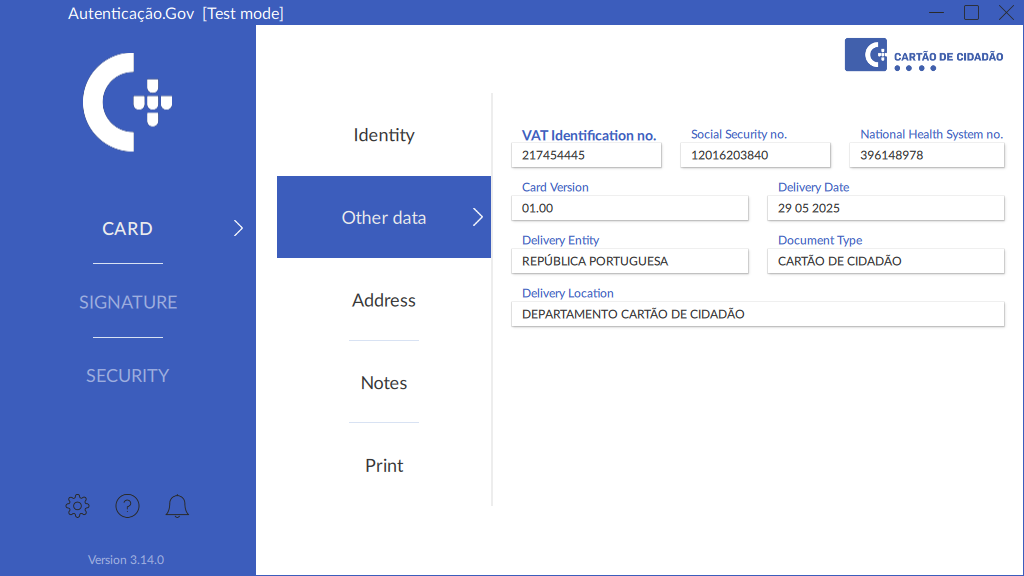
Other data
Provides viewing of other data from the Citizen’s Card and checking of the status of the Citizen’s Card.
Address and Change of Address
⚠ IMPORTANT: Consulting Citizen’s Card Address.
Currently, the address on the Citizen’s Card is read from the central services. This requires a working internet connection to read the address. It shall be ensured that there is no firewall or other software on the local network preventing connection to the addresses
morada.cartaodecidadao.ptormorada2.cartaodecidadao.pt.
On the Address tab, view the current address and access gov.pt to complete the address change process.
Both features require an internet connection. Ensure connection before starting the process.
To complete the address change process, visit the following webpage: Confirm the change of address.
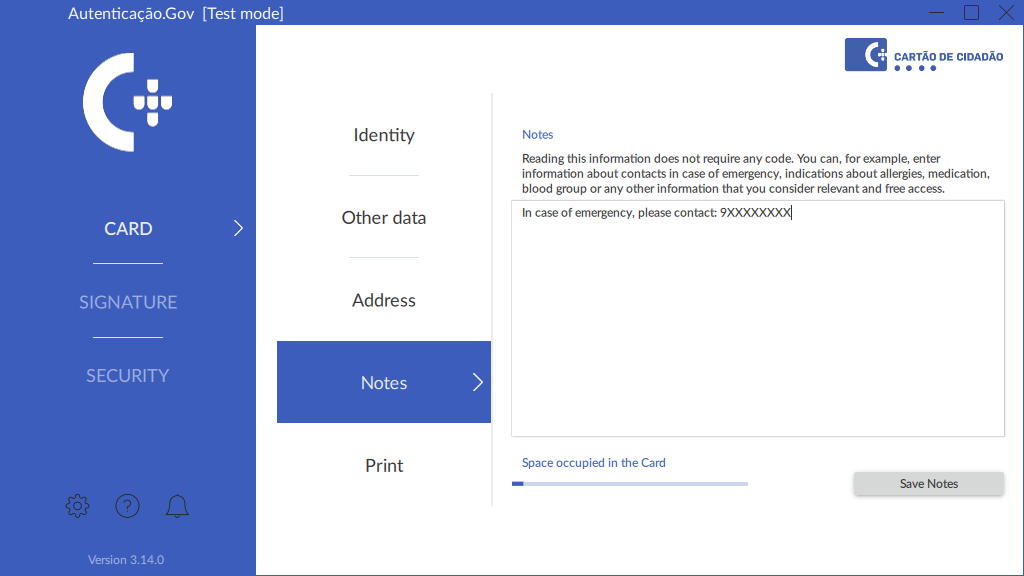
Notes
The application allows editing of the notes recorded on the Citizen’s Card.
Reading this information does not require any code. For example, contact information shall be included for emergencies, details about allergies, medication, blood type, or any other information deemed relevant and freely accessible.
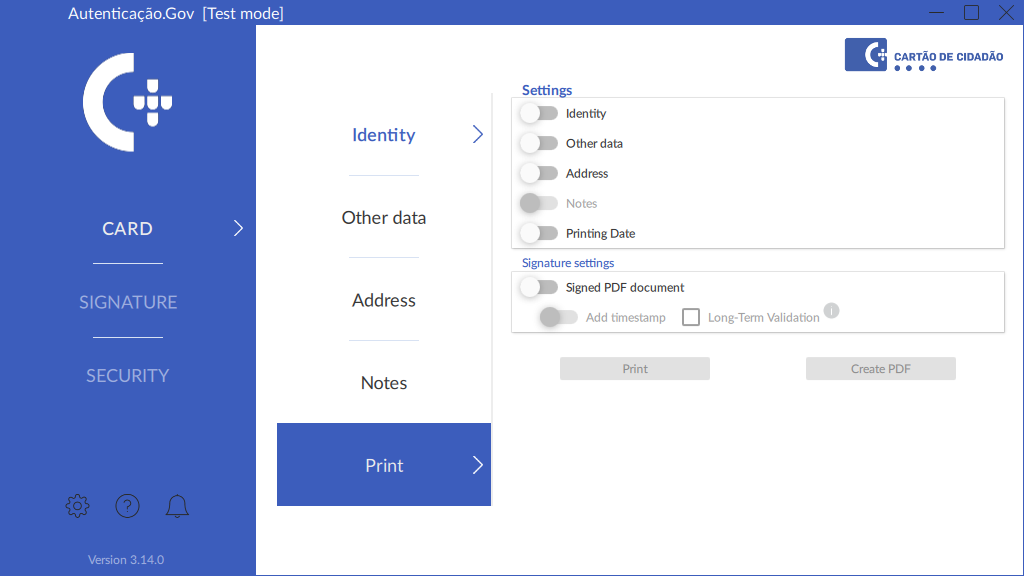
The application allows Citizen’s Card data to be exported to a PDF document or the document to be printed directly.
To perform these operations, follow the steps below:
-
On the main menu, select Card and on the secondary menu the Print option.
-
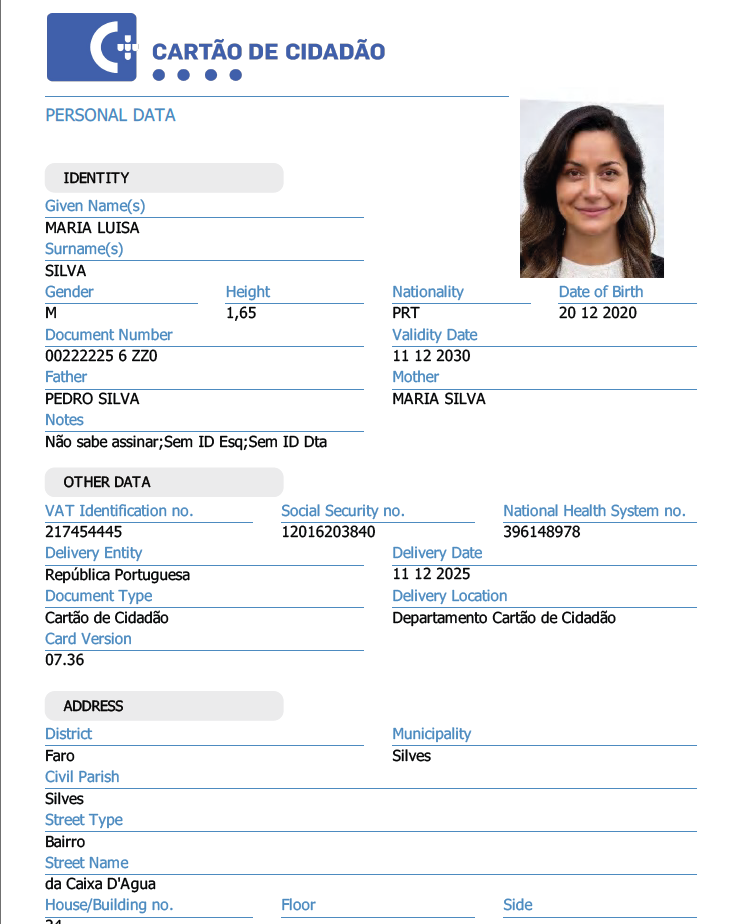
In the workspace, select the field groups to be included in the document and select the Print or Generate PDF option.
The document to be exported and/or printed shall have a graphic appearance as shown in the following image.
Travel data
In the Travel Data section, data is read from various types of identification documents with contactless chips:
-
Citizen’s Cards of the model being issued since June 2024
-
Portuguese Residence Permits
-
Identity cards/documents or residence permits from other countries
This is a dataset readable from documents complying with Regulation (EU) 1157/2019 of the European Parliament and of the Council, or more broadly, the International Civil Aviation Organisation (ICAO) standard
- Access control to the data in these documents requires the entry of a 6-digit numeric code printed on the physical document. In some types of documents, this code is called CAN (Card Access Number ).
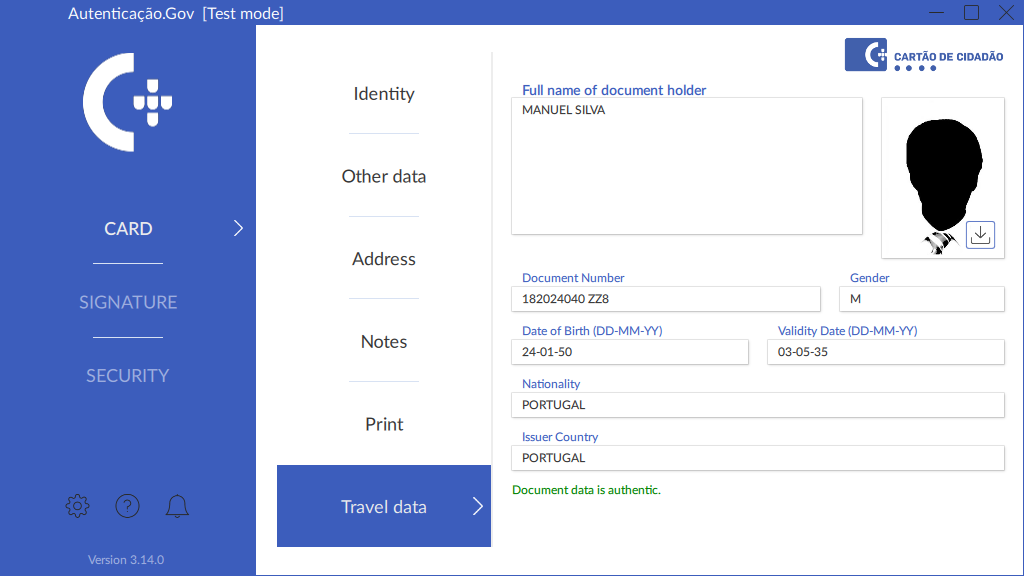
If the data is correctly read from the document’s chip and its digital signature is validated, the following message is displayed in green: “Document data is authentic”
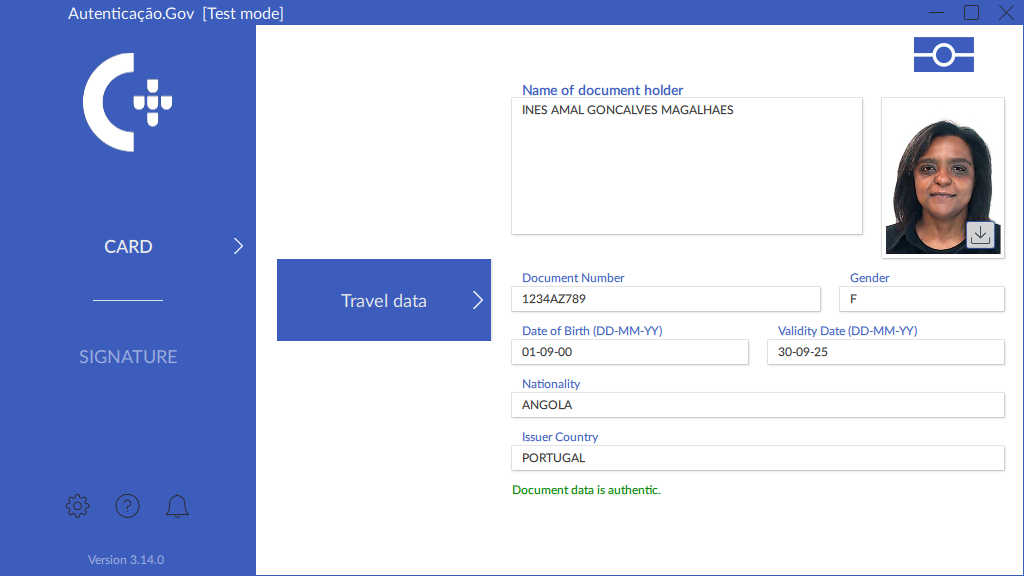
In cases where the field “Name of document holder” is shown instead of “Full name of document holder,” the document chip only contains the name appearing in the optically readable zone (MRZ) of the document. This name format adheres to a series of international rules under the ICAO Doc 9303 standard with a limit on the number and type of characters and so it may be truncated and lack national characters such as cedillas, accents or other diacritics.
Digital signature
A digital signature enables the holder of a Citizen’s Card or Digital Mobile Key to sign, of their own free will, using the personal key on their Citizen’s Card or the Digital Mobile Key.
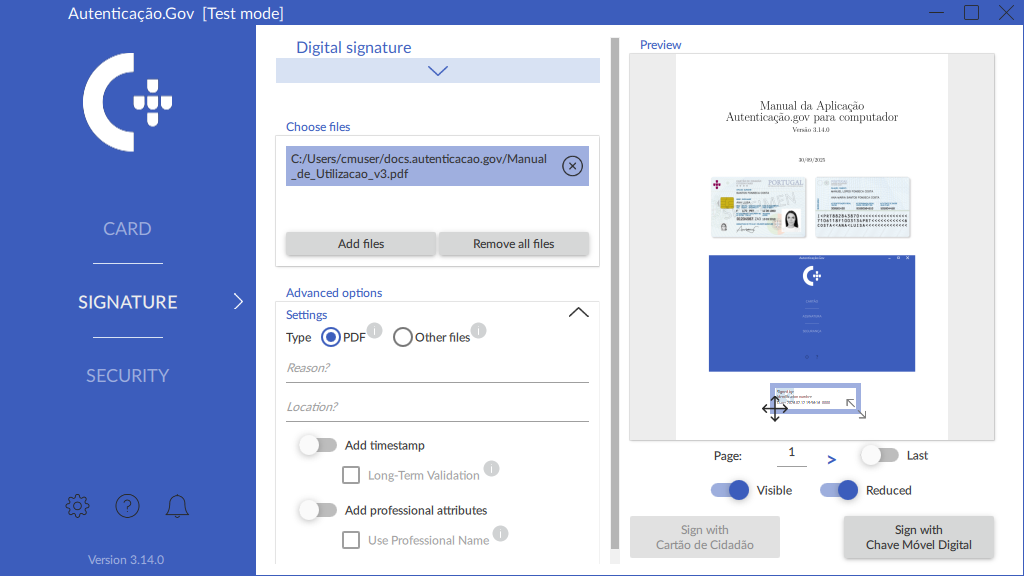
On the Signature menu a PDF document or any other document is signed, with the possibility of signing multiple documents at the same time, adding professional attributes, as well as configuring other options. The digital signature in PDF documents was developed according to Adobe specifications, and can thus be validated later using Adobe Reader software.
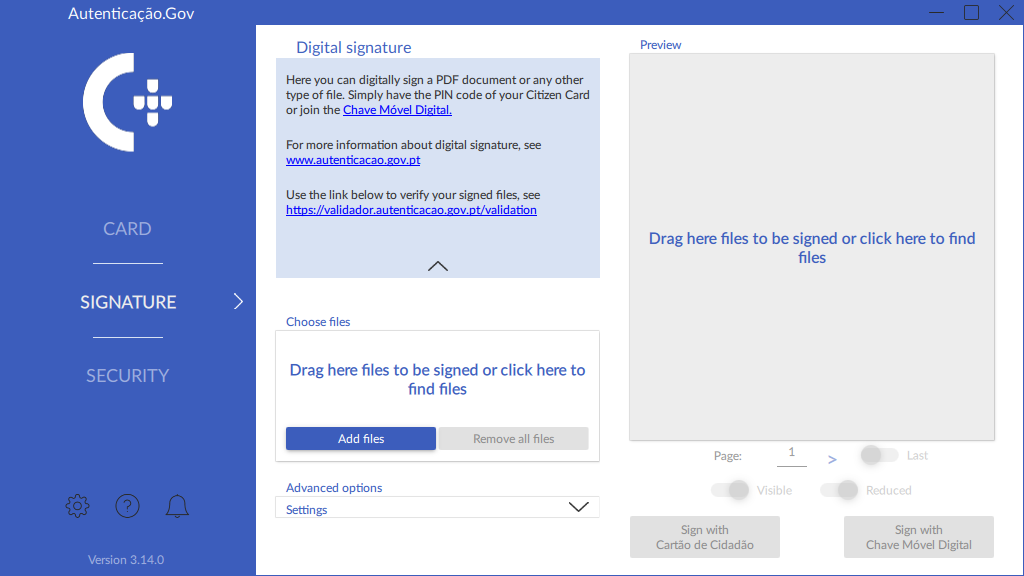
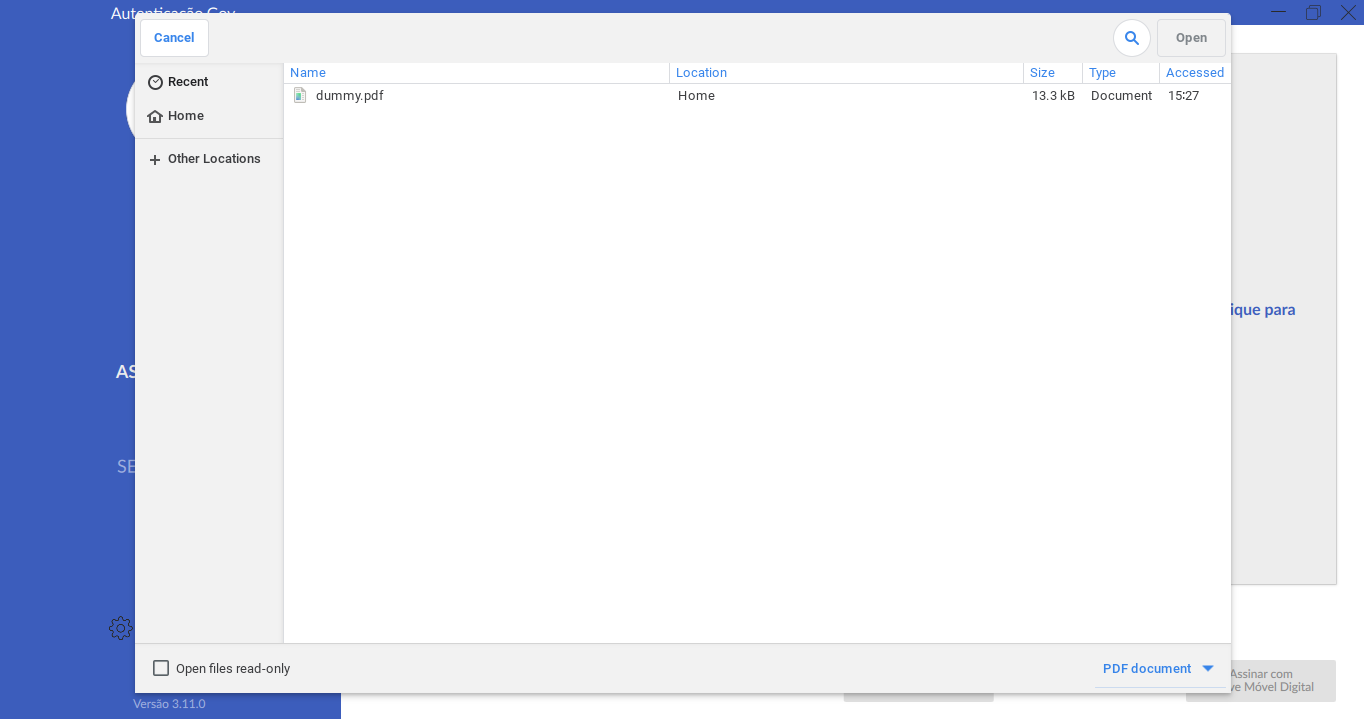
The files to be signed can be selected by dragging them to the preview area or by using the keyboard shortcut CTRL+V (paste). The preview area may also be clicked or the button Add files and the files selected manually. A window will appear to select the files to be signed. The selected files will be displayed in the Choose files section, as shown in the following image.
Choose the files:
-
The Add files button opens a new window allowing selection of the documents to be signed.
-
Remove files individually using the button next to each file name, or all files by pressing the button Remove all.
-
In ChromeOS, to make the files appear for selection, the following procedure is necessary:
-
Drag the file you wish to sign to the Linux Files folder.
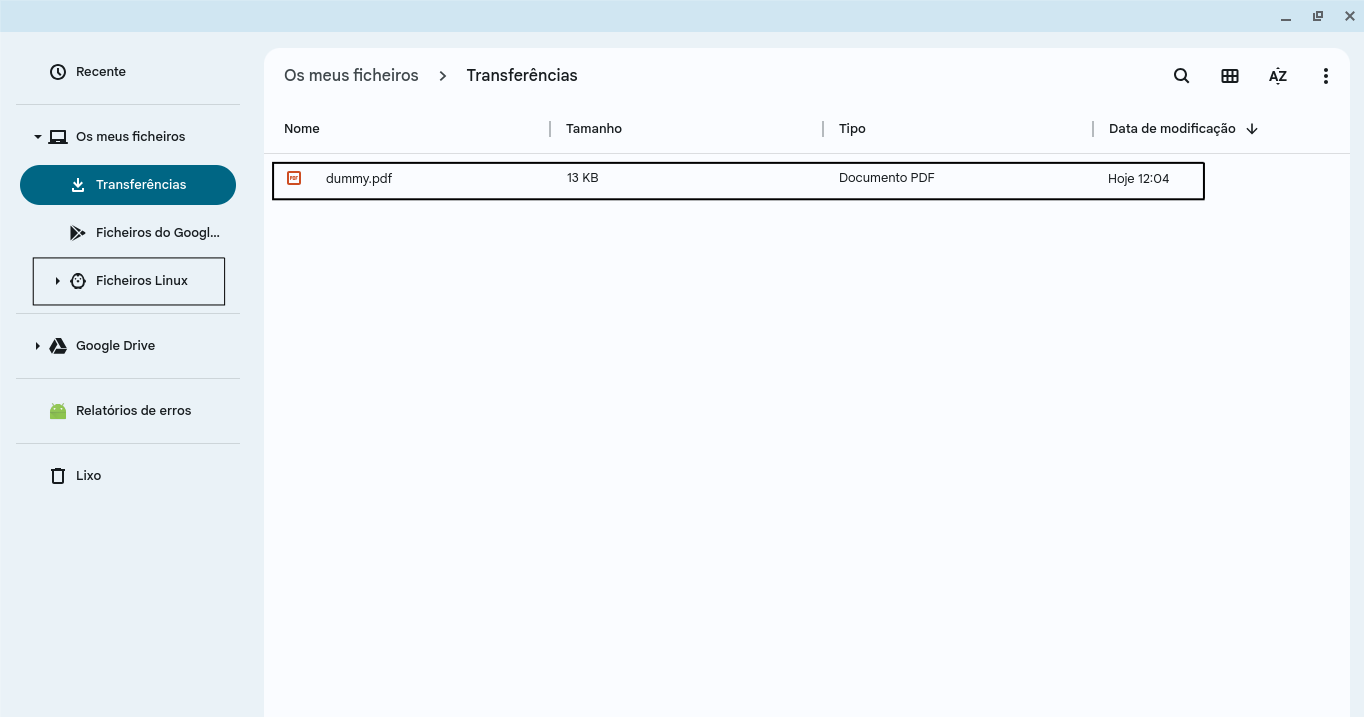
-
After dragging the file, it will appear upon clicking the Add files button.
-
-
Signature preview: The document to be signed is viewed and the position and size of the signature stamp adjusted, moving it to the desired location with the desired dimensions. There is only a preview for PDF, type signatures and any of the files of a multi-signature can be previewed by clicking on the file name in the application.
-
Advanced options - Configurations:
After selecting the files, the signature options shall be selected. The signature configurations are as follows:
-
Type: Signature type, required field, allows file signature selection:
-
PDF: PAdES (PDF Advanced Electronic Signatures).
-
Other files: ASiC package with XML Advanced Electronic Signatures (XAdES). This package is a ZIP file created according to the ASiC (Associated Signature Container) specification developed by ETSI (European Telecommunications Standards Institute) and following EU standards. The file contains the signed information (original files) and the respective signature in XAdES format.
-
-
Reason: The signature reason is an optional field allowing the signatory to indicate the reason for their signature. Available for PDF type signatures.
-
Location: Location where the signature was provided - optional field - allowing the signatory to indicate where the signature was provided. Available for PDF type signatures.
- Adding a timestamp: It adds a timestamp, proving the date on which
the signature was provided. This is the only way to prove that the
document existed at a specific time, as the date and time of signature
are securely applied to the document. The time shown on the visible
stamp is the local time of the computer where the signature was
provided , not having to match the time on the timestamp (obtained
from a remote server). Available for signature types PDF and
Other Files. See Timestamp Service on the Signature configurations page
- Long-term validation: With this option enabled, the data required to validate the digital signature are included in the final signed file. In this way, it is possible to prove in the future that upon signature, the card certificate (or Digital Mobile Key) and its chain were not revoked or expired. This level is advised for documents filed for a long period of time. The signature with long-term validation complies with the PAdES-LTA profile specification.
-
Add professional attributes: The professional signature feature enables authentication based on the user’s qualified professional standing and institutional roles within society. The Professional Attributes section includes the procedure for loading professional attributes. Available for PDF type signatures.
Further information on professional attributes is at the following website:
https://www.autenticacao.gov.pt/a-autenticacao-de-profissionais
-
Visible: The signature is visible in the PDF document. Available for PDF type signatures.
-
Page: The page shall be selected where the signature is to be displayed. Available for PDF type signatures.
-
Last: The last page to display the signature is chosen. Available for PDF type signatures.
- Smaller: Allows the use of a smaller signature stamp. The smaller stamp always displays the following fields in the same order: “Full Name”, “NIC” (Civil Identification Number) and “Signature Date”, unless there is not enough space (long full names). In this case, fields are added if possible until the space is filled, in the same order. Available for PDF type signatures.
-
Upon selecting the desired options, in the area indicated in the previous figure, drag the signature stamp preview to the desired location and then press the button Sign with Citizen’s Card or Sign with Digital Mobile Key.
The Sign with Citizen’s Card button is only available when the Citizen’s Card is inserted into the card reader and correctly read by the application.
After clicking on Sign, choose the folder and file name where you will save the signed file and follow the signing procedure (see section Key introduction). A message is then displayed indicating that the digital signature was successful.
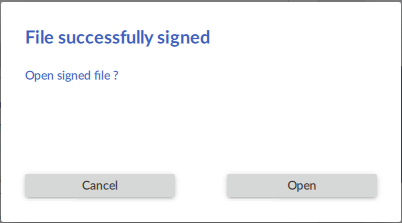
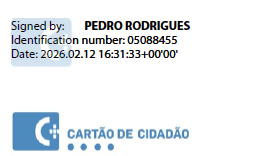
The image below is an example of a file signed with the Autenticação.Gov application.

If there any issues validating signatures, check whether the issue is related with the topic Issues with the new chain of trust
Key introduction
A digital signature enables the holder of a Citizen’s Card or Digital Mobile Key to sign, of their own free will, using the personal key on their Citizen’s Card or the Digital Mobile Key.
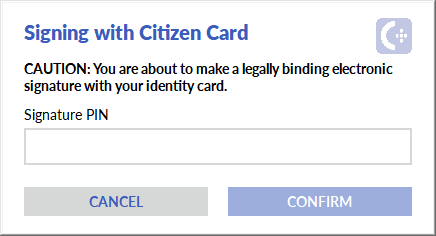
If signing with the personal key on the Citizen’s Card, upon selecting the Sign with Citizen’s Card option, the signature PIN must be entered as shown in the following figure.
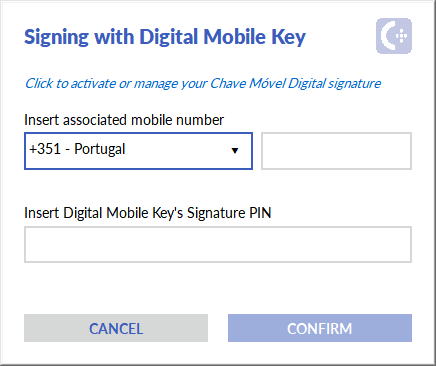
If signing with the Digital Mobile Key, upon selecting the Sign with Digital Mobile Key option, enter the credentials as shown in the following figure.
Verification of signed PDF document on Windows or MacOS
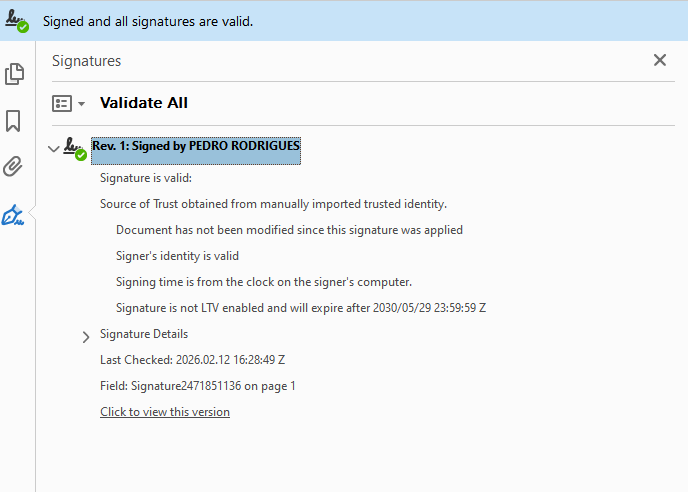
Upon applying a digital signature to a document, it should be automatically identified when opening the document in Adobe Acrobat Reader. The image below illustrates Adobe Acrobat Reader with a PDF document that includes the signature provided in the previous step:
Even when the signature is not visible (if the “Visible” option is not selected when signing), the signature is always validated in the signature panel, allowing viewing of the signature status taking into account the chain of trust and its cryptographic properties.
Note: When using the Adobe Reader function “lock content after signing,” avoid digitally signing the document again. Although it is permitted to add more signatures according to the PAdES standard, Adobe Reader invalidates the first signature in this process.
Security
The application offers some features related to security on the Citizen’s Card.
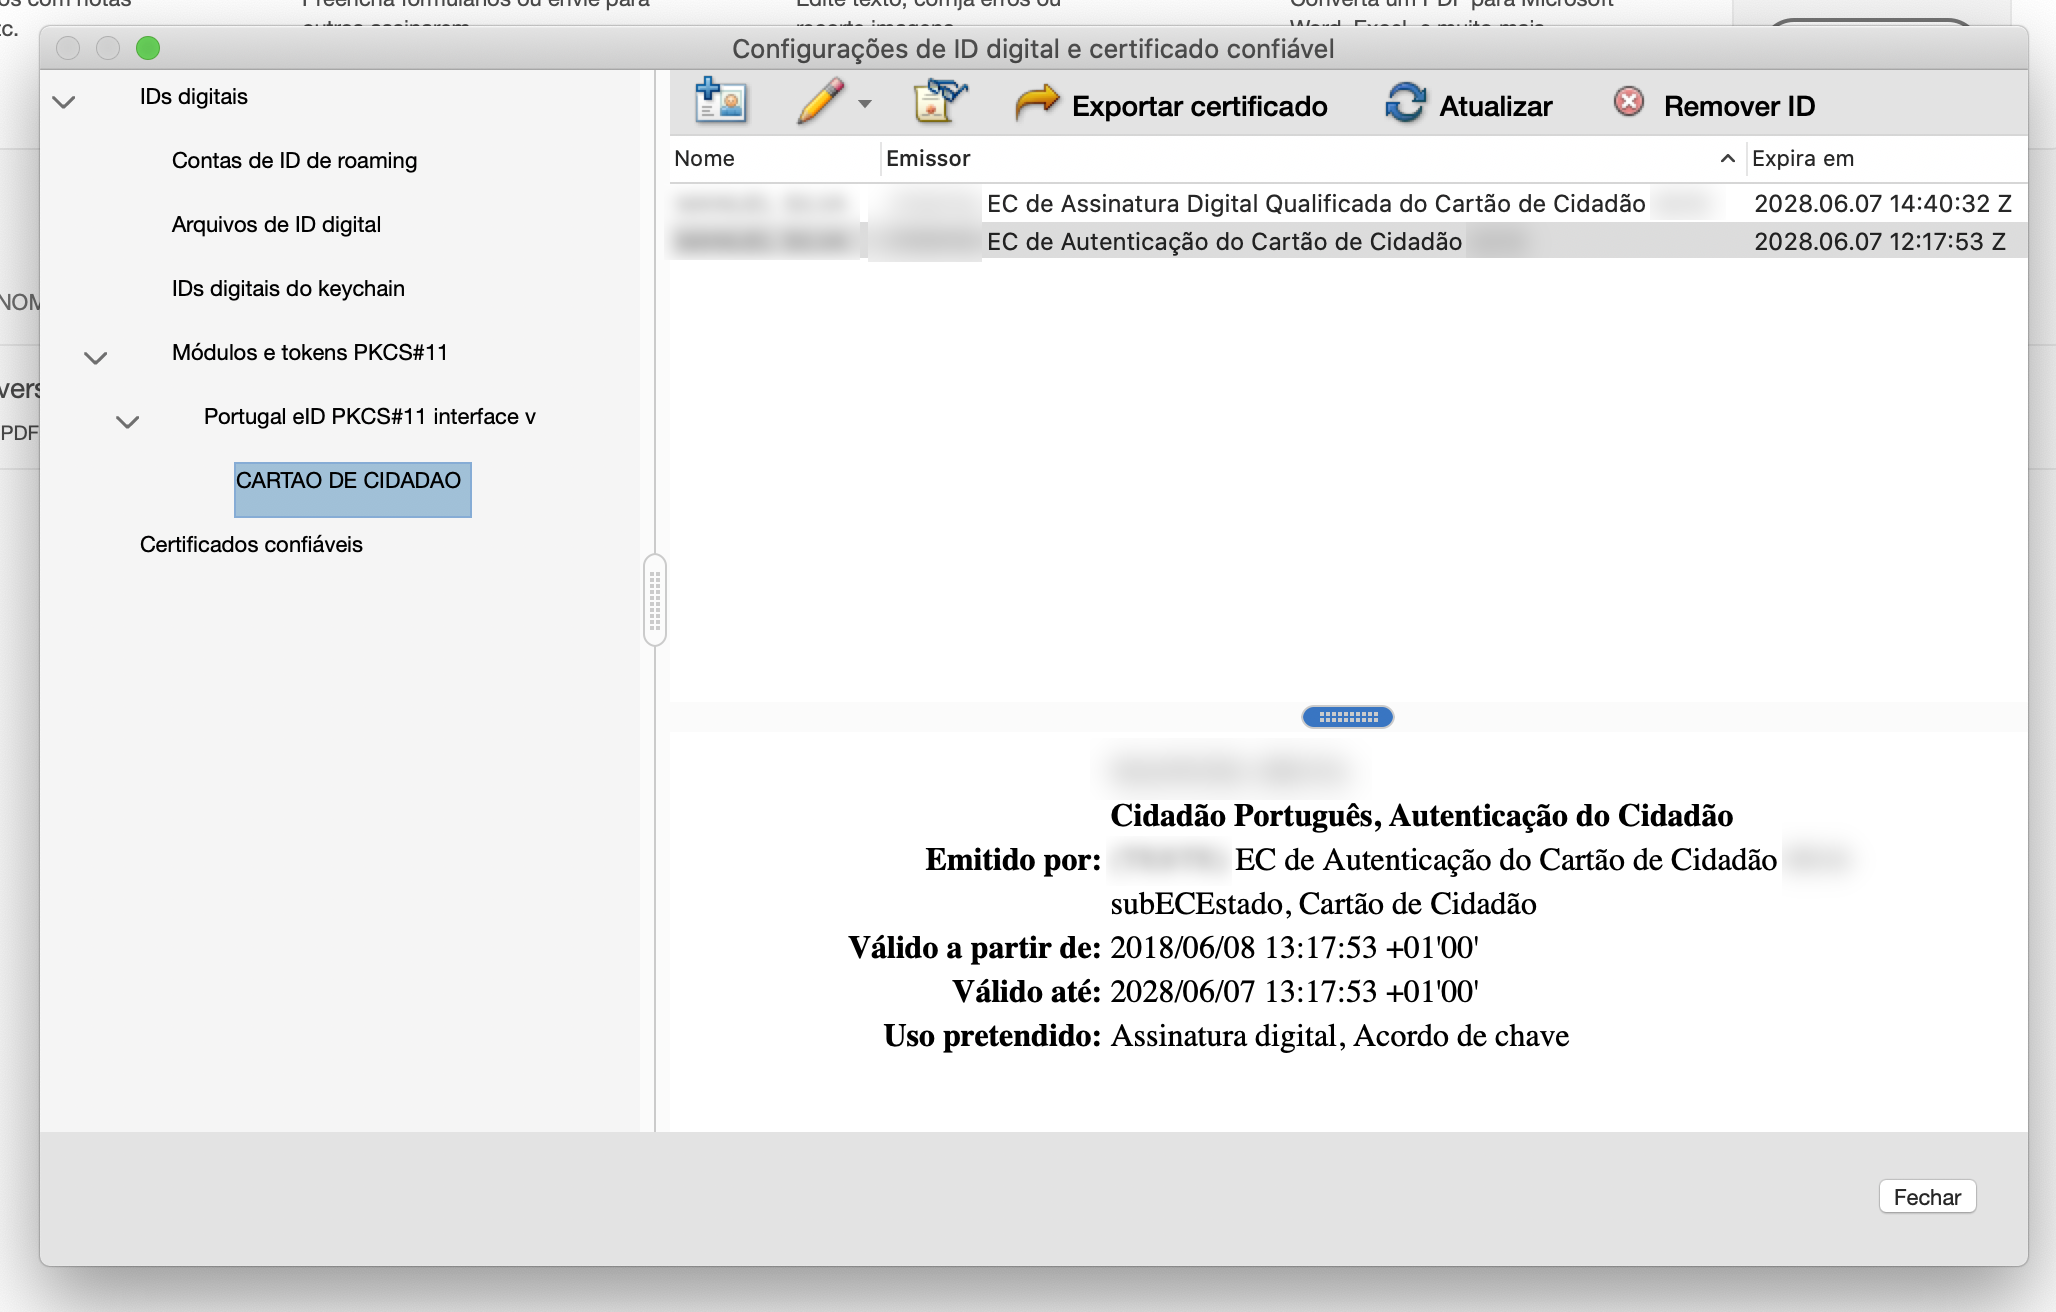
Certificates
This menu allows verification of the Citizen’s certificates and the chain of trust formed by the various Certification Entities of the Citizen’s Card and the Portuguese State.
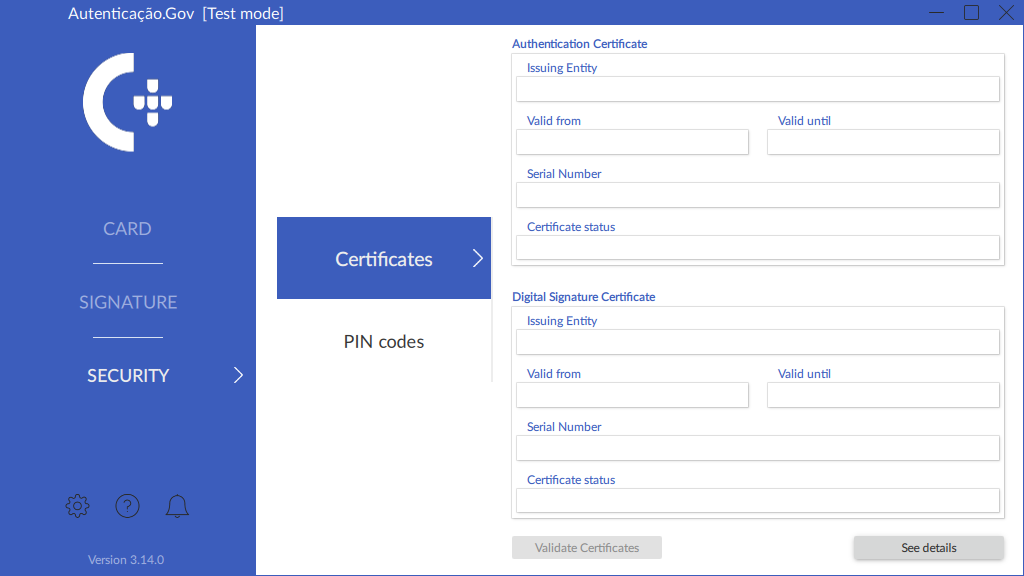
The status message presented in “Certificate Status” fields is a result of a validation bythe Citizen Card Infrastructure, requiring an internet connection. This validation is triggered when pressing the Validate Certificates button.
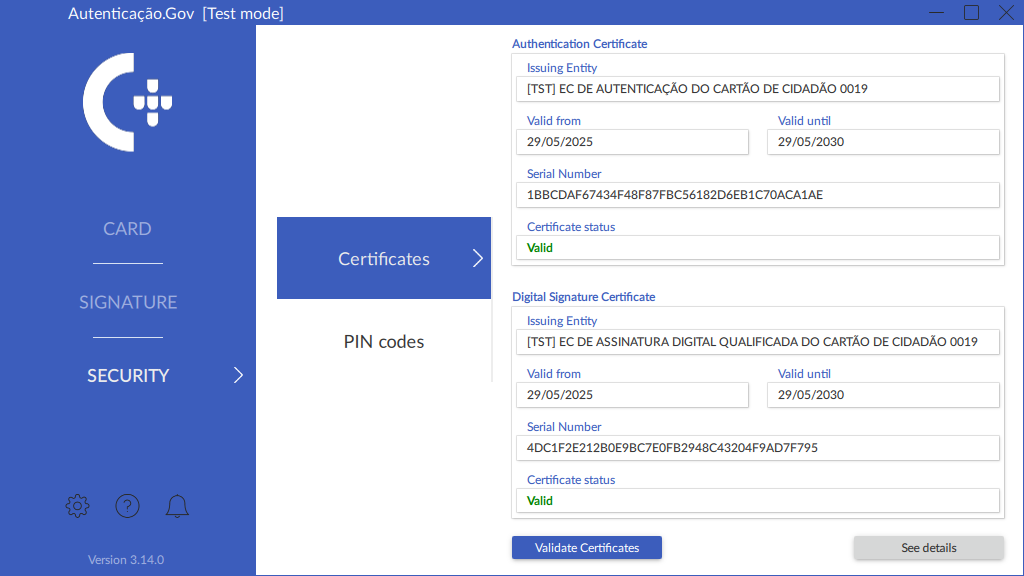
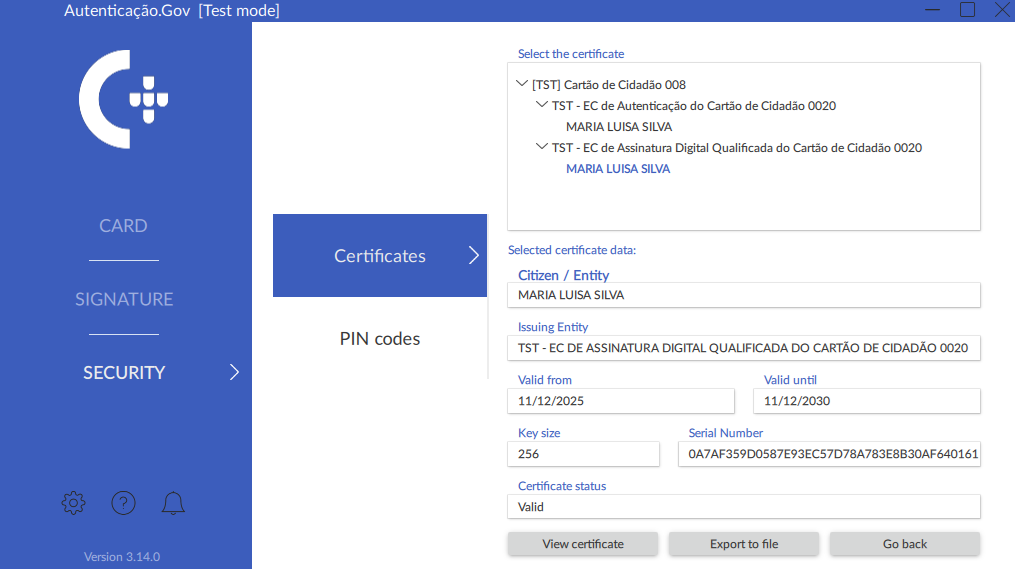
Consult the certificates chain and the details of each certificate by pressing the View details button, visible in the previous image.
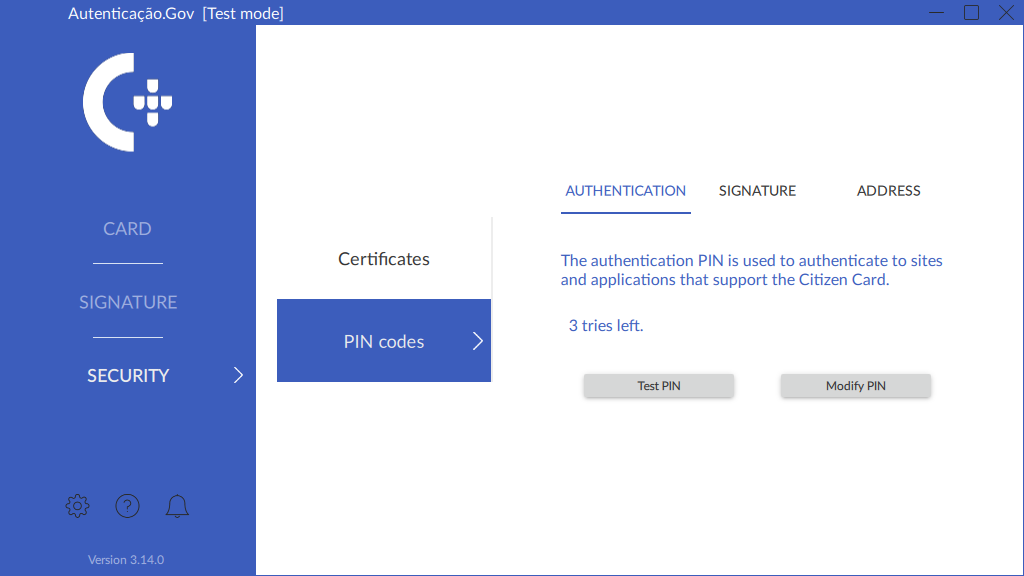
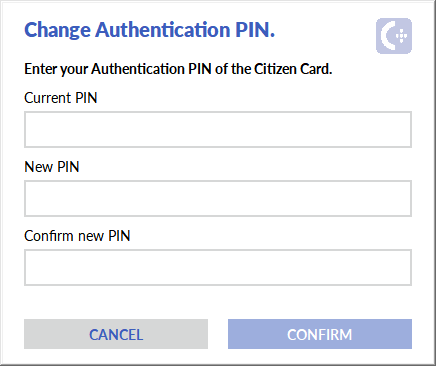
PIN code
On this menu, the PIN codes for the Citizen’s Card are viewed and changed.
-
Authentication PIN: This PIN is used to authenticate at websites and applications supporting the Citizen’s Card.
-
Signature PIN: This PIN is used to sign documents or transactions in applications supporting the Citizen’s Card.
-
Address PIN: This PIN is used for address verification.
Configurations
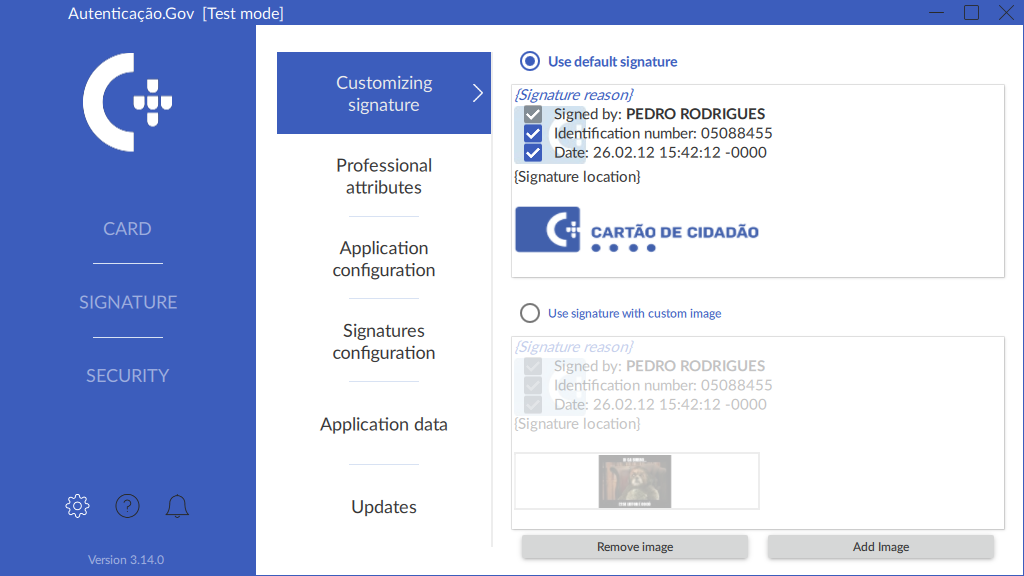
Signature Customisation
On this menu, the digital signature can be customised, replacing the image of the Citizen’s Card with an image of the user’s choice.
The Add signature button allows selection of an image to be used in the customised signature. After adding an image, the Use standard signature or Use a customised signature option is selected, at the discretion of the user.
The minimum recommended image size is 351 x 77px.
The inclusion of the signature date and the civil identification number in the signature is optional. To this end, simply select the desired checkboxes on this menu.
Professional Attributes
The Professional Attributes Certification System (SCAP) is for citizens, to sign a document in their capacity as professionals using their Citizen’s Card or Digital Mobile Key. Further information is at the following website:
https://www.autenticacao.gov.pt/a-autenticacao-de-profissionais
Firstly, select the type of attributes:
-
In the case of Professional Attributes, select the entity(ies) providing the professional attributes to be uploaded and click Load attributes.
-
In the case of Business Attributes, user attributes are loaded automatically when clicking the attribute load button.
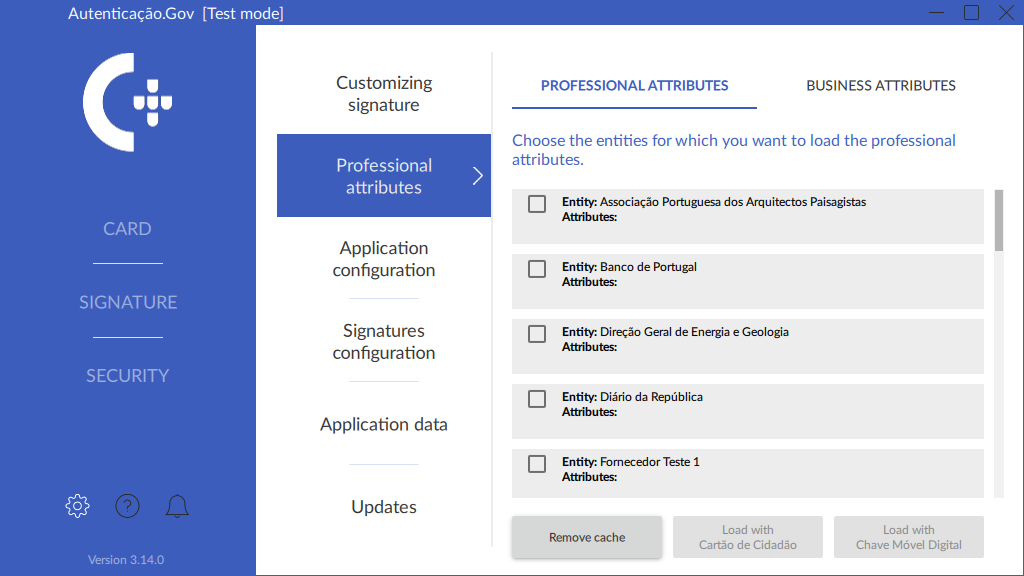
One of the attribute loading buttons is then clicked, depending on whether loading the attributes with the Citizen’s Card or Digital Mobile Key (CMD), respectively:
-
Load with Citizen’s Card: upon selecting this button, enter your authentication PIN and wait for the loading of the attributes.
-
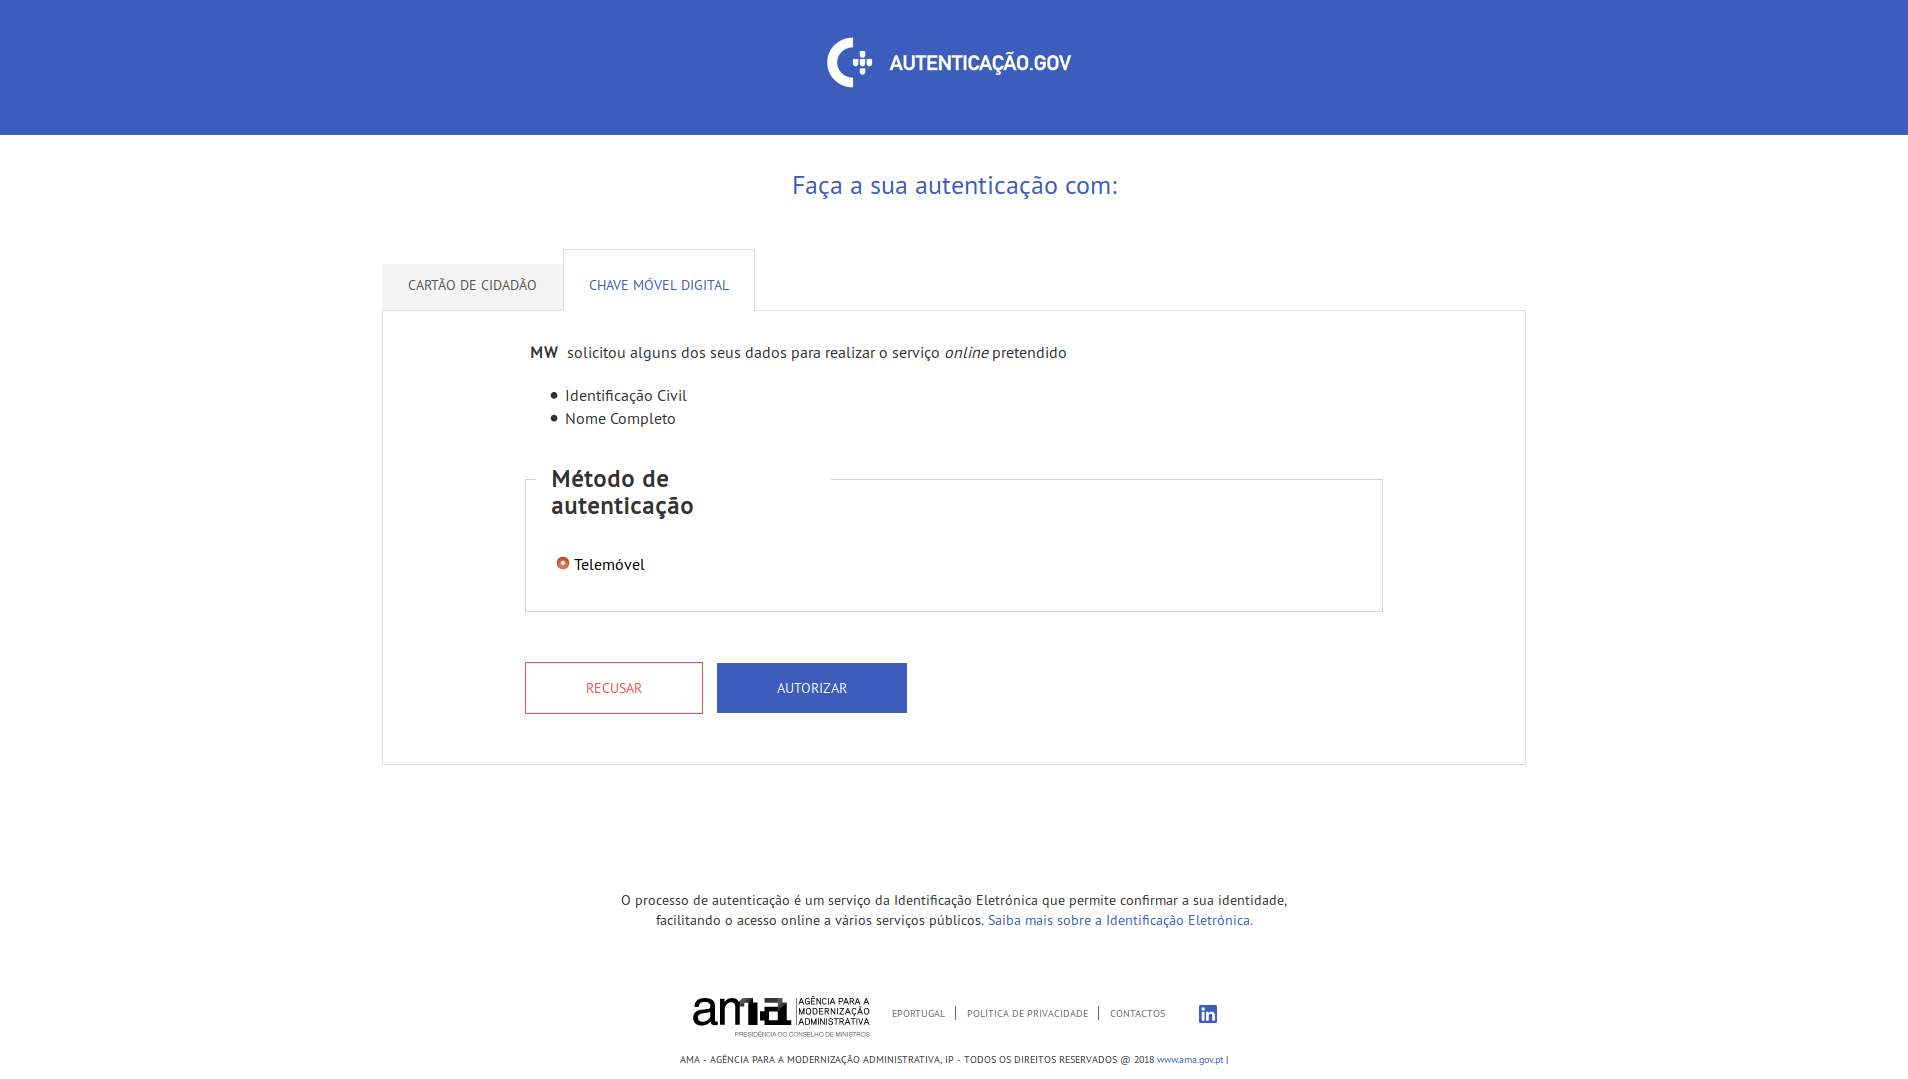
Load with Digital Mobile Key: selecting this button shall initiate an authentication process on the default web browser (for example, Google Chrome, Mozilla Firefox, Safari, or other). Press Authorize and fill out the form with the mobile phone number associated with the Digital Mobile Key and its PIN. Then press Authenticate and enter the security code received on the mobile phone by SMS or notification from the Autenticação.gov app. Press Confirm to complete the authentication.
If authentication was successful, return to the application and wait for the attributes to load.
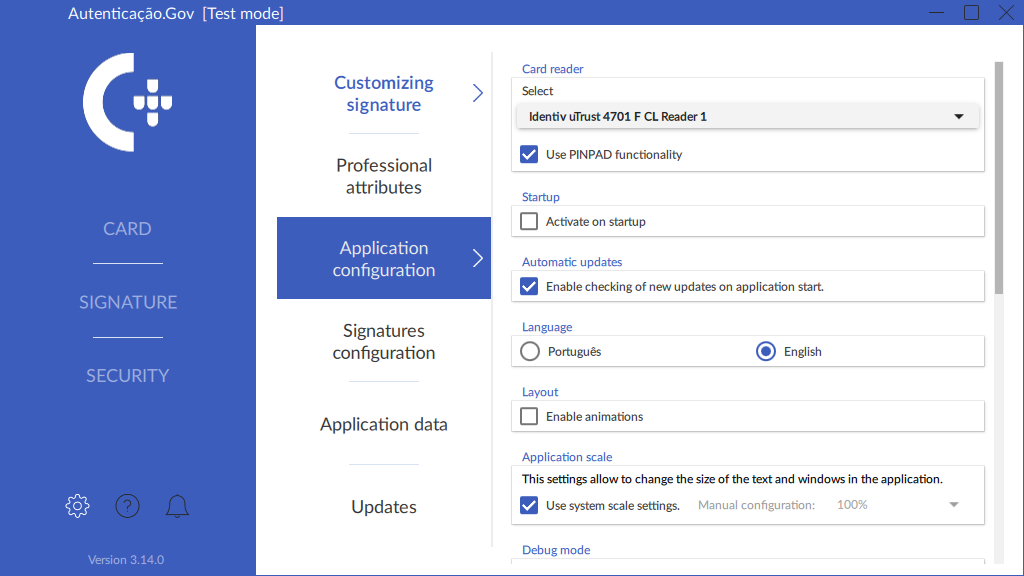
Application configuration
In this window, configure some operating aspects of the application, namely:
-
Card Reader: Selection of card reader to be used. There is also an option enabling or disabling the PINPAD feature on the readers. Readers with PINPAD are card readers who have a physical keypad for entering the PIN code securely.. If this option is disabled, readers with PINPAD will behave identically to readers without PINPAD.
-
Start: Application launch options.
-
Automatic updates: Enable or disable the verification of new updates when the application starts. This option only enables or disables the verification of new application versions. It has no influence on the updating of certificates, carried out automatically, whenever necessary, when the application starts.
-
Language: Select the application language.
-
Appearance: Options related to the application’s appearance. This section provides an option allowing the enabling and disabling of transition animations between menus.
-
Application scale: Options related to text size and other application components.
-
Diagnostic mode: Enable or disable the application’s diagnostic mode. This mode raises the log detail level to debug, helping the support team to resolve any issues with the application.
On all operating systems, to help obtain log files, there is a new feature allowing the creation of a “Diagnostic Report”. Simply press the “Create report” button. Upon pressing the Create report button, a compressed folder (zip file) is created on the Desktop containing all the log files. Send this folder (zip file), attached to a description of the issue, to the support contact. For further information, see the chapter Obtaining Report for analysis on the Configurations menu
The log files by default are created at the following locations and are named with the prefix .PTEID:
-
Windows: In the log folder in the installation folder (by default, C:\Program Files\Portugal Identity Card ), usually:
C:\Program Files\Portugal Identity Card\log\ -
MacOS: User’s Home Directory, for instance:
/Users/User/ -
Linux: User’s Home Directory, for instance:
/home/User/
If application start is unsuccessful, activate the diagnostic mode using the Autenticação.gov software configurations via Registry keys on Windows or a configuration file on Linux and MacOS.
-
On Windows, the registry key:
HKEY_CURRENT_USER\Software\PTEID\logging\log_level;
-
On Linux, the key called “log_level” in the logging section of the file:
$HOME/.config/pteid.conf;
-
On MacOS, the key named “log_level” in the logging section of the file:
$HOME/Library/Preferences/pteid.conf.
The key may have the following values:
-
debug(if there are issues with the application, the support team can help resolve the issue)
-
info
-
warning
-
error (default value)
In a business environment, change the following configuration as described in the chapter Configuration instructions in business environments.
-
-
Graphics acceleration: The application’s graphics rendering mode is activated. The “Hardware (Graphics card)” option should afford a better performance, but if there are any issues, an alternative option may have to be configured (see section Graphical issues in the application.)
-
Network configurations: Proxy server configuration options. In networks where internet access is only possible through an HTTP/S proxy server, the following access information shall be configured:
-
System proxy (Windows and MacOS). Upon selecting this option and if a system proxy configuration or an autoconfiguration script is defined (Proxy Autoconfig), this setting shall be used automatically by the application and other applications using Citizen’s Card middleware.
-
Proxy server: IP address / Hostname / Port.
-
Proxy authentication: Access credentials (if required).
-
The following image shows the application’s configurations menu.
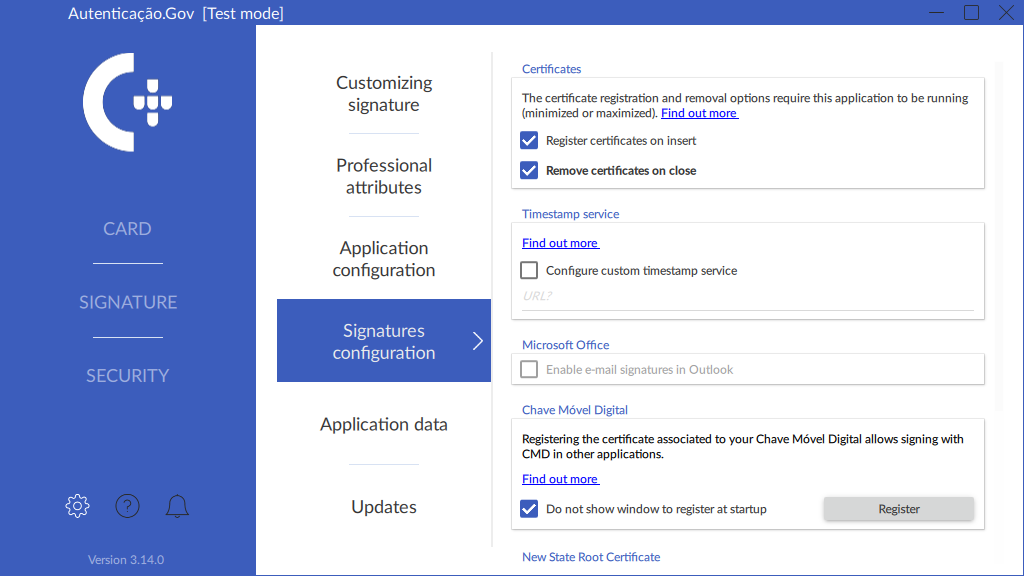
Signature configuration
In this window, configure some aspects related with signing with the Citizen’s Card:
-
Certificates: Options regarding the registration and removal of certificates during card insertion and removal.
The certificate registration and removal options require this application to be running (minimised or maximised).
-
Timestamp Service: Set up a customised timestamp service.
The application allows the selection of a different server for obtaining time stamps, as the default TSA server for Citizen’s Card http://ts.cartaodecidadao.pt/tsa/server has a limit of 20 requests in each 20-minute period. If this amount is exceeded, service access will be blocked for 24 hours, allowing for any other consequences in case of repeated blocking situations. (For further information on the Citizen’s Card timestamp service, visit https://pki.cartaodecidadao.pt).
To use a different server, simply enter the server’s URL in the text box.
Further to this configuration, both PDF document signatures (PAdES) and XAdES format signatures shall use this newly configured server to obtain timestamps when signing.
-
Microsoft Office (Windows): Signature configurations in Microsoft Office applications.
-
Digital Mobile Key (Windows): Registration of the certificate associated with the Digital Mobile Key account. Further information is available in the section Digital signature with Digital Mobile Key.
-
New State Root Certificate (Windows): Installation of the root certificate of the new Citizen’s Card certificate chain in the Windows Trusted Root certificates store. Further information is available in the section Issues with the new chain of trust.
The following image shows the signature configurations menu.
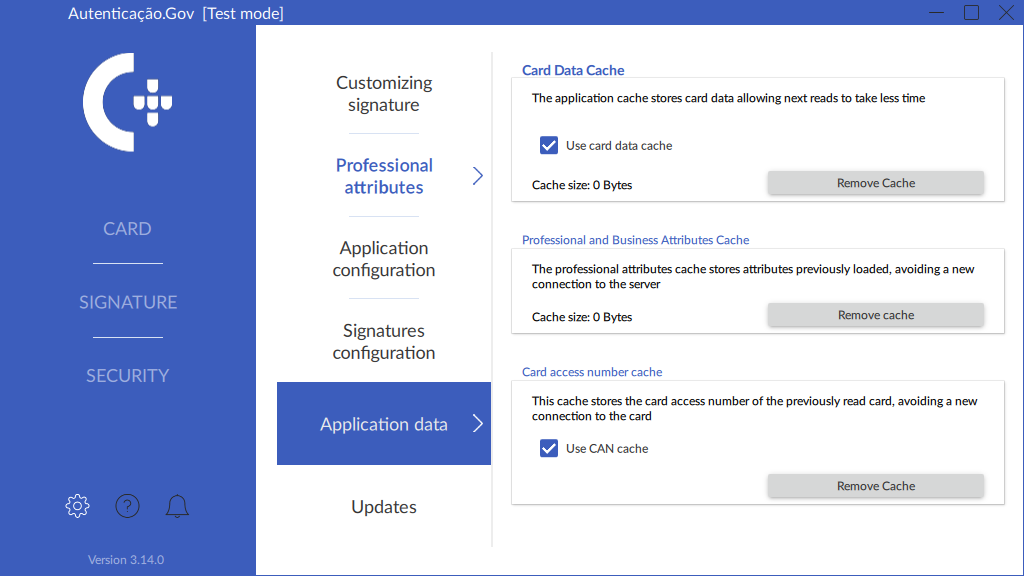
Application data
On this tab, the user can delete cached data stored from card readings and the loading of professional and business attributes.
Stored data relating to the Citizen’s Card includes identity data, photo, and the authentication and signature certification chain.
For professional and business attributes, a list of pre-loaded attributes is stored.
There is also the option to disable the card data cache by deactivating the “Use card data cache” option.
Updates
In this window, you can manually check if there are any updates for the application. Automatic download of the application installer and subsequent initiation of the installation process, subject to available updates and user preference.
Help
The help window provides a summary of the application’s features, indicating the path to this manual, and the application’s support page.
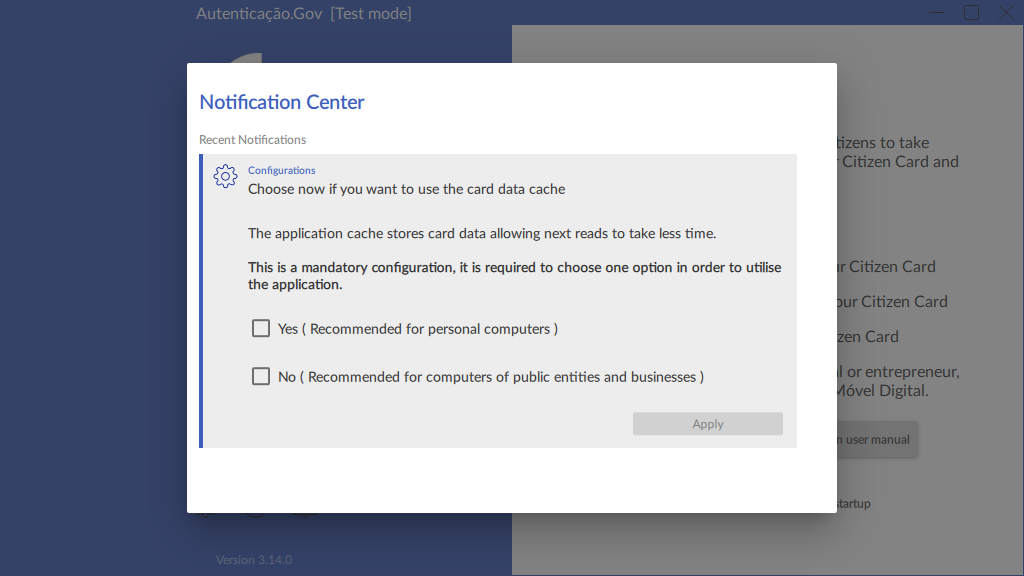
Notification Centre
Provision of information about news, configurations and updates, in the form of notifications, opening automatically when the application starts in the event of new notifications.
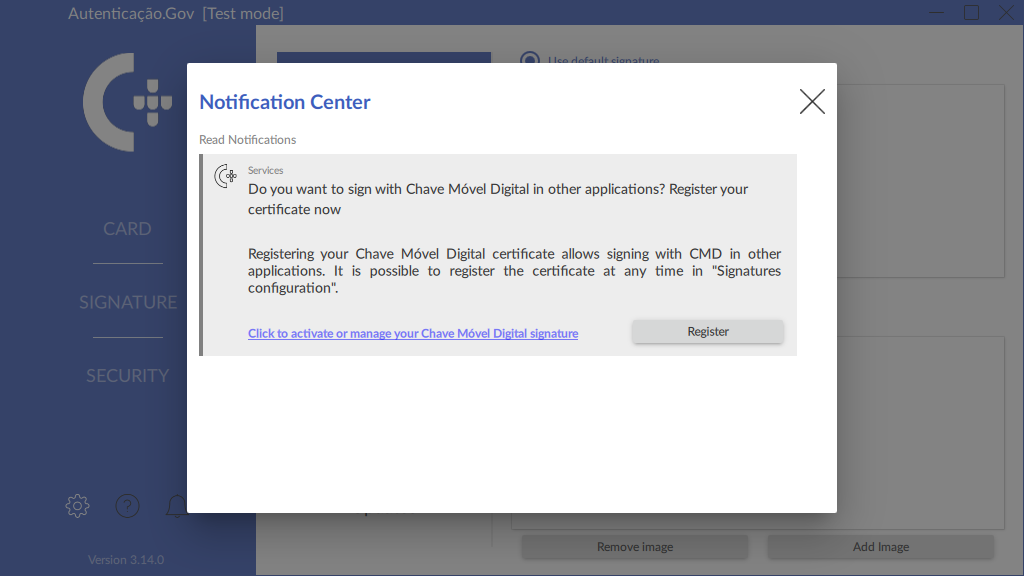
Configurations may have mandatory notifications whose interaction is necessary to use the application, such as the use of the cache:
Contactless Access
Important: This feature has been available since version 3.12.0 of the application.
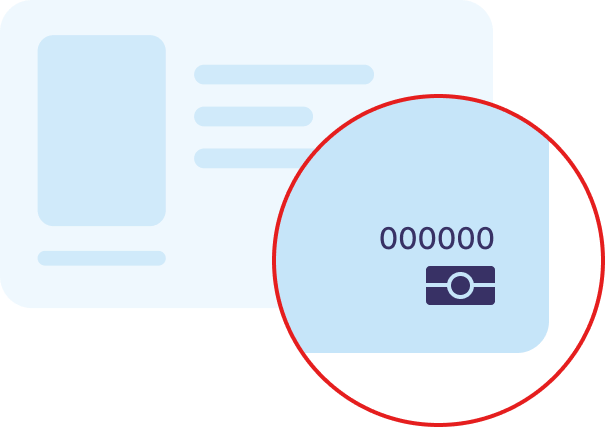
To use the contactless interface of the new Citizen’s Card, a new dialog box is displayed on the page currently in use, for example, the Identity, Address, Certificates, or Signature page. This window requires entry of the card access code, to prevent unauthorised access during contactless reading.
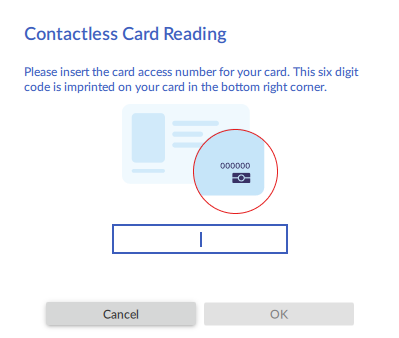
The card access code is the 6-digit code located in the bottom right corner of the new Citizen’s Cards.
This code shall not be required for subsequent uses of the application with the same card.
However, if you do not want the access code to be saved, you can disable this option in the “Application Data” tab within the application’s Configurations menu.
NOTE: Using the card via the contactless interface for signing or authenticating in external applications such as Adobe Acrobat Reader requires the user to read it at least once in the Autenticação.gov application and that the “Save access codes” option is enabled under Configurations.
Integration with applications
The Citizen’s Card middleware, installed with the Autenticação.Gov application, allows integration with other operating system applications, providing two features: Authentication and Digital Signature.
The middleware provides cryptographic support to applications via native cryptographic support in the Windows operating system or via the PKCS#11 interface.
Integration with Windows applications
Integration with applications with the Citizen’s Card:
Automatic registration of Citizen’s Card certificates in the operating system upon insertion into the card reader with the installation of middleware in Windows, ensuring the availability of authentication and signature features for applications using the system’s cryptographic layer
Some examples of these applications include: Microsoft Word, Microsoft Excel, Microsoft Outlook and Adobe Acrobat Reader.
For certificates to be automatically registered, the following is required:
-
The option “Register certificates on insert” available in the Signatures configurations tab is active.
-
Open the local Autenticação.Gov application before inserting the card. It is advisable to read the card at least once in the app.
Integration with applications using the Digital Mobile Key:
Integration with applications is also possible with the Digital Mobile Key through the digital signature component. Follow the procedure described under Digital signature with Digital Mobile Key.
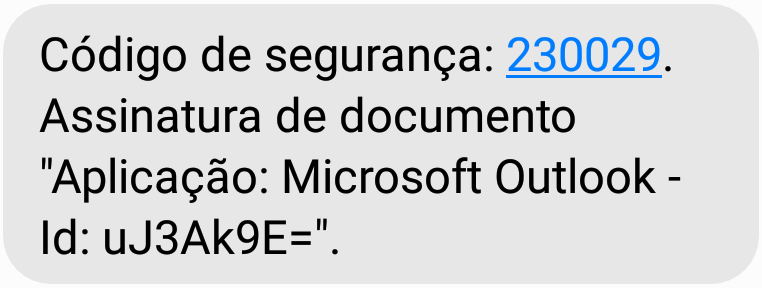
Upon signing with a Digital Mobile Key, the verification message sent to the user follows one of the following two formats:
-
In the case of applications such as Adobe Acrobat Reader or Microsoft Office:
Security code: <code>.
Document signature"<document title/e-mail>".
Example:

-
In the case of other applications supporting digital signatures, or when there is no verification of the document name:
Security code: <code>.
Document signature “Application: <Application name> - Id: <last 8 digits of the hash of the content to be signed>”.
Example:
Integration with applications via the PKCS#11 interface.
For applications supporting PKCS#11, configure the middlewarefile location to enable support. The location of this file depends on the operating system being used.
Windows: C:\Windows\System32\pteidpkcs11.dll
Linux: /usr/local/lib/libpteidpkcs11.so
MacOS: /usr/local/lib/libpteidpkcs11.dylib
Digital signatures in common applications
An explanation shall be provided in the following sections of the use of digital signature features in the following applications:
Digital signature:
Digital signature in Microsoft Office suite
A description is provided in this section of the digital signing of documents in Office files, specifically, in the following applications: Word, Excel and PowerPoint.
Digital signing of document, following these steps:
-
Access the File menu.
-
In the Information section, click the button Protect Document and select the option Add a Digital Signature, as shown in the image below:

-
A specific message appears from the application being used (Word, Excel or Powerpoint), click OK.
-
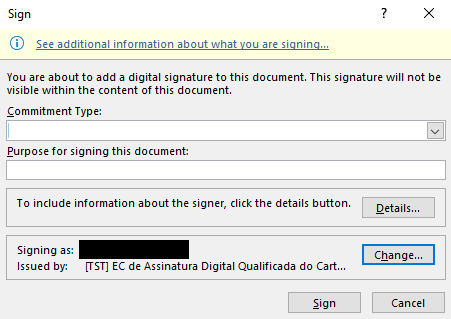
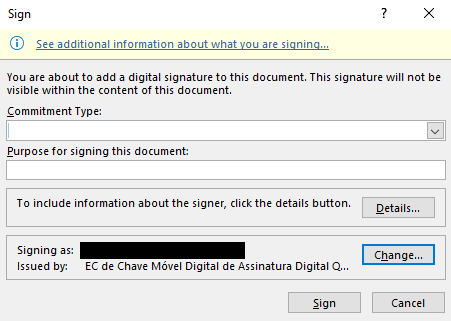
In the dialog box Sign, enter the signature purpose as shown in the image below:
-
Click on sign and enter the signature PIN in the respective window.
-
The document will be digitally signed and read-only, making it impossible to alter it.
More detailed information at the following link: Add/Remove a Digital Signature in Office files.
Digital signature in the LibreOffice / OpenOffice
This section presents the digital signing of documents in LibreOffice files, specifically, in the applications Calc, Write and Impress. The version used in this manual was LibreOffice 5.3. The interface for this feature is quite similar across all versions from 4.0.0 onwards.
In Linux operating systems, the detection of digital certificates in this Suite depends on the security configurations of Mozilla Thunderbird or Mozilla Firefox. For this feature to be available, first configure the integration with the Citizen’s Card in Mozilla Thunderbird or Firefox. See the instructions in: Digital signature of e-mail with Mozilla Thunderbird.
For the digital signing of a document, follow these steps:
-
Access the File → Digital Signatures menu.
-
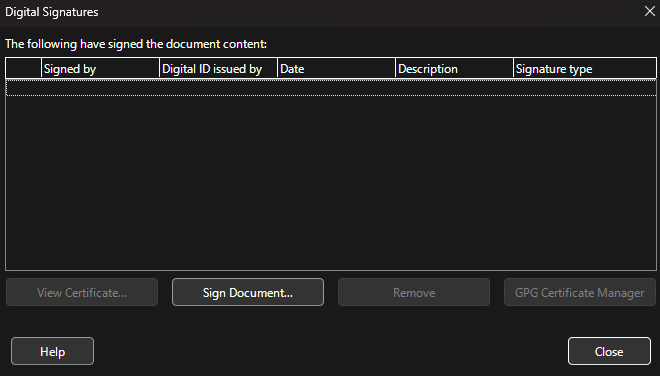
A window will appear displaying the document’s digital signatures. If there are no signatures yet, the list will appear empty as shown in the image below. Click the Sign document button...
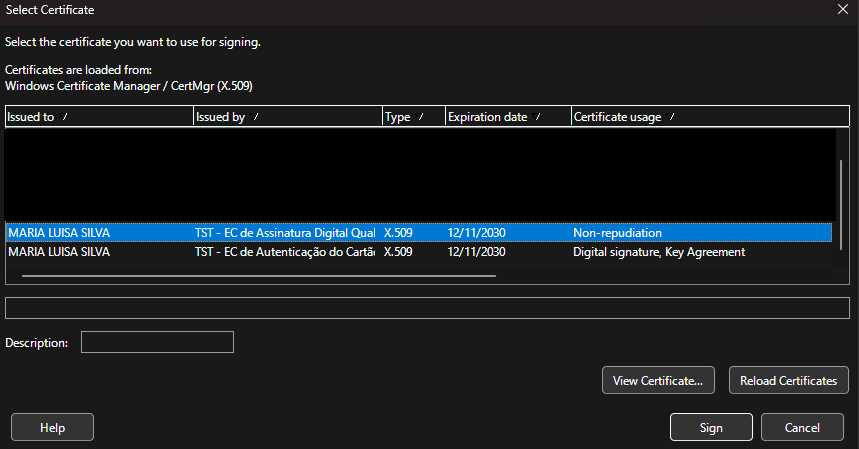
- A window appears for selecting the certificate. Select the certificate with your name and issued by the Citizen’s Card Qualified Digital Signature CA (certificate authority) as illustrated in the image below:
-
Click on Accept and enter your PIN signature in the respective window.
-
The document will be digitally signed.
Digital e-mail signature with Microsoft Outlook
The digital signature in Outlook by default requires the digital certificate to include the e-mail address, with this address matching the e-mail to be signed.
The certificates included on the Citizen’s Card and the Digital Mobile Key do not contain any e-mail address. To make it possible to carry out digital signatures in Outlook with the Citizen’s Card and Digital Mobile Key, this validation needs to be disabled.
In the application, this validation can be disabled by selecting the option Allow e- mail signatures in Outlook on the submenu Signature configuration of the Autenticação.gov application for computers.
Alternatively, to disable matching with the digital certificate email address, follow the instructions provided at the Microsoft website:
-
PT version: http://support.microsoft.com/kb/276597/pt
-
EN version (original): http://support.microsoft.com/kb/276597/
For the digital signing of an e-mail in Outlook, first carry out the respective configuration. The steps below are divided into configuration, consisting of the initial configuration required, and signature, consisting of the signature itself.
Note: The images shown refer to Microsoft Outlook 16.
Configuration - This operation is performed only once.
-
Ensure that correspondence with the digital certificate’s email address is disabled, as instructed above.
-
In Outlook, access the menu File → Options

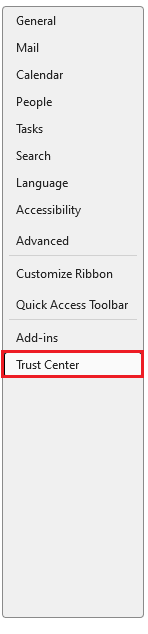
- Click Trust Centre.
- Select the Trust Centre Settings section.
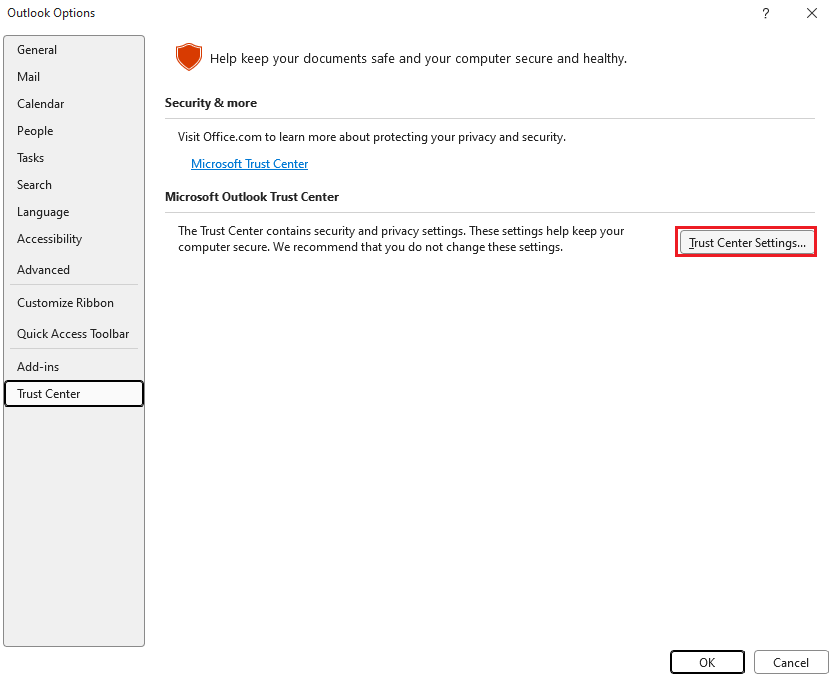
- In this section, click the Settings button
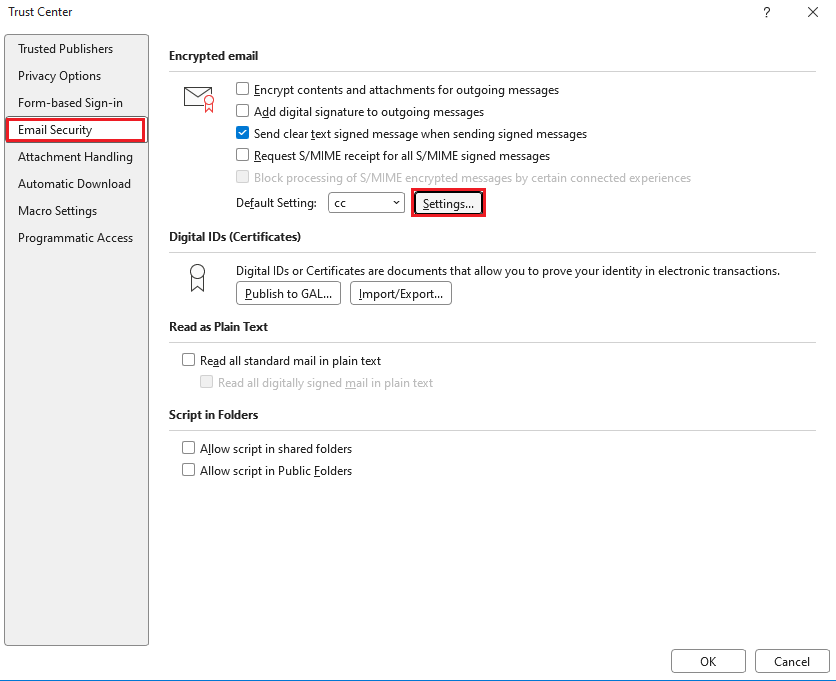
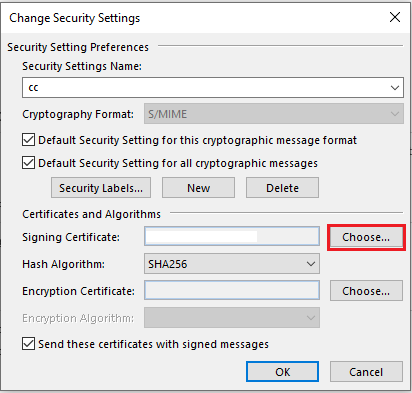
- Add a description for this configuration for example: “Signature with Citizen’s Card” and click the Choose button to select the certificate. Select the Citizen’s Card or Digital Mobile Key signature certificate.
-
In the configuration Hash algorithm, choose SHA256 and click OK.
-
Click OK in all open configuration windows. The configuration is complete.
Signature - to be performed for each signed e-mail sent.
-
In the Options tab of the message creation window, click Sign to activate the signature.
-
Upon clicking Send, the signature PIN shall be requested and the e-mail shall be signed and sent.

Digital signature in Adobe Acrobat Reader
Note: to sign a document on Adobe Acrobat Reader on MacOS, follow the instructions in the section Digital signature in Adobe Acrobat Reader in MacOS (since version 3.11.0)
Note: signing with professional attributes is only possible in the Autenticação.Gov application.
To sign a PDF document in Adobe Acrobat Reader:
-
Some PDF documents were created by their author with signature fields. Identify the signature field to where your signature should be placed and click it. Proceed to point 4 of this procedure. Alternatively, create a new signature field in the desired location. For that goalaccess the Tools tab and select Certificates.
-
Click Digitally Sign in the horizontal bar above the document.
-
Click and drag the mouse to determine the position of the signature stamp in the document.
-
Ensure the Citizen’s Card is inserted into the reader and select the respective signature certificate, issued by the Citizen’s Card X Qualified Digital Signature CA (where “X” is a 4-digit number, for example 0010), and click Continue.
-
Click Sign and choose the name and folder to save the signed document.
-
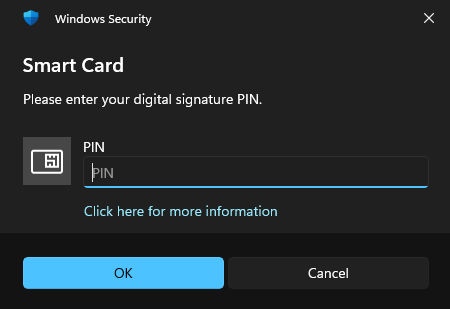
Finally, enter the signature PIN. The window for entering the PIN should be entitled “Windows Security” and display the message “Enter digital signature PIN”.
Digital signature in Adobe Acrobat Reader on MacOS
The Citizen’s Card supports native MacOS applications, via the PteidToken module, implementing the CryptoTokenKit framework.
The initial configuration of this module in Acrobat Reader is much easier than in previous versions. To sign a document in Adobe Acrobat Reader in MacOS, firstly enable the use of the CryptoTokenKit module as follows:
-
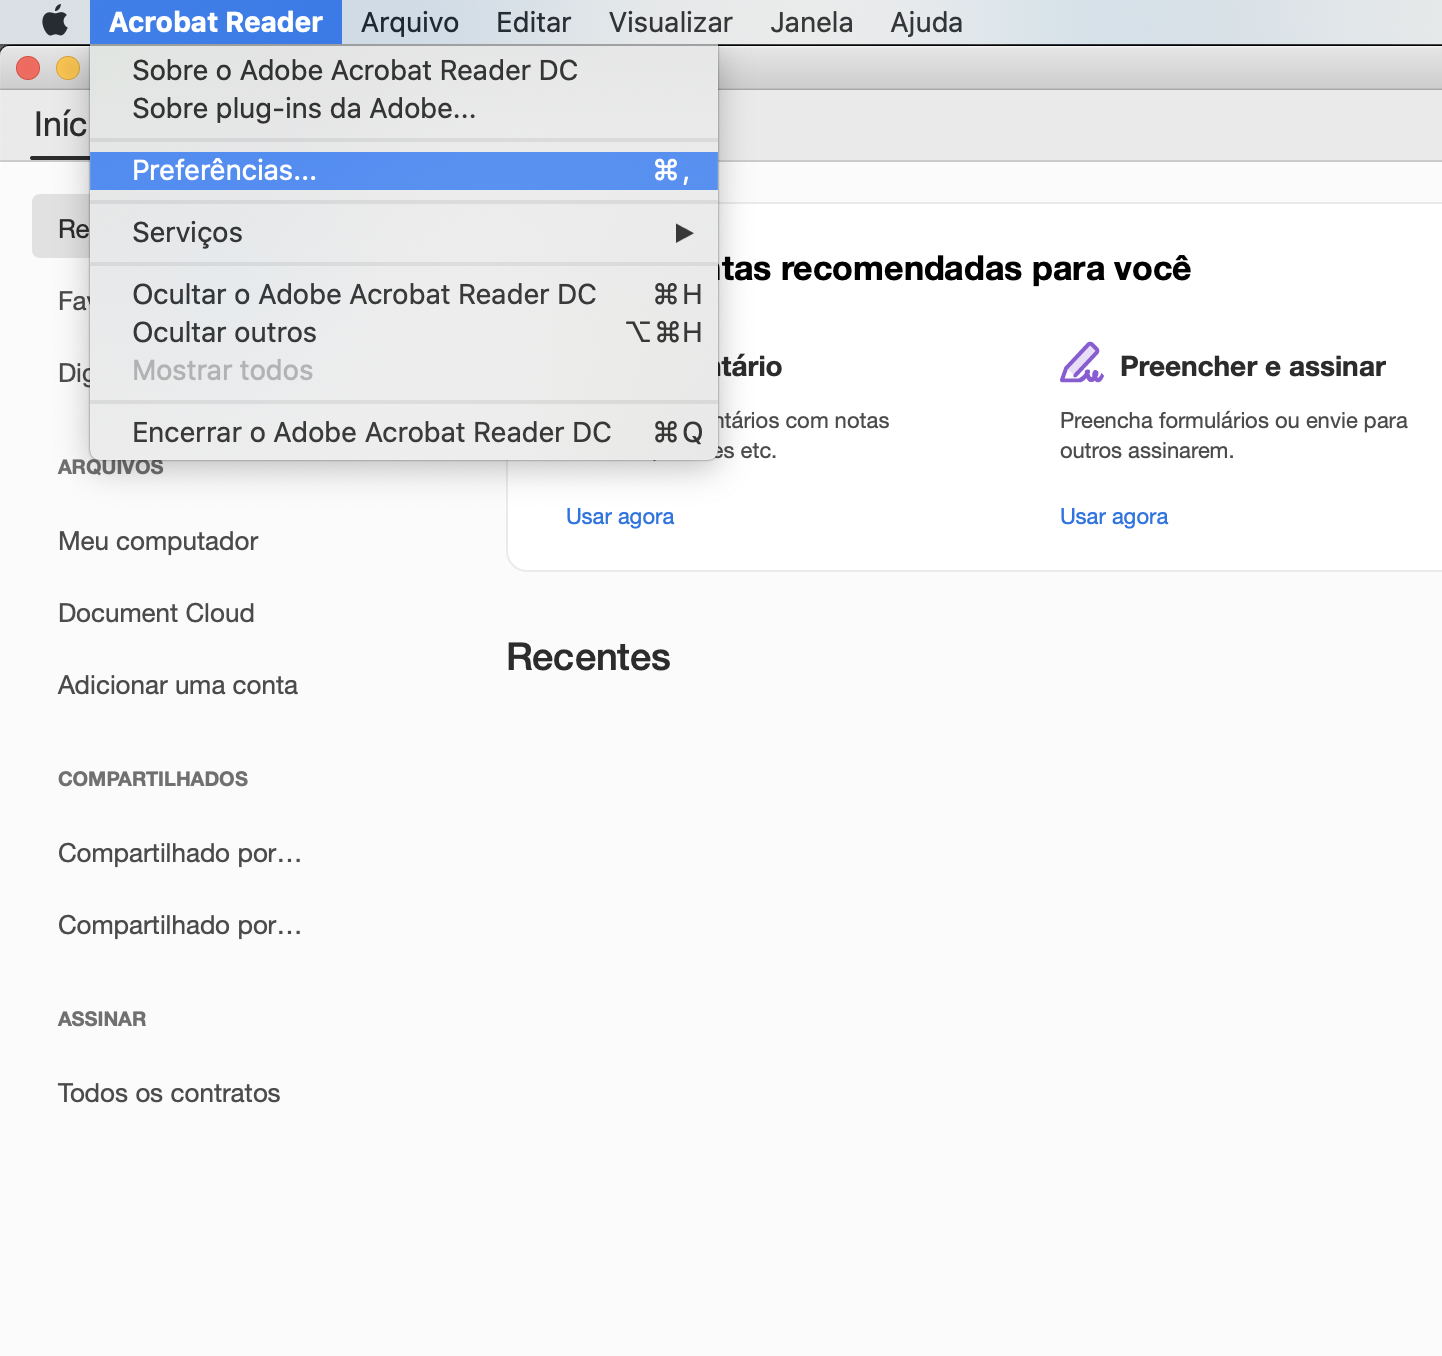
In Adobe Acrobat Reader, access the Preferences.... menu
-
Select the Signatures category and in the “Creation and appearance” section press More....
-
Click the “Enable CryptoTokenKit structure support” checkbox.
Having previously signed with a CC using earlier versions of Autenticação.gov, also ensure that Acrobat Reader is running in native mode if the computer has an Apple M1 processor or successor. Consult the following help page:
After this configuration which is required before first use, insert the Citizen’s Card into the reader and the signature certificate shall then be available in the Certificates menu feature.
Digital signing in Adobe Acrobat Reader on MacOS with PKCS#11.
- In Adobe Acrobat Reader, look for Preferences.
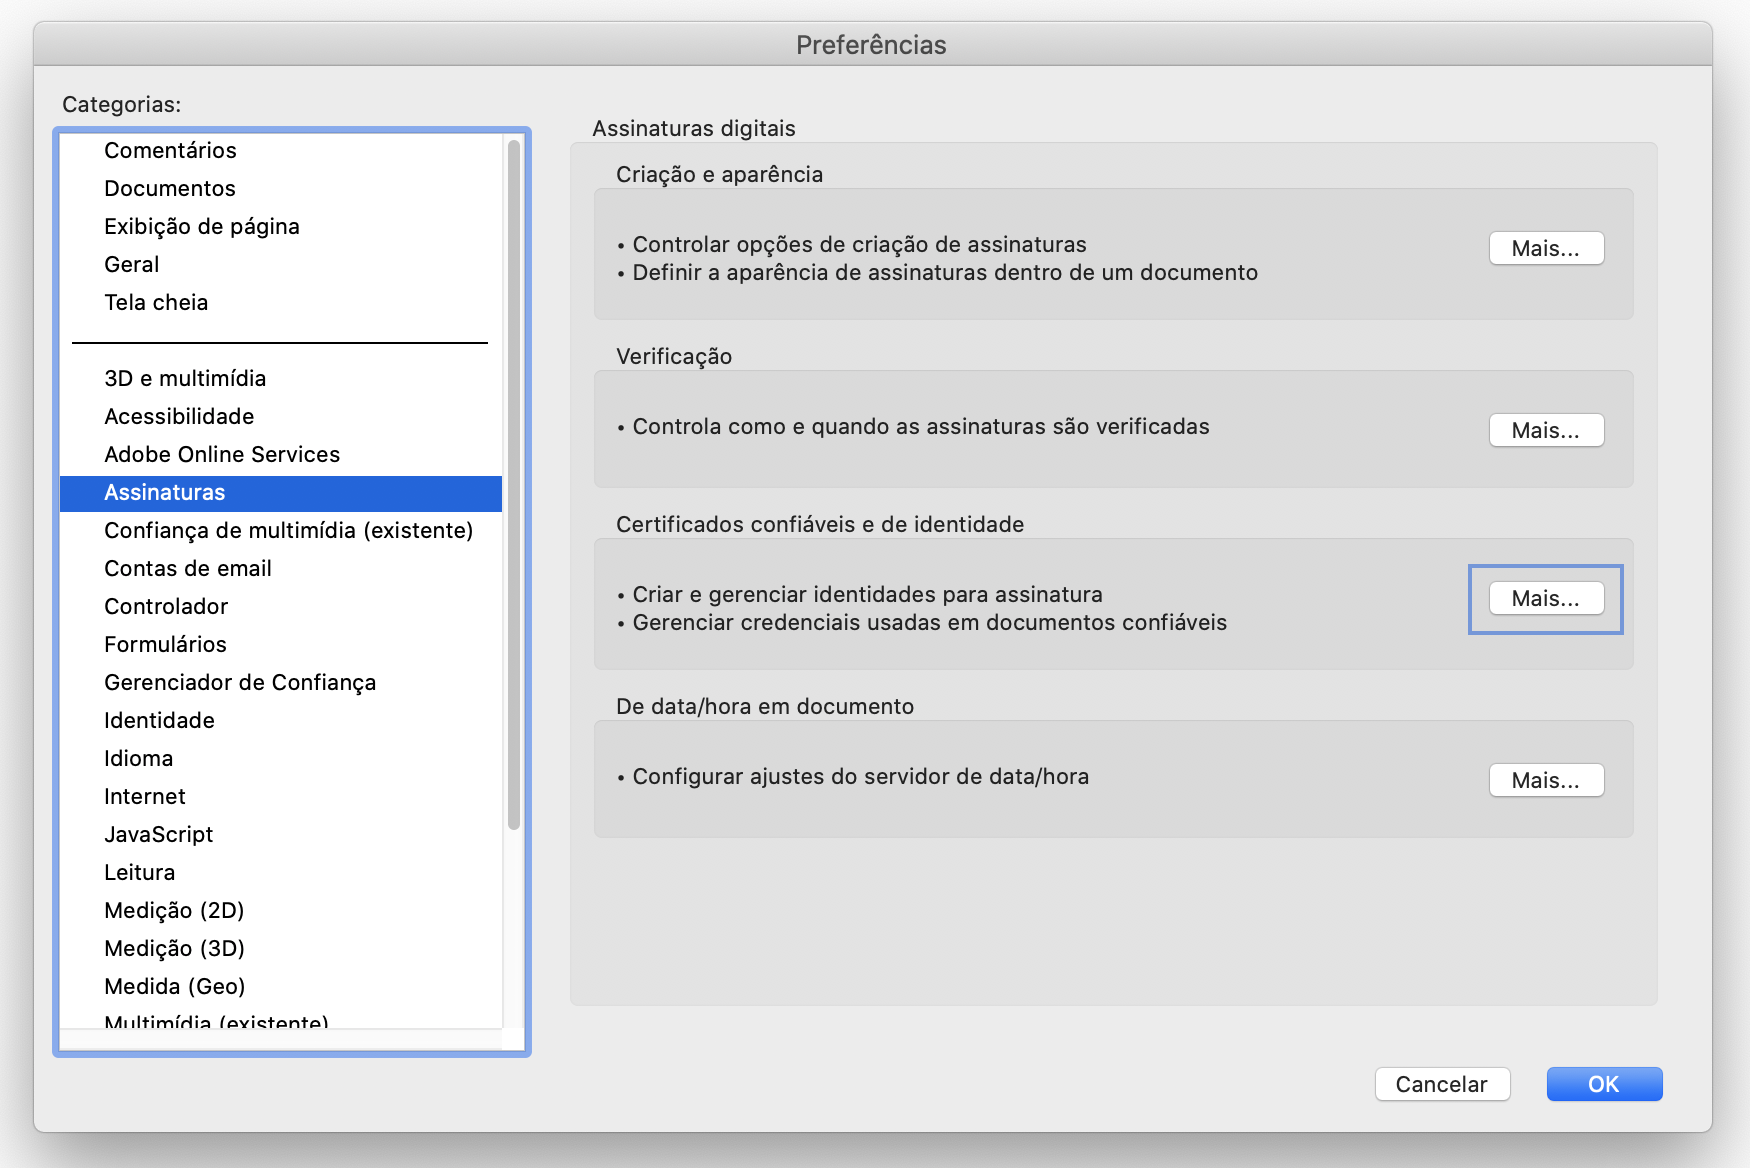
- Select the category Signatures and in section “Identity and Trust Certificates” pressione More....
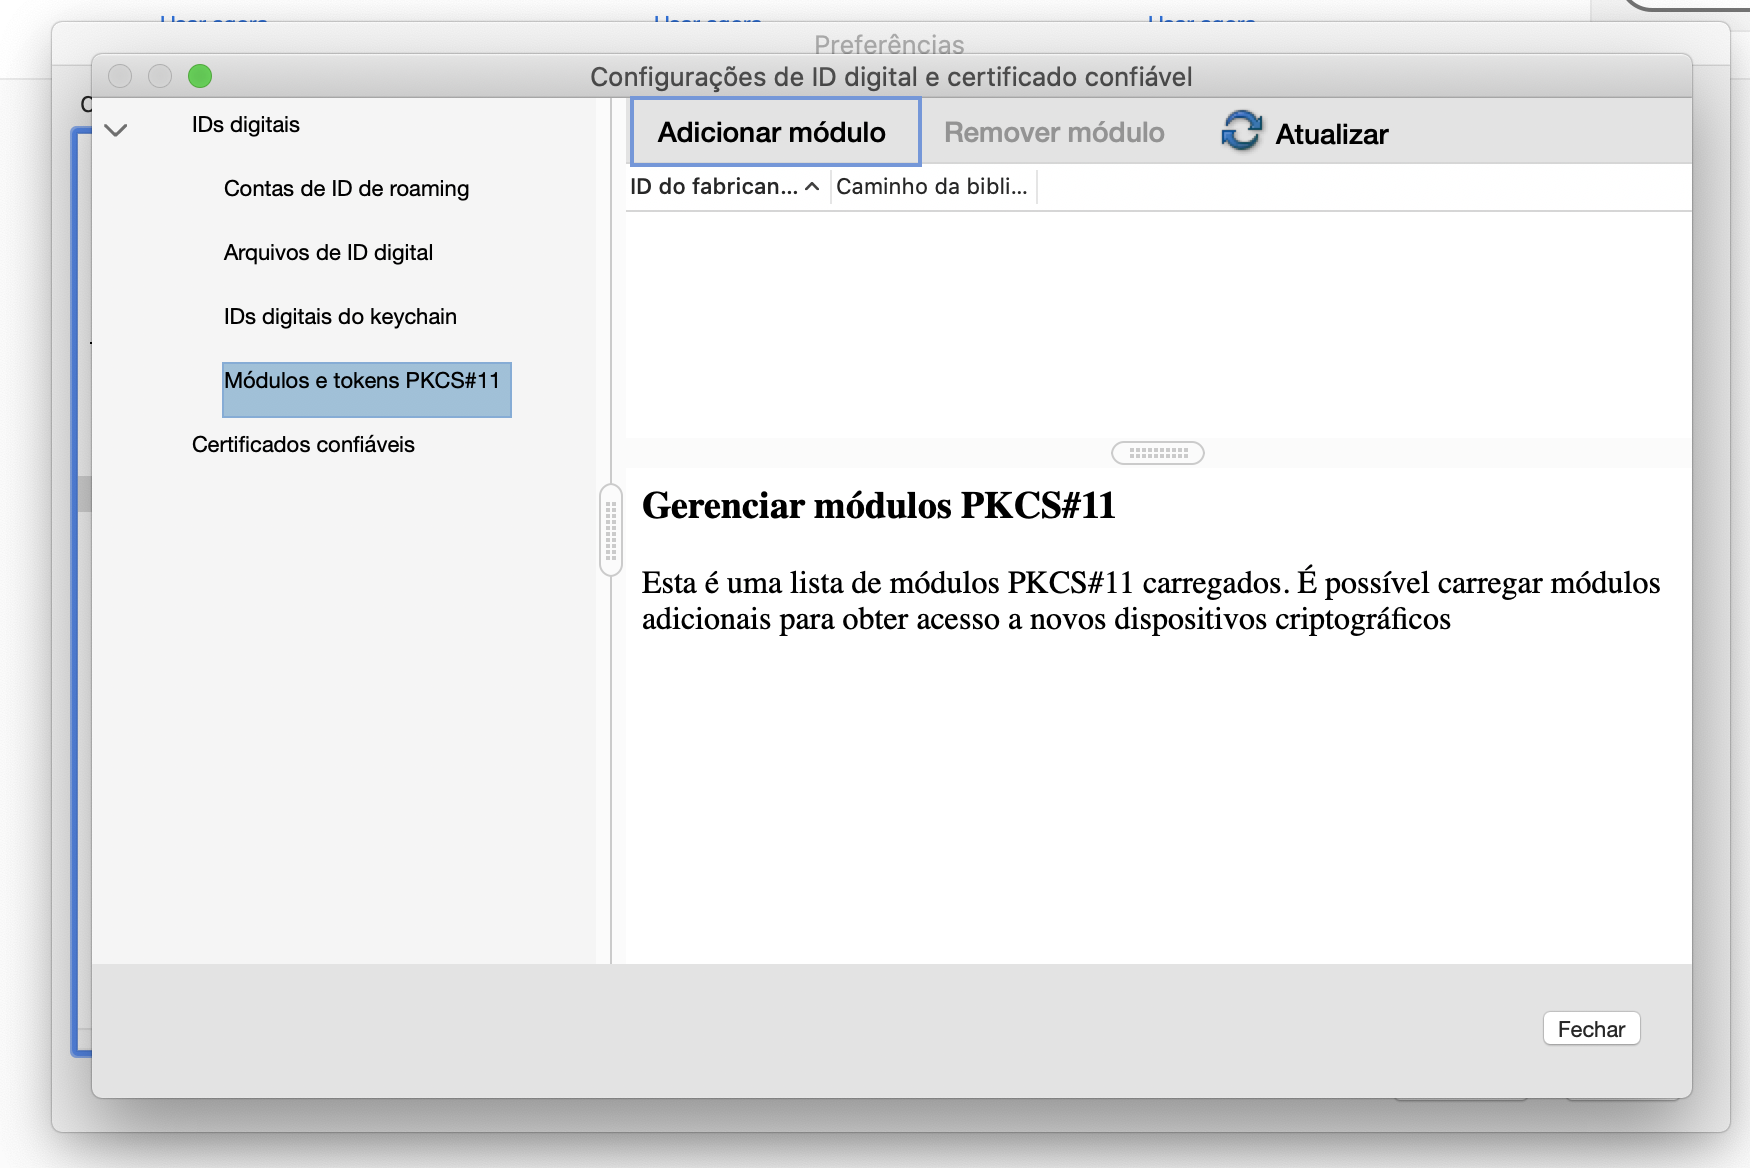
- In section “Digital IDs” select PKCS#11 Modules and Tokens and click Attach Module.
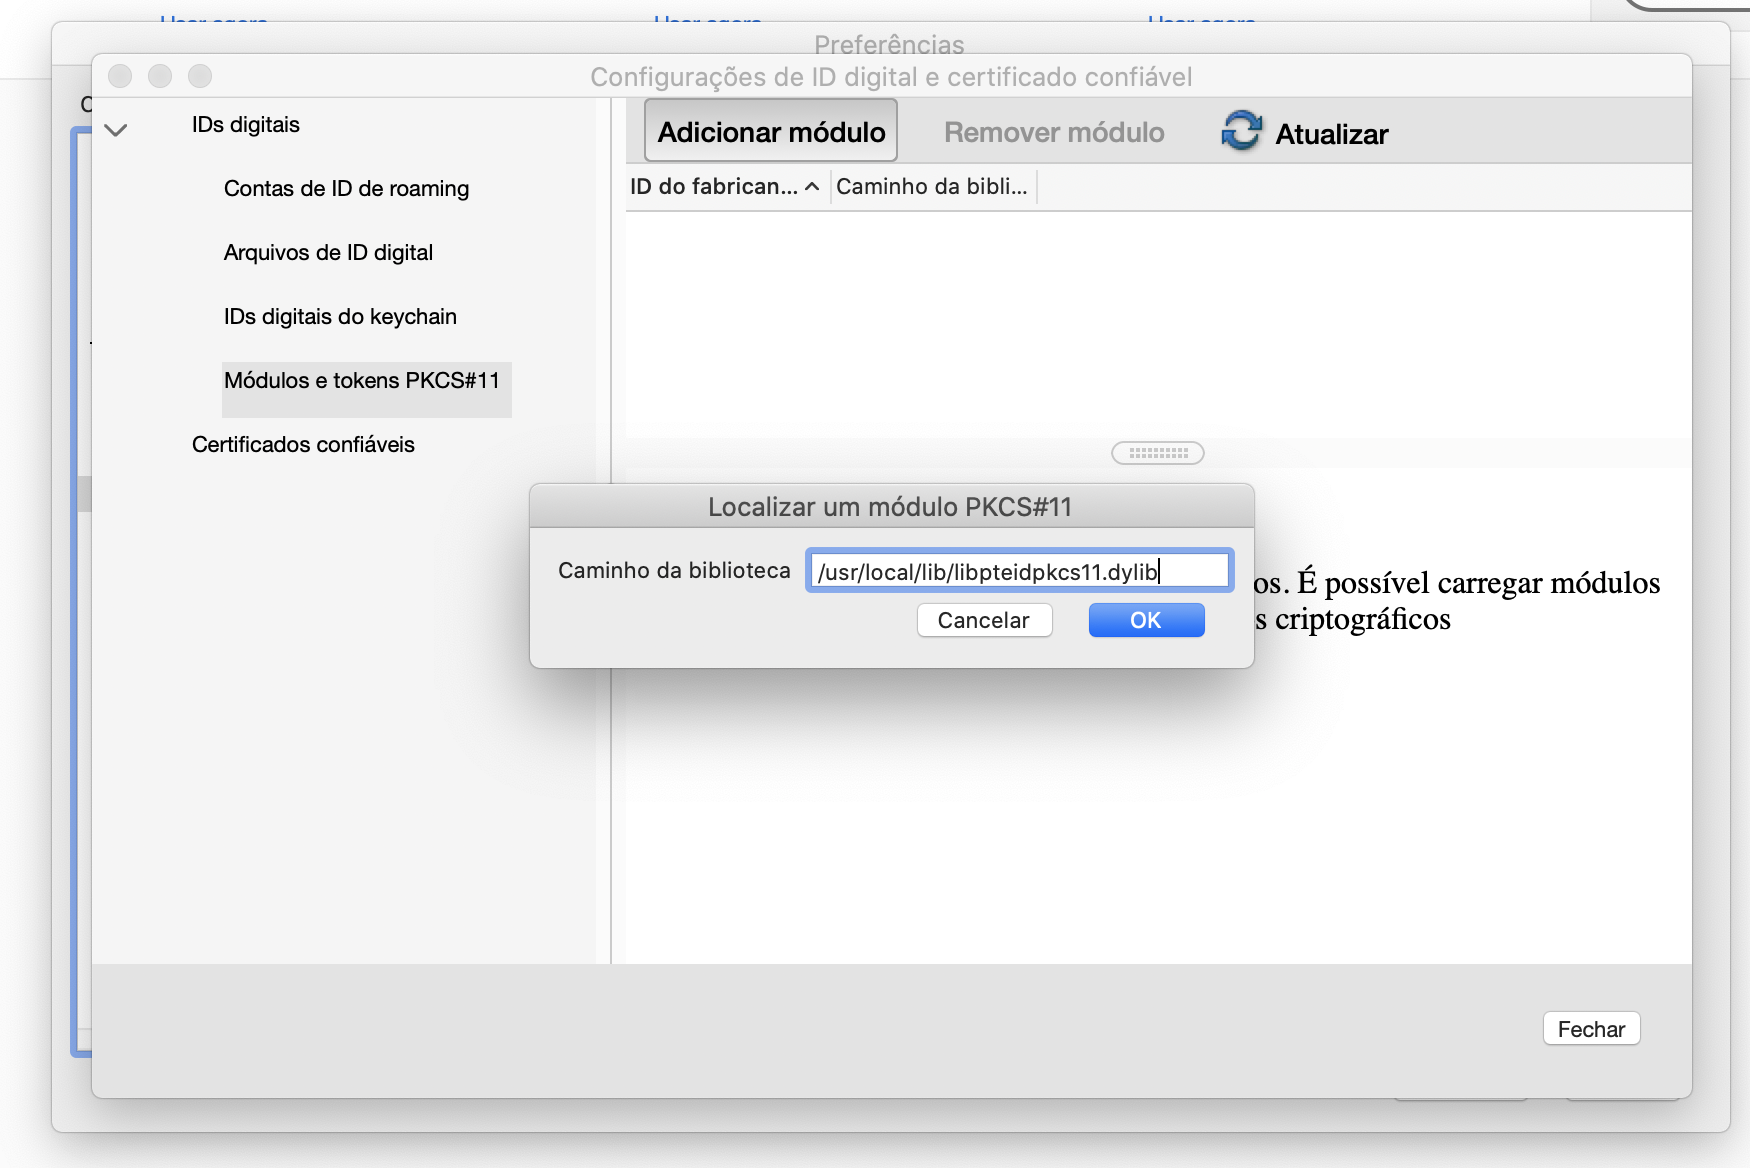
- In the text field, enter the library path:
/usr/local/lib/libpteidpkcs11.dyliband click OK.
If your Citizen Card is inserted in the reader and the module has been successfully added, when you click Update the certificates will become available and visible as shown in the following image. If the certificates are not available as shown, make sure the card is inserted in the reader, restart Adobe Acrobat Reader, and check again.
-
Access the Tools tab and select Certificates.
-
Click Digitally Sign in the horizontal bar above the document.
-
Click and drag the mouse to determine the position of the signature stamp in the document.
-
Select the respective signature certificate, issued by the Citizen’s Card X Qualified Digital Signature CA (where “X” is a 4-digit number, for example 0010), and load Continue.
-
Click Sign and choose the name and place to save the signed document.
-
Finally, enter the signature PIN.
Digital signature with Digital Mobile Key
Sign documents or e-mails with the Digital Mobile Key in Windows in applications such as Microsoft Word, Microsoft Excel, Microsoft Outlook and Adobe Acrobat Reader. The procedure is very similar to those described in the previous sections but two aspects differ:
Certificate registration - registration of the certificate associated with the Digital Mobile Key in Windows.
-
In the Signature configuration tab of the Autenticacão.Gov application, there is a section dedicated to configuring the Digital Mobile Key with the Register button. Press the button to open a certificate registration window.
-
Enter the mobile phone number associated with your Digital Mobile Key account and the Digital Mobile Key Signature PIN and press OK.
-
If the credentials entered in the previous step were correct, a code is received by mobile phone. Enter it to complete the certificate registration process. This code shall be sent by SMS or via a notification from the Autenticação.gov mobile application.
In the event of non-registration of the certificate after reactivating the Digital Mobile Key Signature, or if the currently registered certificate has expired, repeat the registration procedure.
Signature - similar to signing with the Citizen’s Card, with the following differences:
- During configuration or at the time of signing, choose the certificate issued by EC de Chave Móvel Digital de Assinatura Digital Qualificada do Cartão de Cidadão X (where “X” is a 5-digit number, for example, 00001 or 00002).
- Upon confirmation of the signature request within the application, a window appears where, just as in the certificate registration, the Digital Mobile Key signing PIN is entered. Upon entering the correct PIN, an SMS is received with a confirmation code to be entered in the window to complete the signature.
Digital e-mail signature with Mozilla Thunderbird
For the digital signing of an e-mail in Thunderbird, first carry out the respective configuration. The steps described below are divided into configuration, consisting of the necessary initial configuration, and signature, consisting of the signature itself. The printscreens match version 91 of Mozilla Thunderbird.
Configuration - This configuration is carried out only once, and the steps described also apply to configuring certificates in Firefox.
-
Open Preferences and select the Privacy and security tab. Navigate to the section Security -> Certificates.
-
Press the Security devices button.

-
Click the Load button.
-
In the new window, fill in the module name (for example, “Citizen’s Card”) and the path to the PKCS#11module, located in one of the following locations (recommendation: copy the path to the module, according to your operating system, from the following list):
In Windows:
-
C:\Windows\SysWOW64\pteidpkcs11.dll (Windows 32-bits)
-
C:\Windows\System32\pteidpkcs11.dll (Windows 64-bits)
In Linux: /usr/local/lib/libpteidpkcs11.so
In MacOS: /usr/local/lib/libpteidpkcs11.dylib
-
Press OK in all windows.
-
Open Account settings and select the e-mail account.
-
Select the End-to-end encryption tab.
-
In the S/MIME section, press the Select button in the field with the indication “Personal certificate for digital signature”.
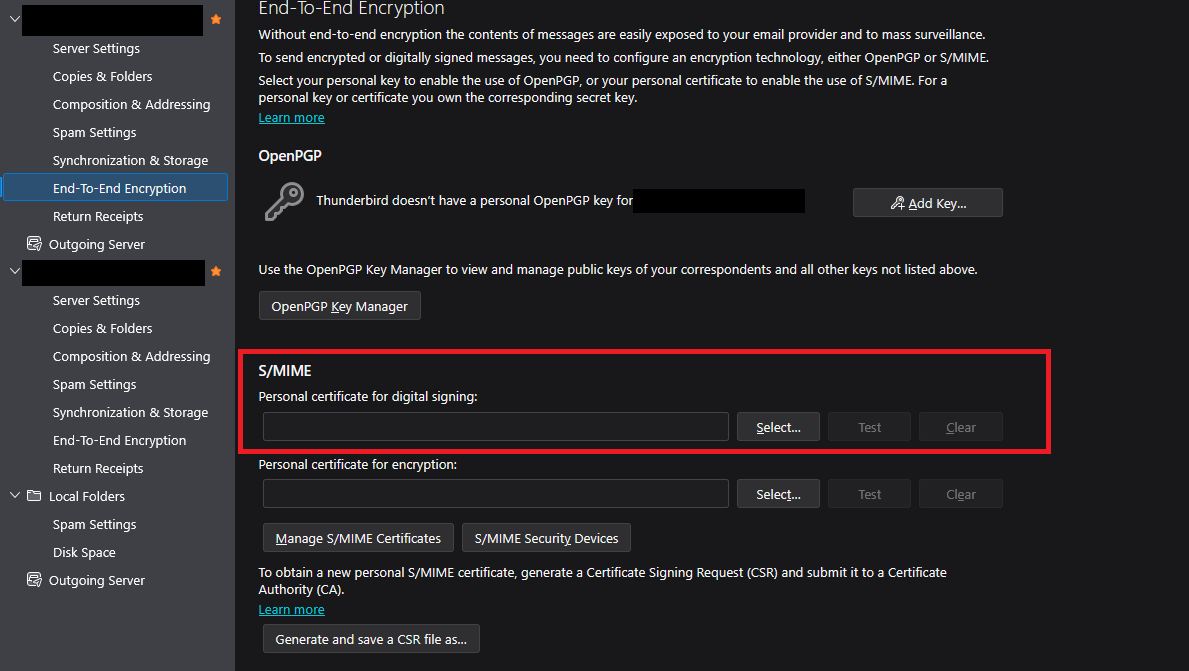
- Select the certificate with the description “CITIZEN’S CARD: CITIZEN SIGNATURE CERTIFICATE and click OK.
-
With Thunderbird 102 or later, in the End-to-end encryption tab, select the “Add my signature by default” box.
-
For Thunderbird to use the Citizen’s Card certificate for signing, register and trust the root certificate of the Portuguese State’s certification chain.
-
For cards issued from April 2020 onwards, the certificate to be registered is the certificate “ECRaizEstado 002” (State Root CA), available at: http://trust.ecee.gov.pt/ecraiz002.crt
-
For cards issued before April 2020, the certificate to be registered is the certificate “ECRaizEstado” available at: http://trust.ecee.gov.pt/ecraiz.crt
To import the root certificate, click “Manage certificates...” in the window used in point 1 and select the “Authorities” tab. Import the correct root certificate for the card and for the question “Do you trust “ECRaizestado/EcRaizEstado 002” for the following purposes?” select the option: “Trust this CA to identify e-mail users.”
Signature - to be performed for each signed e-mail sent. Only required for Thunderbird versions prior to version 102.
-
Open the e-mail composition window.
-
Upon clicking Send, the signature PIN shall be requested and the e-mail shall be signed and sent.
Digital signature of DWF files
NOTE: DWF file signature only supports signing with a Citizen’s Card
1. Firstly, install on your computer the Autodesk Design Review 2013 (the latest versions do not offer the digital signature feature).
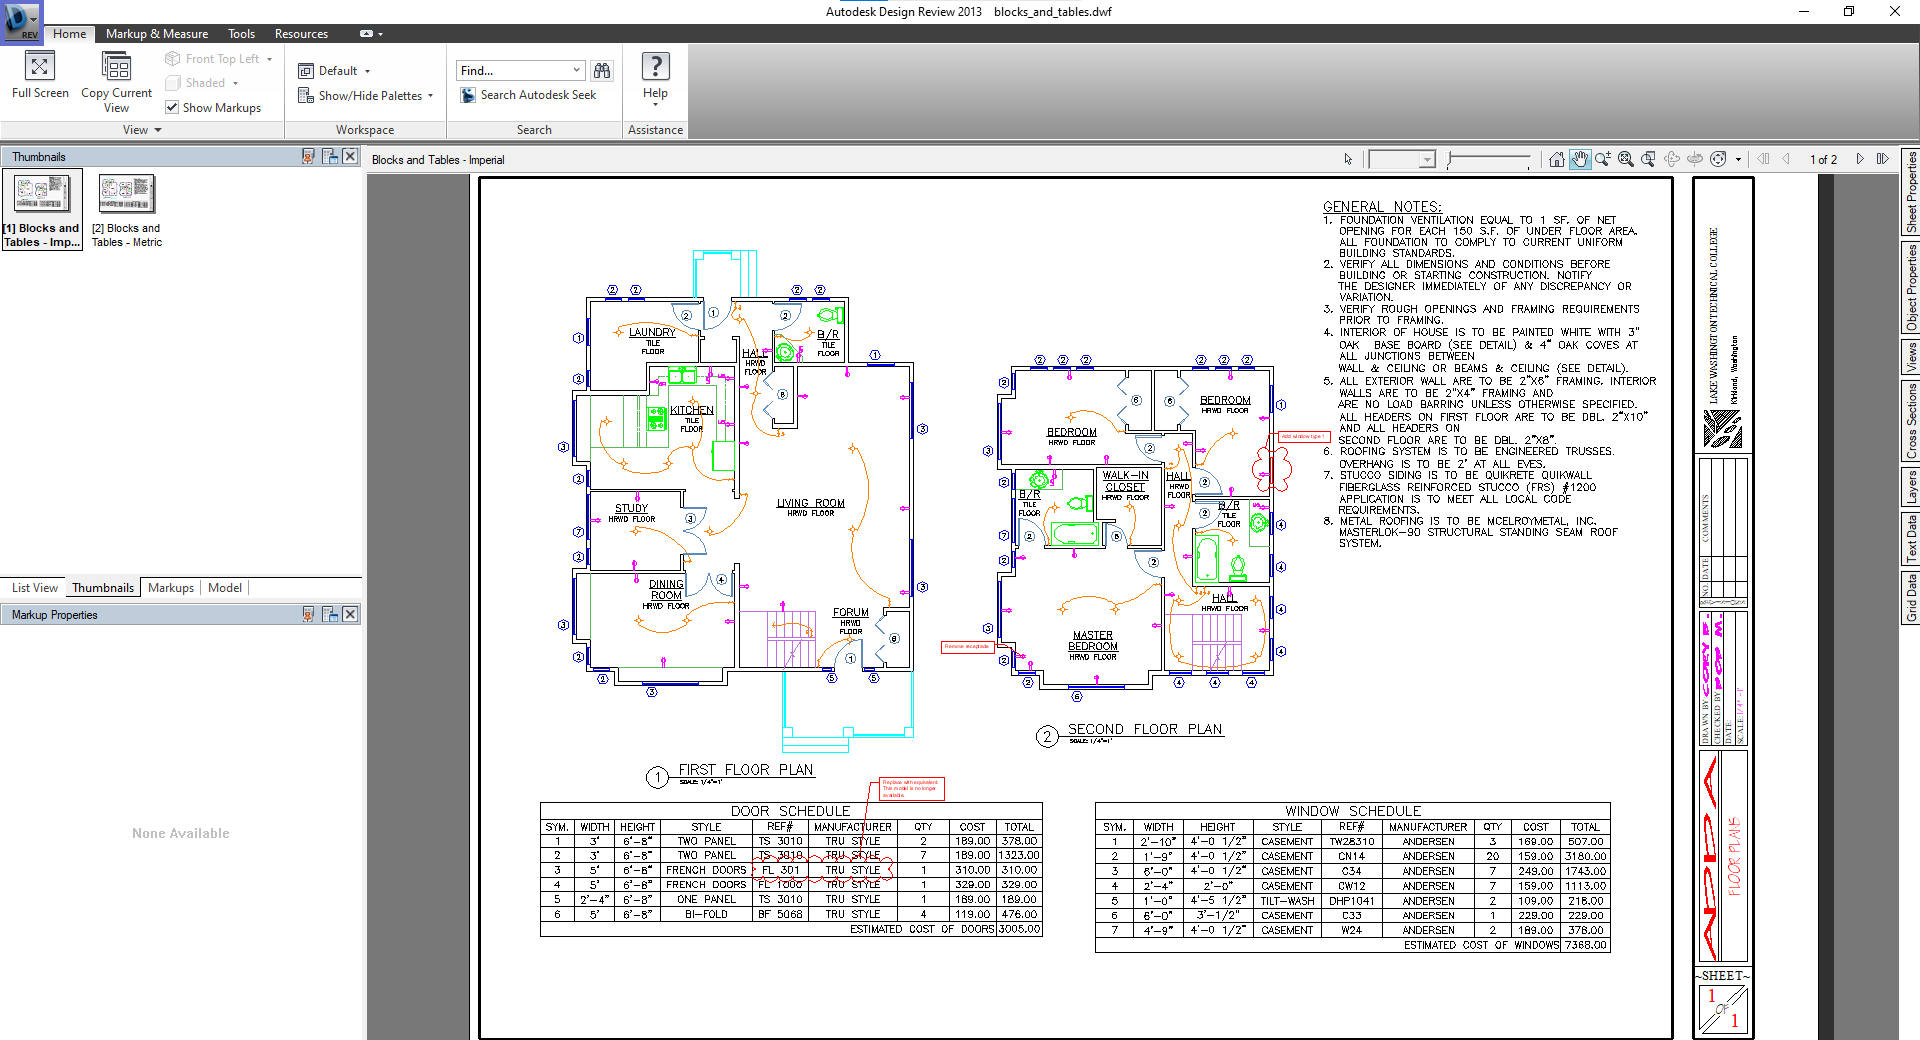
2. Open the DWF file in the application.
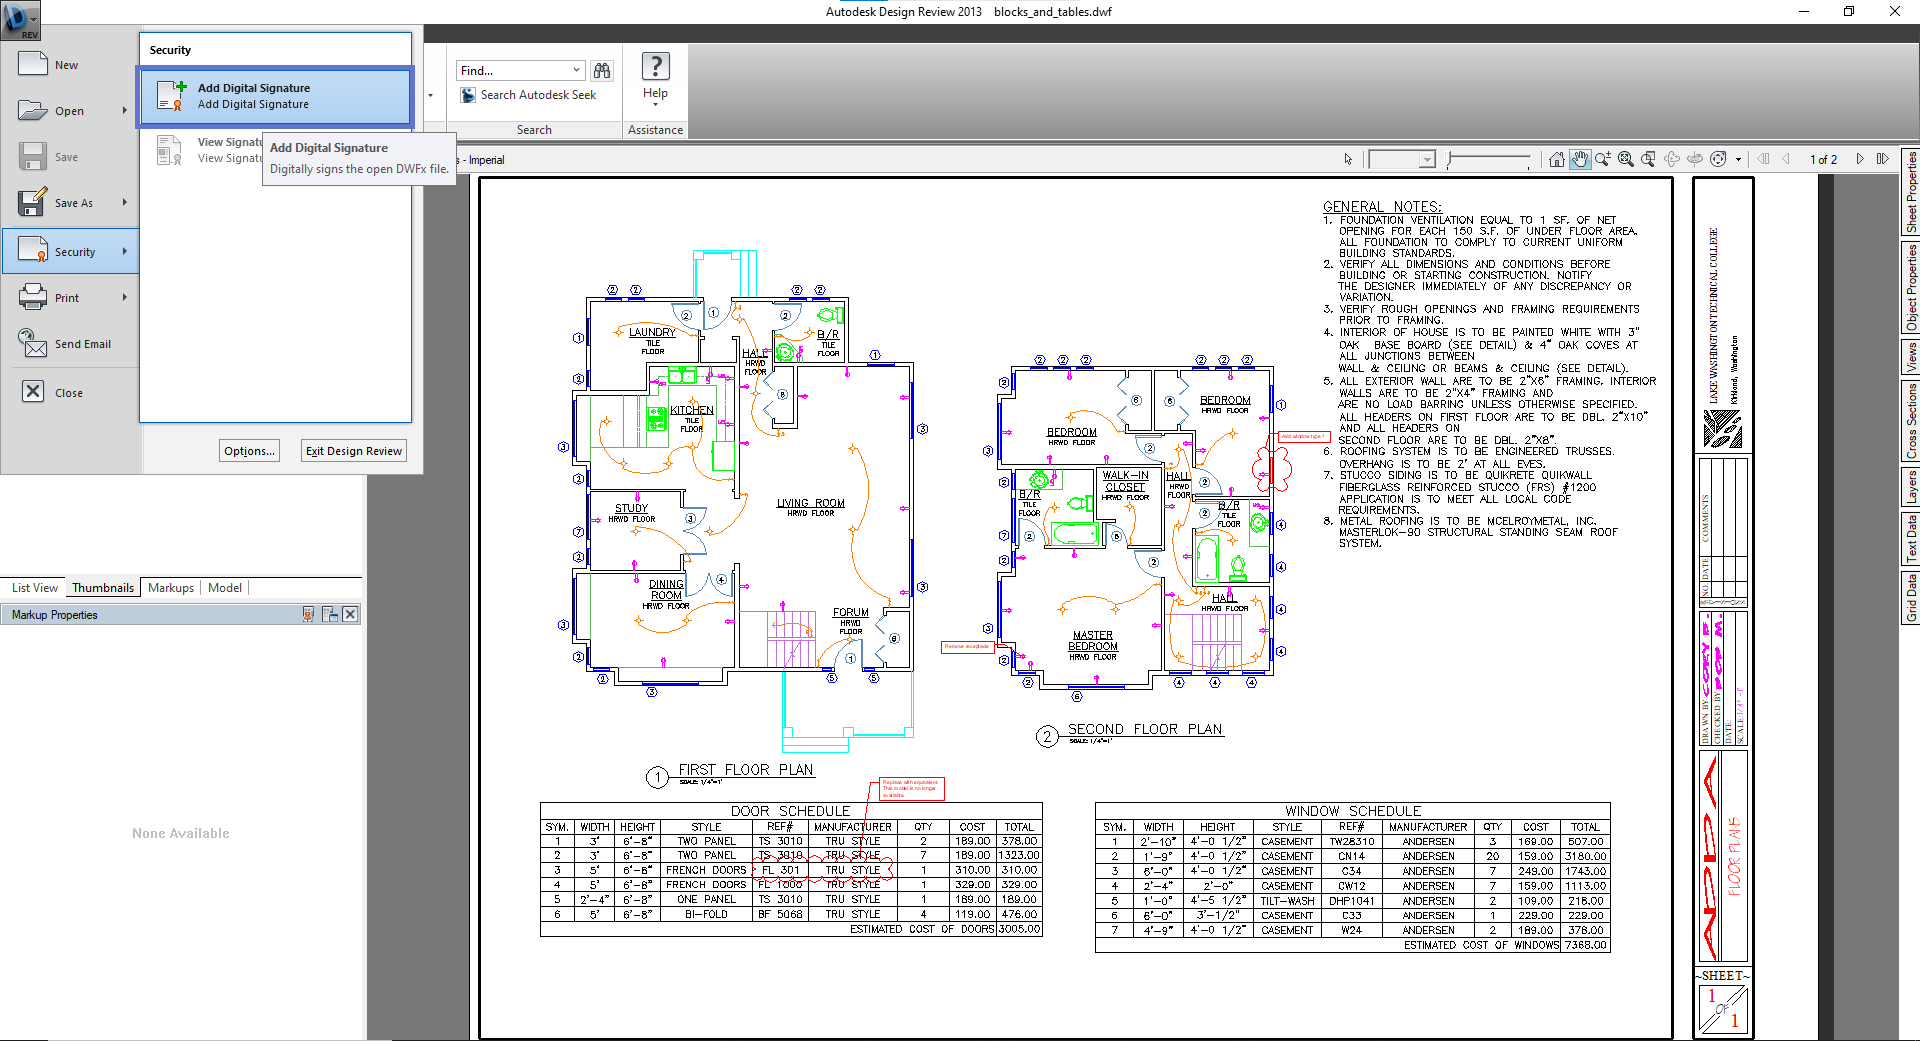
3. Access the menu in the upper left field:
4. Access the Security option:

5. Select the Add Digital Signature option:
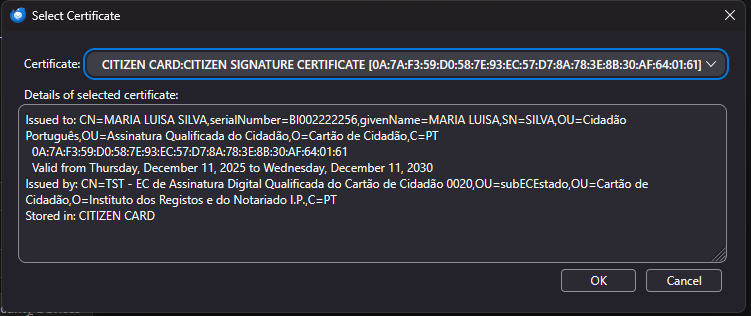
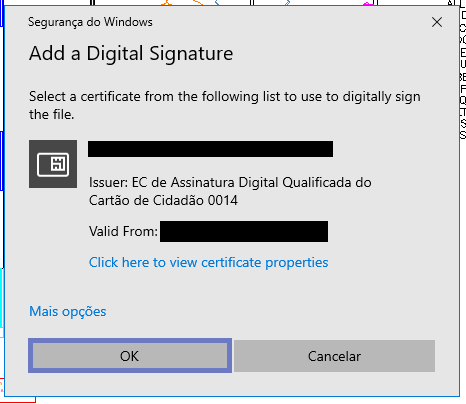
6. This window will display the computer’s current certificates; click More Options to select another certificate. Make sure the selected certificate matches the digital signature certificate. Finally, just press OK:
7. Enter the signature PIN requested in the window:
8. After this procedure, the digital signature process is complete and a window will appear confirming that the signature is valid.
Digital signature of DWG files
-
Firstly, you must have an updated version of the application installed on the computer. AutoCAD (version tested was version AutoCAD 2022).
-
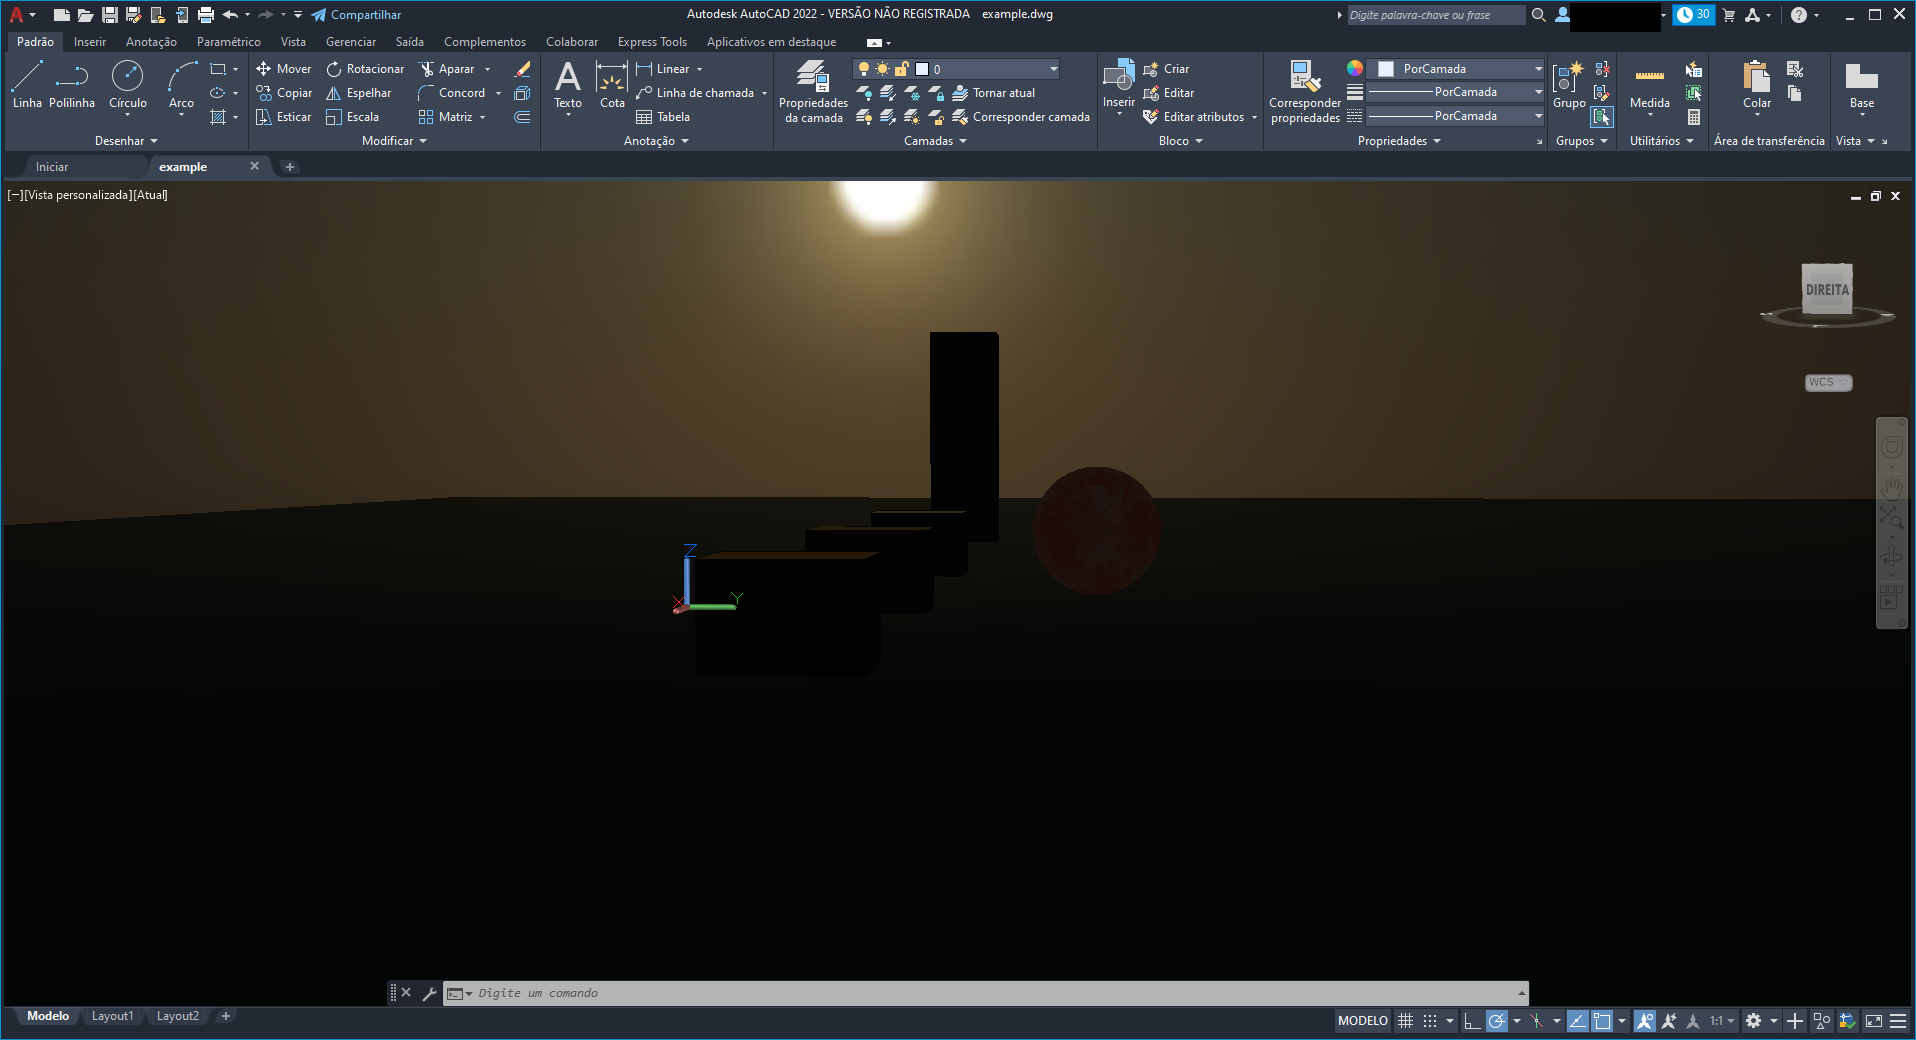
Open the DWG file in AutoCAD
-
Access the menu in the upper left field:
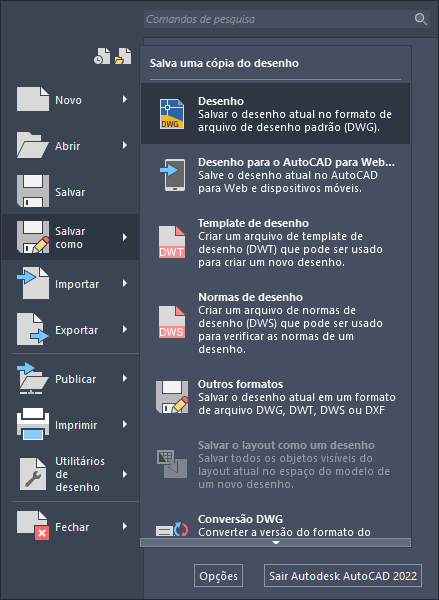
- Access the Save as option and select Drawing:
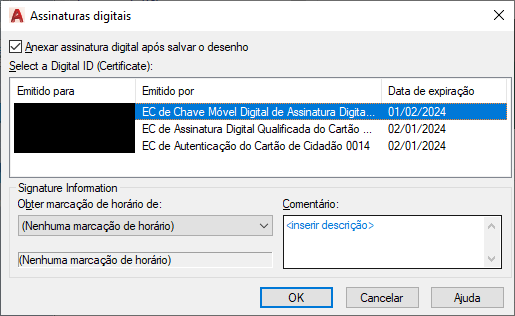
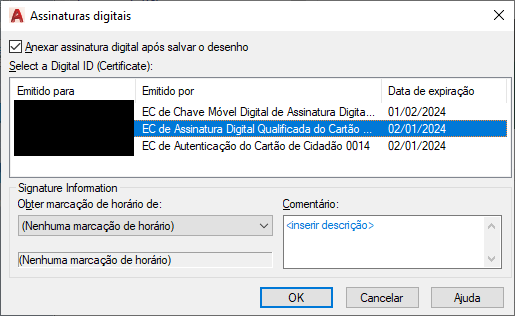
- Access the Tools option select Digital signatures...:

- Activate the checkbox Attach a digital signature after saving the drawing.. This window displays the computer’s existing certificates; select Digital Mobile Key CA... if signing with the Mobile Key, or Citizen’s Card Qualified Digital Signature CA... if signing with the Citizen’s Card. Finally, just press OK:
NOTE: To sign using a Digital Mobile Key, follow the procedure of this section Digital signature with Digital Mobile Key .
- Digital Mobile Key:
- Citizen’s Card:
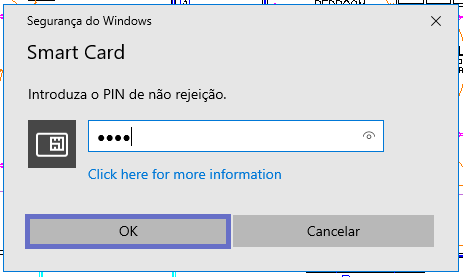
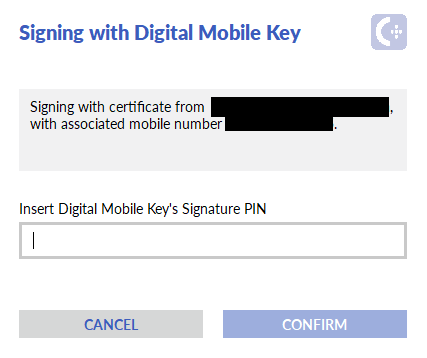
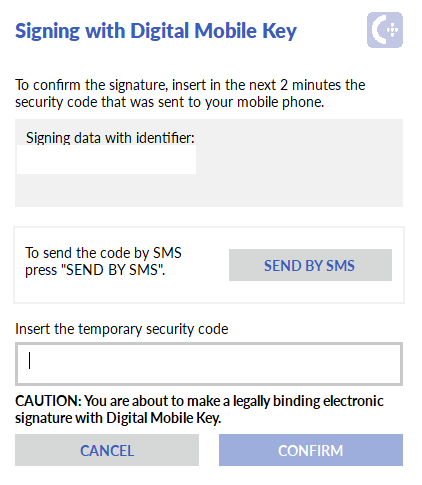
- If signing with the Citizen’s Card, simply enter the signature PIN (referred to in the window as the non-repudiation PIN) and press OK. If signing with a Digital Mobile Key, the Digital Mobile Key signature pin shall be requested and, after entering it correctly, the confirmation code shall be requested, sent to the registered mobile phone number.
- Digital Mobile Key:
- Citizen’s Card:
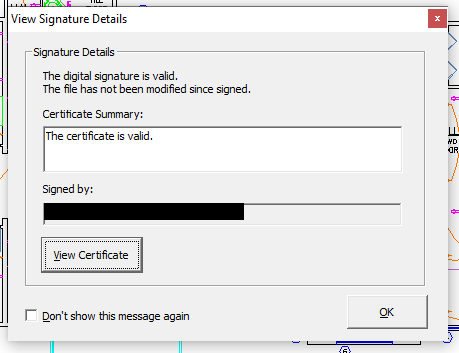
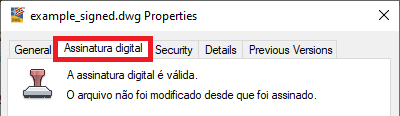
- After this procedure, the digital signature process is complete. Confirm the signature by right-clicking on the document, selecting Properties and accessing the Digital Signature menu:
- Digital Mobile Key:
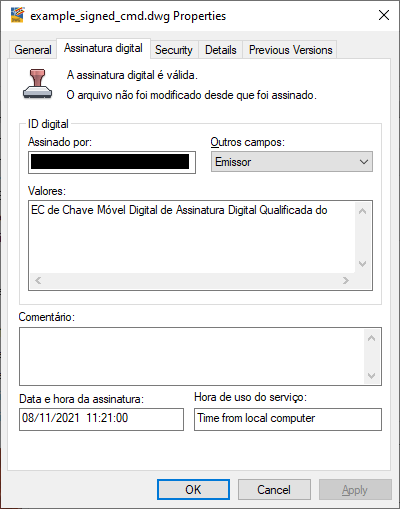
- Citizen’s Card:
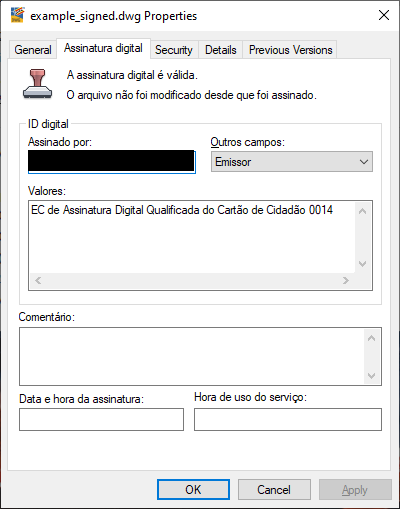
If the Digital Signature tab is not present, see the section Properties of the file signed by AutoCAD.
Authentication at WEB portals
There are two forms of authentication at a web portal using the Citizen’s Card:
-
TLS authentication with client certificate via browser.
-
Authentication via certificate through Autenticação.gov.pt portal
The authentication method depends entirely on the website’s configuration; the user cannot choose one method over another.
Client-side certificate authentication via browser is being deprecated, as it presents disadvantages in data collection; however, some websites still use this method.
To use this authentication method, the application must be installed on the computer.
Use the Windows Operating System; the browsers Internet Explorer, Microsoft Edge and Google Chrome do not require any configuration once the Citizen authentication certificate is registered.
For Mozilla Firefox on any operating system, the configurations described in Configure authentication for Mozilla Firefox should be performed.
Authentication via certificate through the autenticacao.gov.pt portal does not require the installation of the application, but rather the Autenticação.Gov plugin.
For further information, consult this help page:
For a computer configuration to support either option, the installation of the application and Autenticação.Gov plugin are advised.
Configure authentication for Mozilla Firefox
To configure Mozilla Firefox, load the PKCS#11 module from the Citizen’s Card. In version 73.0.1 (similar for other versions):
-
Under Mozilla Firefox options, access Privacy and Security. You can access it directly by entering about:preferences#privacy on the address bar.
-
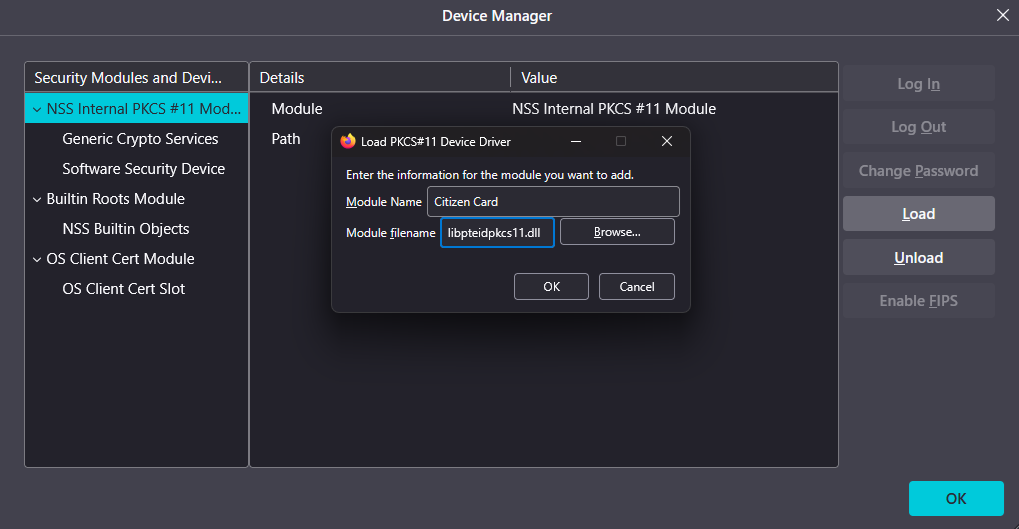
Scroll to the bottom of the page and, in the Certificates section, press Security devices... to open the “Device Manager” window.
- Press Load. Fill in the module name, for example “PKCS#11 of the Citizen’s Card” (avoid “ç” and “ã”). Then click Search ... and scroll to the PKCS#11 module of the Citizen’s Card, located as described in the section Integration with applications.
Note: in MacOS, copy and paste the following name into the
“Module file name” field: /usr/local/lib/libpteidpkcs11.dylib
- Press OK in the open windows to finish.
Problem-Solving
An error message is displayed when attempting to add the PKCS#11 module to Firefox / Thunderbird
To add the PKCS#11 module to Firefox, a card reader is installed on the computer.
Make sure the reader is switched on and installed and a card is inserted before adding the PKCS#11 module.
If using a 64-bit Linux or MacOS version, use a 64-bit version of Firefox / Thunderbird.
It is not possible to add the PKCS#11 module to Adobe Acrobat Reader in MacOS
In earlier versions of Adobe Acrobat Reader for MacOS, it is not possible to add the PKCS#11 module. We recommend updating Adobe Acrobat Reader to the DC version.
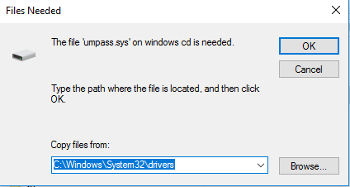
Incompatibility of Citizen’s Card signatures with Adobe Reader, Microsoft Office or LibreOffice
Access the file pteidmdrv.inf , by default in the directory
C:\Program Files\Portugal Identity\PTeID Minidriver
(or in the directory selected during installation). After opening the
directory, open the file options menu and select Install.
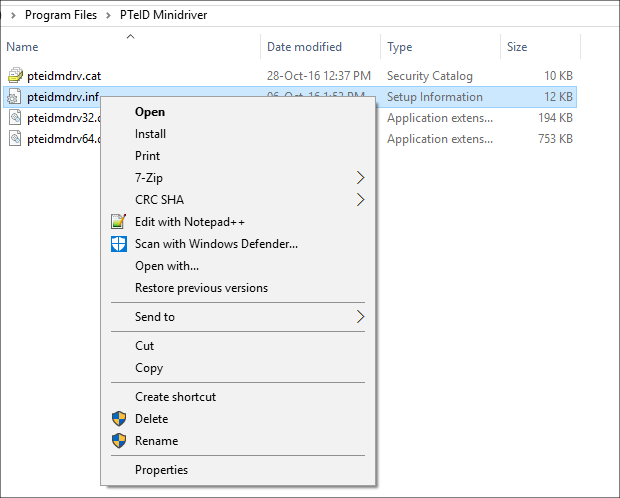
After selecting this option, a dialog box appears (see image below)
entitled “Required Files,” where the “drivers” folder located in
the directory is selected.
C:\Windows\System32.
If there are issues, check whether they are related with the topic Issues with the new chain of trust.
The card reader is installed but is not detected by the Citizen’s Card application
Windows
-
Check whether the card reader is compatible with the PC/SC standard (consult the card reader documentation or contact the manufacturer).
-
Check that the card reader drivers are correctly installed (refer to the card reader documentation).
-
Check whether the Smart Card service is initiated:
a) Access to Control Panel and then go to Administration Tools
b) Click Services
c) Check whether the Smart Card service is initiated. If not initiated, right-click on the service and click Start.
d) Disconnect the reader from the computer.
e) Close the Citizen’s Card application.
f) Reinsert the reader and reopen the application.
-
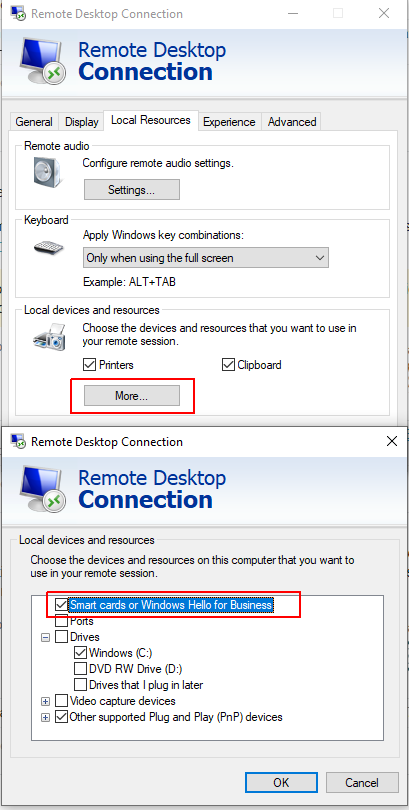
If using a connection to a remote machine and the card reader is to be shared, check whether:
a) The card reader is being connected to the local computer
b) The Smart Card was selected from the list of local devices and resources to be used for the remote connection (See image below).
Linux
⚠ For Ubuntu 22.04 systems, refer to note 2 of the Linux installation section
-
Check whether the card reader is compatible with the PC/SC standard (consult the reader documentation or contact the manufacturer).
-
Check that the reader drivers are correctly installed (refer to the reader documentation). Most smartcard readers today are supported by the open-source CCID driver. Additional information is available at: https://ccid.apdu.fr/
-
Check whether pcscd daemon is up and running:
a) In a terminal window, execute the following command:
ps -e | grep pcscdb) Search for a reference to the
pcscdprocess.c) If not listed, start the service using the command:
sudo systemctl start pcscdd) If an error message is received, pcscd may not be installed. Use your Linux distribution package manager to install pcscd (sometimes it is included in a package called pcsc-lite).
Failure to detect certificates during signature attempts within LibreOffice / Apache OpenOffice**
The LibreOffice / OpenOffice suite in Linux uses the Mozilla Firefox application configurations (or alternatively, Thunderbird) for certificate detection.
For certificate detection in LibreOffice / Apache OpenOffice Suite, carry out the respective configuration in Mozilla Firefox if this application is installed. Otherwise, configure Mozilla Thunderbird to sign documents in LibreOffice.
For further information, consult this help page:
Graphics issues in the application
The rendering mode configured in the application during installation provides the best performance in most cases: hardware rendering. However, this mode requires a working OpenGL driver in the system for the computer’s graphics card.
In the event of graphics issues, changing the graphics rendering mode is advised. Change it in the Graphics Acceleration section of the Application configuration submenu.
In the event of application startup failure, change this option in three different ways:
-
[Windows Exclusive version 3.4.0 or higher] In the application’s installation folder (which, by default, is
C:\Program Files\Portugal Identity Card) there are three shortcuts to open the application by changing the graphics rendering mode. The shortcuts are clickable icons with the application’s symbol and the following names:-
Autenticação.Gov Software for Software rendering (OpenGL);
-
Autenticação.Gov Hardware for Hardware rendering (graphics card);
-
Autenticação.Gov Direct3d for Software rendering (ANGLE, emulating OpenGL by using Direct3D);
In the event of graphical problems, or application start failure, try all three options and choose that which works best. The last option selected will be saved, restarting the application by clicking the icon on the desktop or in the start menu.
-
-
Using the Autenticação.gov software configurations (via Registry Keys in Windows or configuration file in Linux and MacOS).
-
In Windows, the registry key:
HKEY_CURRENT_USER\Software\PTEID\configuretool\graphics_acceleration;
-
In Linux, the key “graphics_acceleration” in the configuretool section of the file:
$HOME/.config/pteid.conf;
-
In MacOS, the key called “graphics_acceleration” in the configuretool section of the file:
$HOME/Library/Preferences/pteid.conf.
The key may have the following values:
-
0 for Software rendering (OpenGL);
-
1 for Hardware rendering (graphics card);
-
2 (Exclusive to Windows) for Software rendering (ANGLE, emulating OpenGL by using Direct3D).
-
-
Using the Command-line interface.
In business environments, change this configuration as described in the chapter Configuration instructions in business environments
Issues with integrated graphics cards
When experiencing issues with graphics cards, refer to the topic Graphics issues in the application.
The application interface does not support move or drag operations (Linux in Wayland)
In Linux systems using a Wayland-based graphics interface system, several interaction problems have been detected, including the inability to move the window by dragging it from the title bar.
The following temporary solution is advised, assuming there is a XWayland component:
Use the parameter -platform xcb , or the environment variable
QT_QPA_PLATFORM=xcb to force the application to run in X11 mode, using
XWayland.
$ eidguiV2 -platform xcb
or
$ QT_QPA_PLATFORM=xcb eidguiV2
Application start-up failure
When the application fails to start up,, change the application options using the Autenticação.gov software configurations (via Registry Keys in Windows or the configuration file in Linux and MacOS).
One potential cause of issues is related with the computer’s graphics card; see the topic Graphics issues in the application.
Issues with the new chain of trust
Citizen’s Card certificates have been issued since 4 April 2020, under the new chain of trust of the Portuguese State. The root certificate of the new chain, if not provided by the operating system, is installed to ensure that the certificates of cards issued after said date are automatically trusted by the Windows operating system, as well as by some applications not using the list of trusted services published by the European Union.
Install the certificate from the Windows Store through the Citizen’s Card application in the Signature configuration submenu. Click the Install certificate button in the section New State Root Certificate. The certificate shall be added to the Trusted Root Certification Authorities Store associated with the Current User. Note: The automatic certificate installation feature is only available as from version 3.4.0 of the application onwards; earlier versions require the manual method described below.
Alternatively, install the certificate manually by following the instructions in the SCEE (State Electronic Certification System) chain installation manual available at https://www.ecce.gov.pt/certificados/. Follow the specific instructions for the State Electronic Certification Entity Certificate - ECRaizEstado 002 (steps 4.1 to 4.10 of the manual).
Issues validating signatures
In the event of validation problems in Adobe Acrobat Reader, for example, when receiving the message “Signature validity is UNKNOWN” in a signature generated with the Mobile Key or Citizen’s Card, using the alternative ARTE Signature Validation Service is advised.
This service validates signatures according to European standards for qualified electronic signatures. The documents submitted are not saved on the server after processing.
Issues with unsupported PDF files
The Autenticação.Gov application currently does not support the following types of PDF files:
-
Encrypted PDF files;
-
PDF files containing XFA forms (created, for example, in the Adobe LiveCycle application).
The signing of these files with the Citizen’s Card or Digital Mobile Key is possible using an external application, for example, Adobe Acrobat Reader. Follow the steps described in the section Digital signature in Adobe Acrobat Reader.
Error in communication when signing with a Digital Mobile Key
These incidents usually involve citizen connection to a corporate network. In this eventuality, there is probably a security gateway or HTTPS proxy on the network filtering HTTPS traffic and interfering with the connection to the signature service using a Digital Mobile Key.
Ask your company or organisation network administrator or IT support team to configure an exception to the HTTPS traffic filtering for the Digital Mobile Key Signature service. The necessary information is in the section below Online services used by the application. We advise you to add the addresses of the various online services used by the application to the exceptions list.
Online services used by the application
Some application features require a connection to online services to function correctly. It shall thus be ensured that there is no firewall or other software on the local network preventing connection to these services.
The hostnames and respective ports used are listed below by feature.
Authentication with Digital Mobile Key:
- cmd.autenticacao.gov.pt (port 443)
Certificate validation:
OCSP Servers:
- ocsp.ecee.gov.pt (port 80 and 443)
- ocsp.multicert.com (port 80)
- ocsp.root.cartaodecidadao.pt (port 80)
- ocsp.auc.cartaodecidadao.pt (port 80)
- ocsp.asc.cartaodecidadao.pt (port 80)
- ocsp.asc.pki2.cartaodecidadao.pt (port 80)
- ocsp.asc.pki2.cartaodecidadao.pt (port 80)
- ocsp.root.pki2.cartaodecidadao.pt (port 80)
CRL Servers:
- crls.ecee.gov.pt (port 80)
- pkiroot.multicert.com (port 80)
- pki.cartaodecidadao.pt (port 80)
- pki2.cartaodecidadao.pt (port 80)
Signature with Professional Attributes:
- scap.autenticacao.gov.pt (port 443)
- autenticacao.gov.pt (port 443) (only for loading with CMD)
Reading online address:
- morada.cartaodecidadao.pt (port 443)
- morada2.cartaodecidadao.pt (port 443)
Application update:
- autenticacao.gov.pt (port 443)
- aplicacoes.autenticacao.gov.pt (port 443)
Certificate and news updates:
- raw.githubusercontent.com
- When downloading the file at https://raw.githubusercontent.com/amagovpt/autenticacao.gov/master/pteid-mw-pt/_src/eidmw/news.json
- github.com
- URLs in the following format: https://github.com/amagovpt/autenticacao.gov/blob/master/pteid-mw-pt/_src/eidmw/misc/certs/FILENAME
Documentation:
- URLs in the following format: https://amagovpt.github.io/docs.autenticacao.gov/FILENAME
Timestamp (by default):
- ts.cartaodecidadao.pt (port 80)
Obtaining the report for analysis via the Configurations menu
To enable the technical analysis of issues with the Autenticação.gov application, a Support Report is created. This Support Report contains log files with information about the application’s operation, essential for diagnosing any issues.
To obtain the Support Report:
-
Open the application and navigate to the menu. Configurations -> Application configuration.
-
In the “Debug Mode” section, select the option Enable debug mode.
-
Restart the application.
-
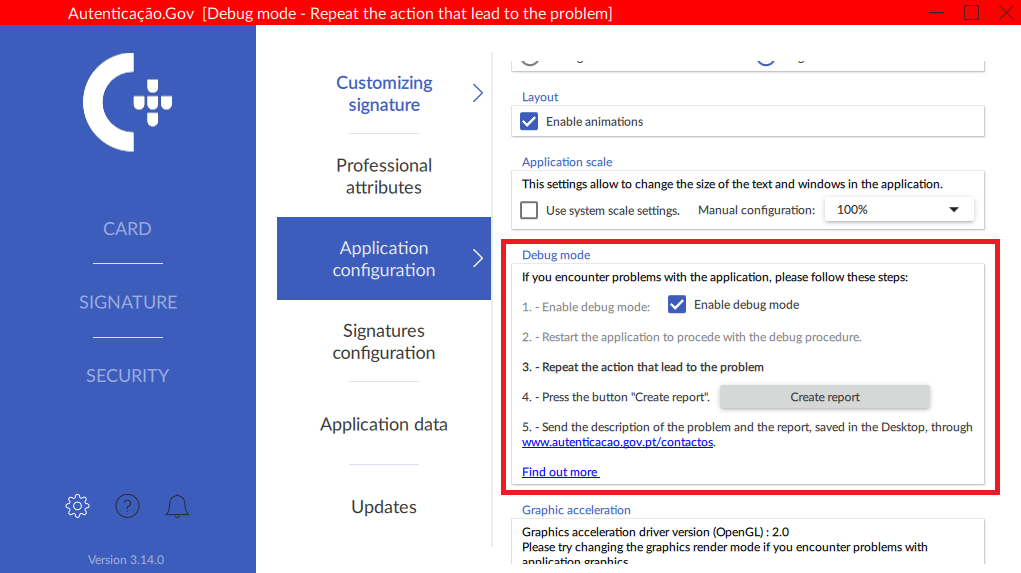
After restarting, the application indicates the active debug mode in the application’s top bar, and the bar colour changes to red. See image below.
-
Repeat the action that resulted in the error/issue. When debug mode is enabled, the information written in the log files shall be more detailed.
-
Navigate back to the menu Configurations ->Application configuration.
-
Press the Create report button. Upon pressing the Create report button, a zip file containing the application log files is created on the Desktop, named in the following format Autenticacao.gov_logs_DATE.zip.
-
Finally, email this zip file, along with a detailed description of the issue, to the support contact at cartaodecidadao@irn.mj.pt.
Removing metadata from PDF files
Removing metadata from PDF files, for example through the “Print to PDF” option on some browsers, can remove existing digital signatures in the file, even if the visual seal remains.
Consequently, any required metadata removal using this or a similar process, must precede the digital signing process.
Properties of the file signed by AutoCAD
If the Digital Signature tab is absent from the signed file properties, the procedures outlined in the following webpage must be implemented: Autodesk.
Command-line interface
When run from the command line, the Autenticação.gov desktop application supports several modes and options described in the following subsections.
Consult help and version
The --help (or -h) option allows the viewing of the available options on the command line for each mode.
The installed version can be viewed with --version (or -v).
Example (Linux):
$ eidguiV2 -h
Shortcut to configure graphics rendering mode
Configure the graphics rendering mode using one of the following options:
-
-w: (Exclusive to Windows) for Software rendering (ANGLE, emulating OpenGL by using Direct3D).
-
-s: for Software rendering (OpenGL);
-
-c: for Hardware rendering (Graphics card) (Default value);
In the event of graphics issues, or application start failure, try all three options and choose that which works best. The last option chosen shall be saved, restarting the application by clicking the icon on the desktop, in the start menu, or even via the command line without specifying this parameter.
When experiencing issues with graphics cards, refer to the topic Graphics issues in the application. Example (Linux):
$ eidguiV2 -c
Example (Windows):
$ "C:\Program Files\Portugal Identity Card\pteidguiV2.exe" -c
Shortcut to signature submenu
Through the command-line interface, the application can be started directly from the digital signature submenu.
The shortcut to the signature submenu (sign) requires the paths to the files to be loaded for signing.
The following options are supported:
-
--destination DESTINATION (-d DESTINATION): configures the destination folder for the signed file. Destination folder shall not be requested from the user upon signing.
-
--tsa: activates the signature with timestamp;
-
-- reason REASON (-r REASON): configures the ‘reason’ field of the signature;
-
-- location LOCATION (-l LOCATION ): configures the ‘location’ field of the signature.
Examples (Linux):
$ eidguiV2 sign -d /home/user/Documents/ficheiro.pdf
$ eidguiV2 sign --tsa -m "motivo" -l "localidade" -d /home/user/Documents/ \
ficheiro1.pdf ... ficheiroN.pdf
Example (Windows):
> "C:\Program Files\Portugal Identity Card\pteidguiV2.exe" sign^
 -d C:\Users\USER\Documents ficheiro.pdf
Note: Parameters containing whitespace characters must be enclosed in quotation marks. For example (Linux):
$ eidguiV2 sign -d /home/user/Documents/ "ficheiro para
assinar.pdf"
Configuration instructions in business environments
Configurations via Windows registry keys
The Autenticação.gov software configurations are saved in Windows in registry keys. Changes made by the user to the graphics interface override the default values and are stored in sub-keys of:
HKCU\Software\PTEID
A standardised installation is configured by adding some values to the
Windows registry for all computer users after software installation,
using the keys listed below, sub-keys of the root key:
HKLM\Software\PTEID
Note: The following registry entries MUST never be removed or altered:
HKLM\Software\PTEID\general\install_dirname
HKLM\Software\PTEID\general\certs_dir
The following registry entries can be added:
HKLM\Software\PTEID\logging\log_level
- Type: String (
debug,info,warning,error) - Description: Level of detail in the Middleware and application logs.
-
Default value:
errorHKLM\Software\PTEID\logging\log_dirname - Type: String
- Description: Directory where middleware and application log files are generated.
-
Default value:
C:\Program Files\Portugal Identity Card\logHKLM\Software\PTEID\logging\log_prefix- Type: String
- Description: Prefix for the name of the log files.
-
Default value:
.PTEID_HKLM\Software\PTEID\general\admin_config
- Type: Number (
0/1) - Description: Enable (
1) or disable (0) the administrator configuration, forcing the use of the proxy configured by the administrator in the proxy registration section in HKLM. Consequently, user-entered values are ignored and the proxy configuration is disabled in the application settings. -
Default value:
0(disabled)HKLM\Software\PTEID\general\cache_dirname - Type: String
- Description: Directory where the Middleware and application cache is stored.
-
Default value:
C:\Users[User]\AppData\Roaming\.pteid-ngHKLM\Software\PTEID\general\cache_enabled - Type: Number (
0/1) - Description: Enable (
1) or disable (0) the cache for Citizen’s Card data. -
Default value:
1(active)HKLM\Software\PTEID\general\scap_host - Type: String
- Description: Hostname of the Professional Attributes Service (SCAP).
-
Default value:
scap.autenticacao.gov.ptHKLM\Software\PTEID\general\scap_port - Type: Number (
1to65535) -
Description: Professional Attributes Service port (SCAP).
HKLM\Software\PTEID\general\use_pinpad - Type: Number (
0/1) - Description: Use PINPAD feature.
-
Default value:
1(Yes)HKLM\Software\PTEID\general\auth_pin_cache_normal - Type: Number (
0/1) - Description: Authentication PIN caching via Minidriver.
- Default value:
0(No). For versions prior to3.1.0, the default value is1. -
Configurable from version:
3.1.0HKLM\Software\PTEID\configuretool\start_autoupdate - Type: Number (
0/1) - Description: Check for software or certificate updates upon application start-up and notify the user.
-
Default value:
1(Yes)HKLM\Software\PTEID\configuretool\graphics_accelaration - Type: Number (
0/1/2(only in Windows)) - Description: Graphics rendering mode.
0for software rendering (OpenGL),1for hardware rendering (graphics card), or2for software rendering (ANGLE emulating OpenGL using Direct3D). -
Default value:
1(Graphics card)HKLM\Software\PTEID\configuretool\start_with_windows - Type: Number (
0/1) - Description: Start the application with Windows.
-
Default value:
1(Yes)HKLM\Software\PTEID\configuretool\registrate_certificate - Type: Number (
0/1) - Description: Register certificates in Windows by inserting the card. The certificate registration and removal options require this application to be running (minimised or maximised).
-
Default value:
1(Yes)HKLM\Software\PTEID\configuretool\remove_certificate - Type: Number (
0/1) - Description: Remove Windows certificates by removing the card.
-
Default value:
0(No)HKLM\Software\PTEID\proxy\use_system_proxy - Type: Number (
0/1) - Description: Use the proxy server defined in Windows/MacOS.
-
Default value:
1(Yes)HKLM\Software\PTEID\proxy\proxy_host - Type: String (hostname or IP address)
-
Description: Proxy server address.
HKLM\Software\PTEID\proxy\proxy_port - Type: Number (
1to65535) -
Description: TCP port of proxy server.
HKLM\Software\PTEID\certificatecache\cert_cache_validity - Type: Number (
0to2147483647) - Description: Local cache time (in seconds) of the certificate validity status.
-
Default value:
60HKLM\Software\PTEID\xsign\tsa_url - Type: String
- Description: Timestamp server used for signing documents in the format
http(s)://HOST:PORTO -
Default value:
http://ts.cartaodecidadao.pt/tsa/serverConfigurations via configuration file on Linux and MacOS
The Autenticação.gov software configurations are saved in a configuration file on Linux and MacOS. This configuration file is located at the following path:
Linux: $HOME/.config/pteid.conf
MacOS: $HOME/Library/Preferences/pteid.conf
where HOME indicates the system user’s Home directory.
The file format follows the INI format with the respective configuration section indicated by a tag. The values specified in each section/tag are those indicated in the previous table for Configurations via Windows registry keys.
For example, to manually enable diagnostic mode, the following 2 lines should be added to the file:
[logging]
log_level=debug
Automated installation in Windows environments
To install the software automatically, follow this procedure (with administrator privileges):
-
Add the codesigning certificate of AMA (Agency for Administrative Modernization) to Store Trusted Publishers associated with the Local Computer via the MMC tool or via the following command:
certmgr -add AMA\_codesigning.cer -c -s -r localMachine TrustedPublisherThe certificate is obtained from the MSI installer by viewing the file signature in the context menu at:
Properties -> Digital Signatures -> Details
-
If the operating system is Windows 7, a Hotfix provided by Microsoft is installed to resolve any mismatch with the software codesigning certificate. Follow the instructions in this article:
-
Having already obtained the installer in MSI format, install the software without user interaction using the following command:
msiexec /i Autenticacao.gov-xxx.msi /qnTo avoid restarting the system after installation, the parameter /norestart is added to the command.
Information about proxy servers
Configuration in Windows
If the computer in question has a proxy correctly configured in Windows, either by IP/Hostname + Port or via an auto-configuration script (PAC file), no configuration is required in the application.
The current software version does not support certain proxy server configurations, specifically those requiring NTLM or Kerberos authentication. To use features that require internet access (address reading,, certificate validation, signature with professional attributes or signature with Mobile Key), in these environments a network reconfiguration or the use of an open proxy or one with Basic authentication shall be necessary.
Configuration in MacOS
In MacOS, system proxy is supported, but only if configured by IP/Hostname + Port.
User Notes
Developed by the Portuguese State
(Agência para a Modernização Administrativa, IP and Instituto dos Registos e do Notariado, IP (Institute of Registries and Notaries))
© Copyright (C) 2010-2026